Make life easier by reducing the need to flip between apps. If you are using Outlook Web App, Outlook 2013, or Outlook 2016 connected to Office365 or Exchange Server 2013 then be sure to take advantage of this email and contact synchronization add-on. Smartly links emails to your SuiteCRM records and keeps your contacts in sync.
Single User Installation
Single User Installation
Note: It will take some efforts from you to setup because Microsoft does not provide a technology for automatic installs yet. So contact support@grinmark4u.com for assistance if needed. We're always looking to get feedback from our customers. Please let us know where we've impressed you or where we can improve.
Note: If you purchased the Multi User plan then follow this guide instead: Multi User Installation
Note: If you have Exchange server on-premises then make sure to note this difference here.
Prerequisites
- SuiteCRM v6.0 or higher and SuiteCRM v7 or higher.
- Office 365 Account with Outlook Web Access (Outlook Online)
Installation
Note: Legacy steps for add-in installation are described here.
Open Outlook Web Interface in a browser and login with your user name. In the same browser window navigate to
It will open Add-Ins for Outlook popup dialog.
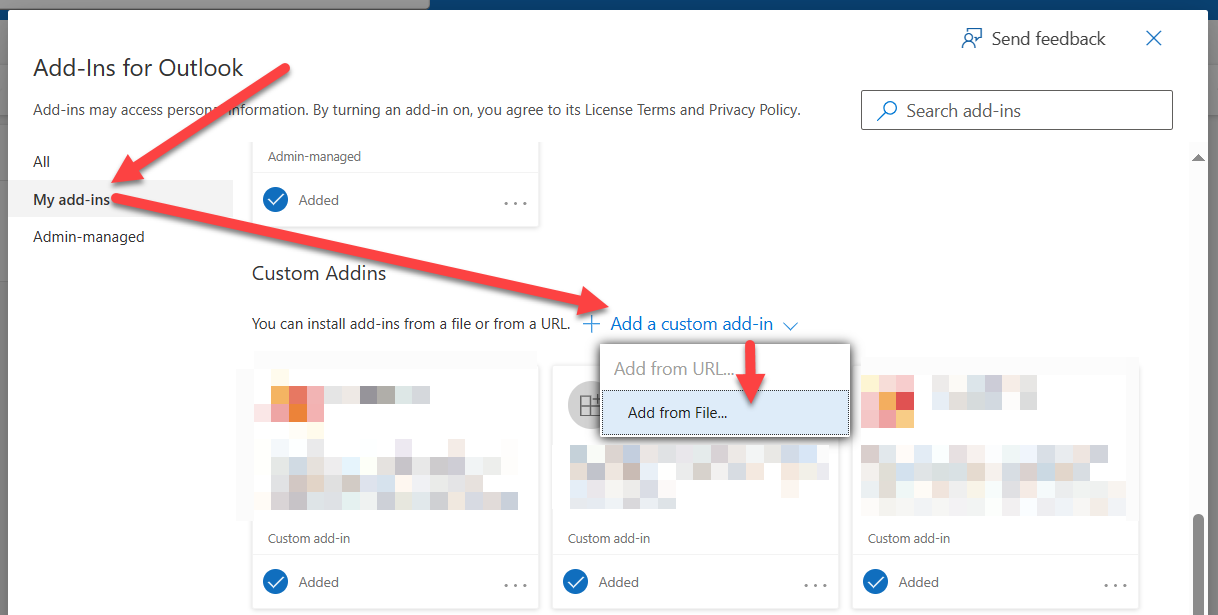
Download the add-in manifest file (copy-paste this URL into another browser tab):
https://www.grinmark4u.com/download/RibbonOutlookPluginSuiteCRM.xml
In the popup dialog choose Add from File..., then select downloaded RibbonOutlookPluginSuiteCRM.xml. Follow the installation prompts.
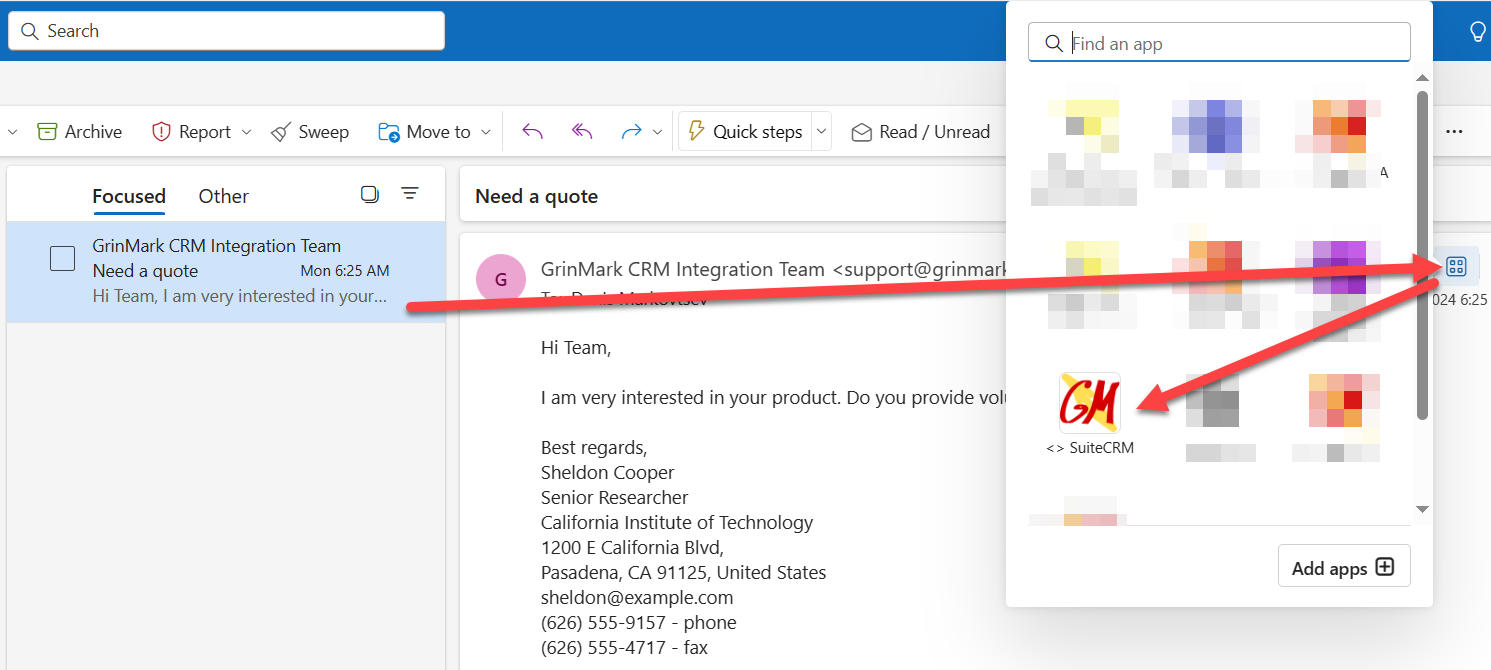
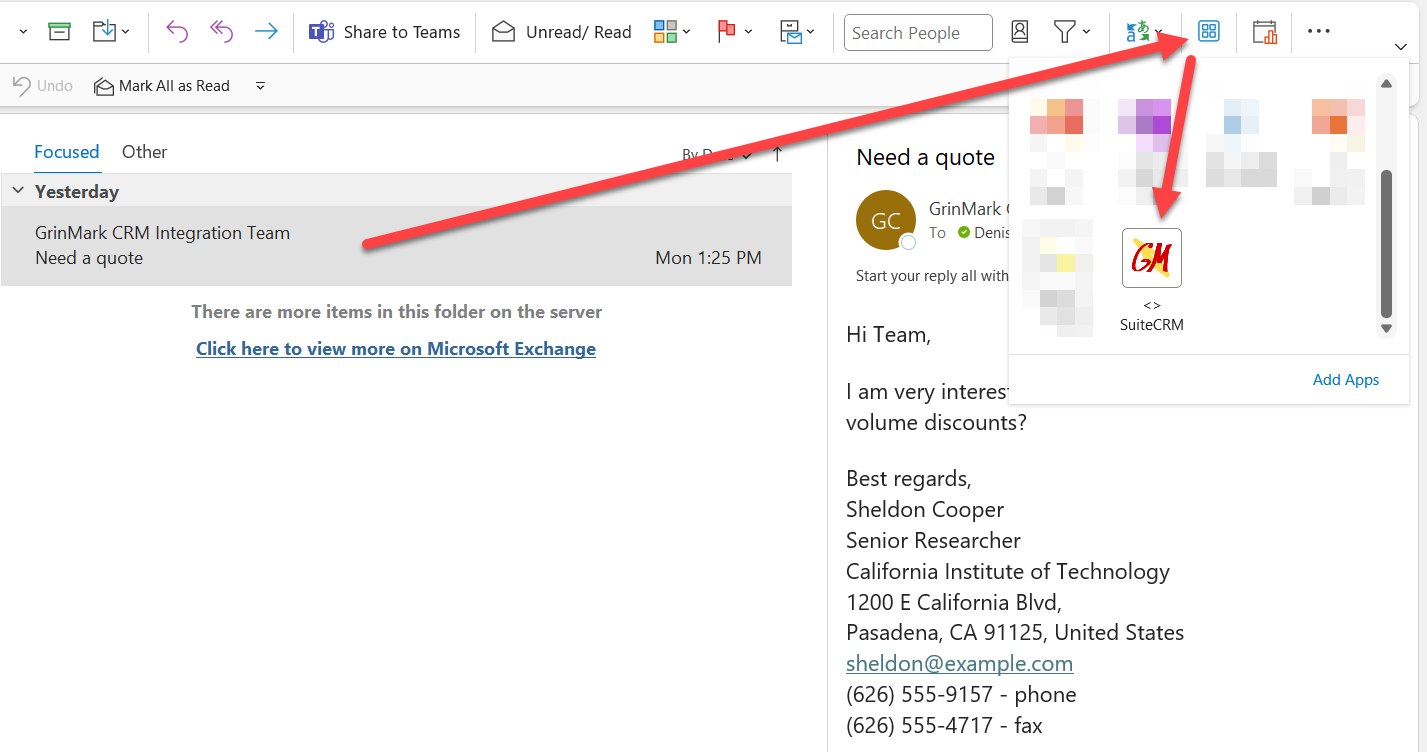
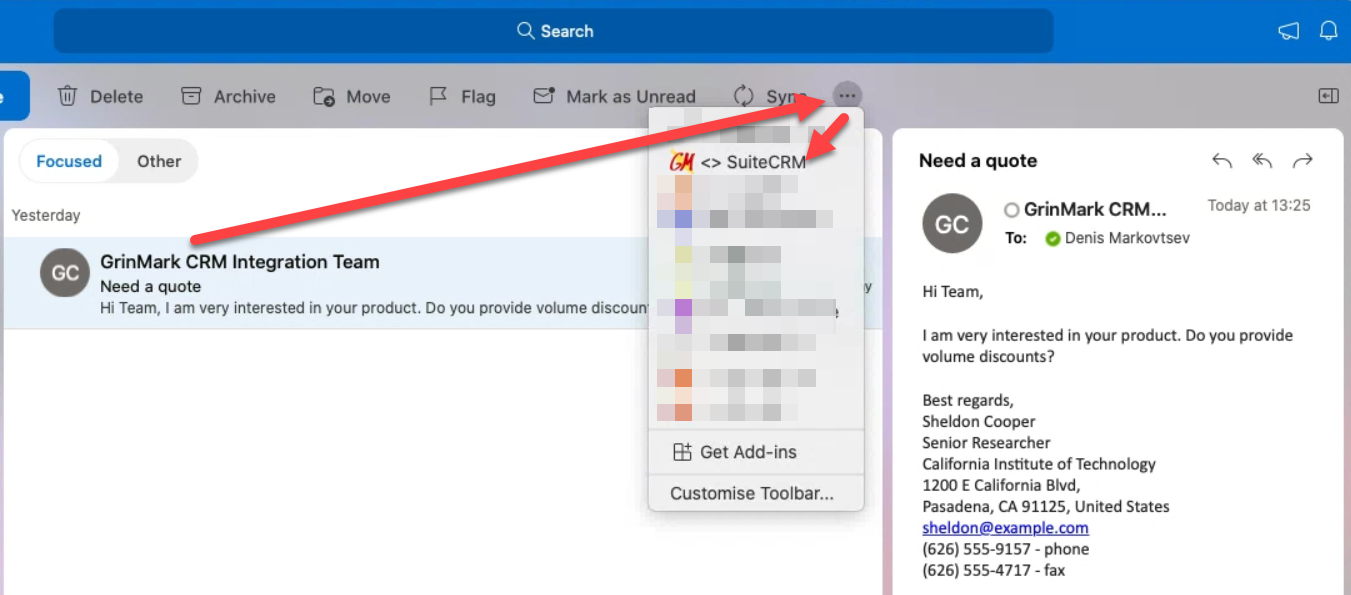
The plugin is now accessible from within each Email message as a button labeled <> SuiteCRM or from the ribbon:
- Outlook Web
- Outlook for Windows
- Outlook for Mac
Activation and Configuration
You need to define some settings for App to be able to archive and synchronize. All settings are
configured at the Settings page.
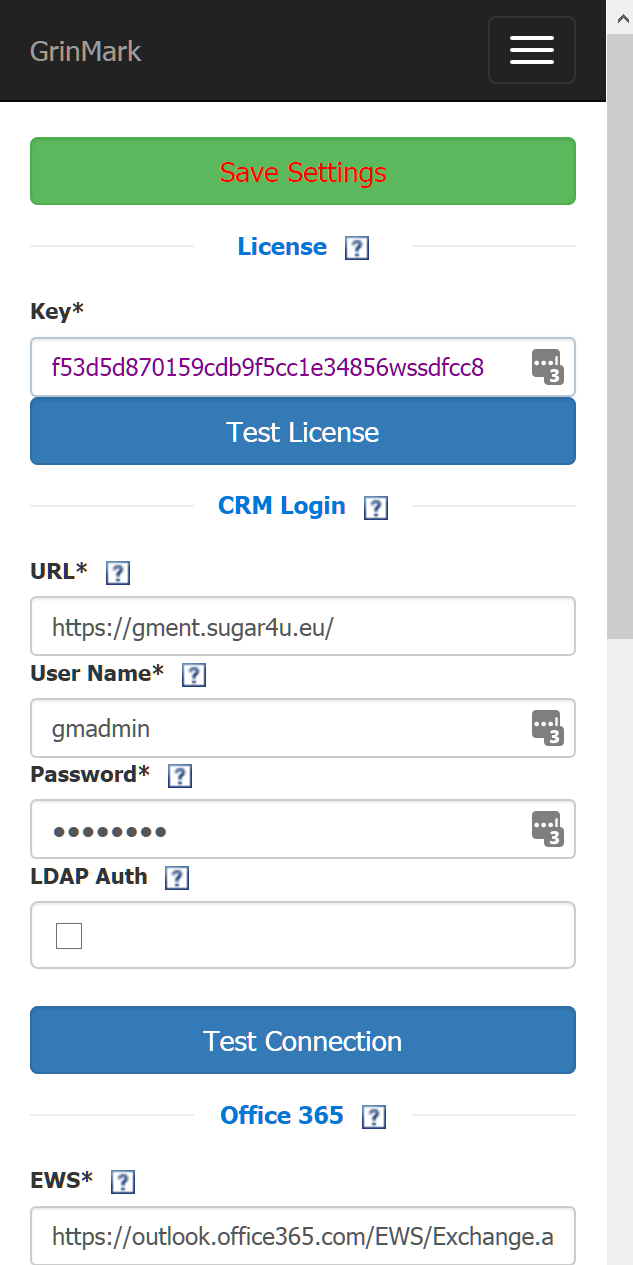
1: License key
After you start your 30-day trial, grab the license key from the page after checking out and specify it here.
2: CRM URL
It may be taken from the web URL as follows. Look at the line in the web browser when logging into SuiteCRM.
It looks like:
http://ex.grinmark4u.com:8090/aedemo/index.php?action=Login&module=Users&login_module=Home&login_action=index
i.e.:
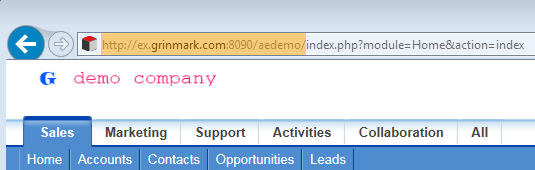
Cut the trailing part starting from index.php and leaving the trailing / and you get the right URL, i.e. the correct URL is:
http://ex.grinmark4u.com:8090/aedemo/
3: User Name, 4: Password
SuiteCRM login name of the user and password.
5: Test Connection
Use it to make sure your SuiteCRM instance is accessible. If connection is successful CRM settings will be automatically saved.
6: Office 365 Password, 7: Test Connection, 8: Save
You need to specify the password that is used to log into Office 365 Outlook (mailbox password).
It is recommended to press Test Connection to make sure password is applied properly.
If connection is successful Exchange settings will be automatically saved.
