All-In-One CTI is a computer telephony integration between SugarCRM and most popular PBXs. Easy install. Stable work. 100% support.
Install Guide - Panasonic
1. System Requirements
You should install PBX-connector application on the server connected to Panasonic PBX with USB cable or LAN.
PBX-connector system requirements:
- Server is running under Windows 7, Windows 8, Windows Server 2008, Windows Server 2008 R2, Windows Server 2012
- Panasonic TDE KX-TDA 30/100/200/300/600, KX-TDE 100/200/600, KX-NCP 500/1000
- Panasonic TSP Driver
- Microsoft WindowsInstaller 3.1
- Microsoft .NET Framework 2.0
Note! The "Incoming call pop-up" and "Smart transfer" features don't work if your PBX can't detect the Caller ID on external phone lines. For example, if you have Panasonic KX-TDA100 connected to analog land lines then you should have the KX-TDA0193 board installed for CallerID detection.
2. Please check before installation
- Server satisfies the system requirements
- You have administrator level access to the server
You have ProstieZvonki_Panasonic.msi installation package
##3. Panasonic TSP Driver Installation If you have Panasonic TSP Driver already installed, then you can skip this step.
If you don't have Panasonic TSP driver then you can download installation package on (our web-site)[http://www.prostiezvonki.ru/download}.
Note! Please use only the TSP driver that supports you Panasonic PBX model.
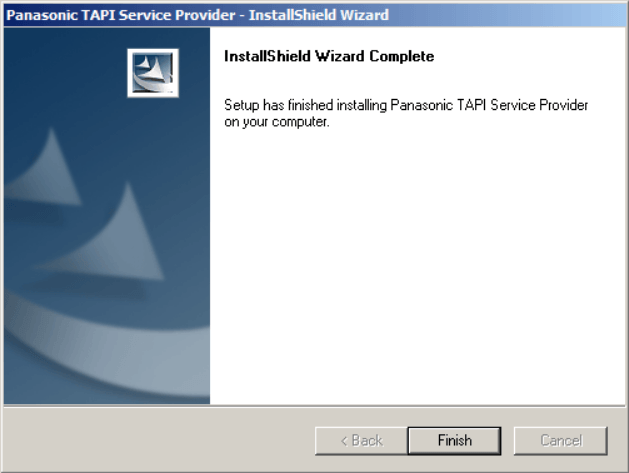
Run the proper Panasonic TSP Driver installation program:
- panasonic_tsp_instx86_4040.exe - 32-bit Windows OS;
- panasonic_tsp_instx64_4040.exe - 64-bit Windows OS.
Once installation is completed you should set TSP driver configuration parameters.
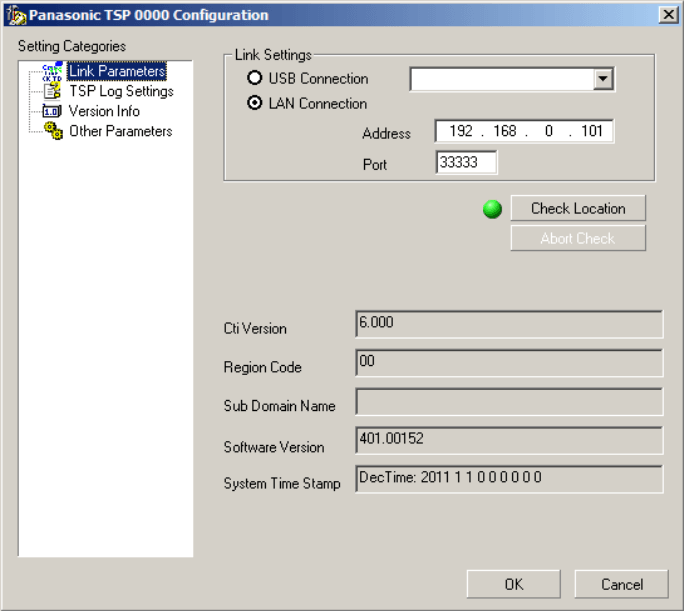
А. Panasonic PBX is LAN connected
Please note that you should have one of the following boards installed in your Panasonic PBX in order to provide LAN connectivity:
- NS1000 Mother board
- NCP500/1000 IPCMPR Card
- TDE100/200/600 IPCMPR Card
- TDA100/200/600 CTI Link Card
- TDA30/50 IP Gateway Card
Enter your Panasonic PBX IP address and TCP port
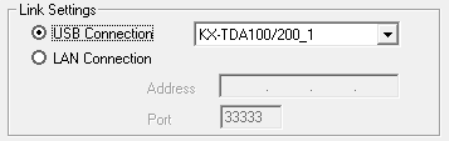
B. Panasonic PBX is USB connected
Choose the "USB Connection" option and select the appropriate PBX in drop-down box.
To test the connectivity click the <
If configuration parameters are correct then you should see the details retrieved from PBX (CTI Version, Region Code, Sub Domain Name, Software Version and System Time Stamp). Indicator near the "Check Location" button lights green.
If TSP driver fails to connect the PBX then a message window appears. "Address 'X.X.X.X:33333' is not responding. Save anyway?".

Click <
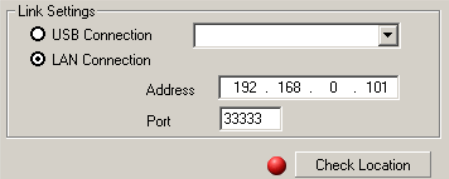
Check that PBX is properly connected to server. Check the LAN settings on your PBX if you have LAN connection. Once you updated the configuration settings click the "Check Location" button again to test connectivity.
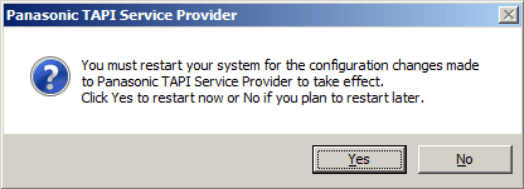
Click <
Click "Yes" to restart computer:
4. PBX-connector Installation
Install the ProstieZvonki_Panasonic.msi installation package.
Note! Installation folder name and path should contain English letters only.
5. PBX-connector configuration
Open the PBX-connector configuration file config.txt in text editor. You can find configuration file in a folder where the PBX-connector is installed, for example: C:\Program Files\Vedisoft\ProstieZvonki-Panasonic
PBX-connector basic settings
1) Define the port parameter. PBX-connector listens on that port for incoming connections from CRM plug-ins.
Note! PBX-connector receives the incoming TCP connection from CRM plug-ins on that port. If Windows firewall or 3-rd party firewall/antivirus software is active then please update its settings to allow incoming TCP connection on that port.
2) For better security you can limit the access to PBX-connector by defining the client_id parameter. Client_id parameter is very similar to password – all the CRM plug-ins should provide correct client_id when connecting to PBX-connector.
3) Define the log file name with log_file parameter and log verbosity with log_level parameter.
4) Define the first digit of incoming call distribution group (ICD) numbers in group_starts_with parameter if there are ICDs defined on your PBX. By default ICD numbers start with "6".
5) PBX-connector can store the call history in special queue when there is no connection between PBX-connector and CRM plug-in. When CRM plug-in connects to PBX-connector then it receives call history from that queue.
If you want to use that queue you should define queue_max_length parameter value. For example if you want to store call history in that queue for last 24 hours then parameter value should be twice as large as the average amount of calls per 24 hours.
6) If you have dial out prefix on your PBX then define the outgoing_prefix parameter value. Default parameter value is "9".
7) For better security you can switch on the SSL encryption with use_ssl parameter. If switched on then all the communications between PBX-connector and CRM plug-ins will be encrypted.
8) Paste the license key to the contract parameter value.
Note! You can use for testing this license key YLMCA38554279587123543095
Note! If can ask for private license key by email Vedisoft support.
Note! PBX-connector verifies license key by submitting license key to Vedisoft's license server. If you have firewall installed please allow the PBX-connector to establish HTTPS connections to external web-sites.
Smart transfer configuration
You can use "Smart transfer" feature to transfer incoming calls to responsible employees automatically without IVR or secretary.
If you want to use the "Smart transfer" feature please do the following:
1) Switch the smart_transfer parameter to "on".
2) Define the smart transfer time-out (in seconds) in transfer_time parameter. If PBX-connector doesn't receive the extension number from CRM plug-in within that time, then it transfers call to the secretary extension number.
3) Define the secretary extension number with secretary parameter. You can use any of the following extension types:
- extension number
- incoming distribution call group number
- IVR number.
If parameter is empty then call remains on the same line.
4) You can use "Smart transfer" feature on specific external lines. Please define these external lines in the catch_list parameter.
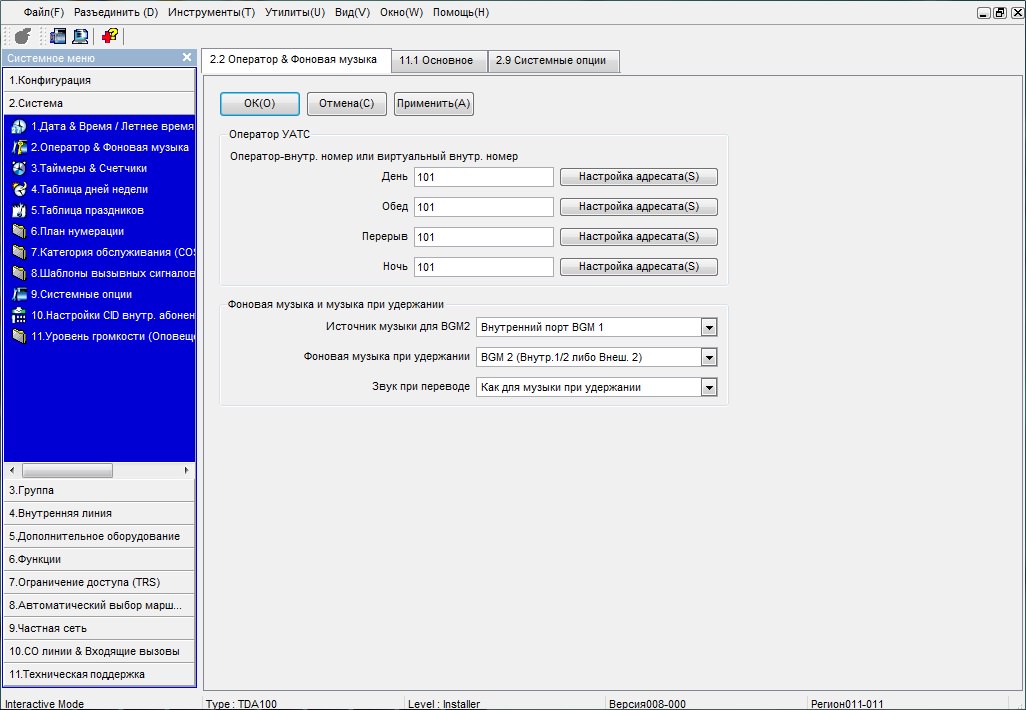
Note! If you're going to use the "Smart transfer" feature then you should route all the incoming calls to "Operator" ("101" extension number by default). You can define the "Operator" using the Maintenance Console application:
How does the "Incoming call pop-up" feature works?
Every CRM user has PBX extension number defined in CRM. So when use's phone is ringing the incoming call notification pop-up appears.
How do I disable call handling on certain external lines?
You can disable call logs and incoming call notifications on specific external lines by defining them in the ignore_list parameter value.
6. Running the PBX-connector
Before starting the PBX-connector make sure that TSP Driver works properly:
1) Start TSP Connection Monitor: <
2) Select your PBX:
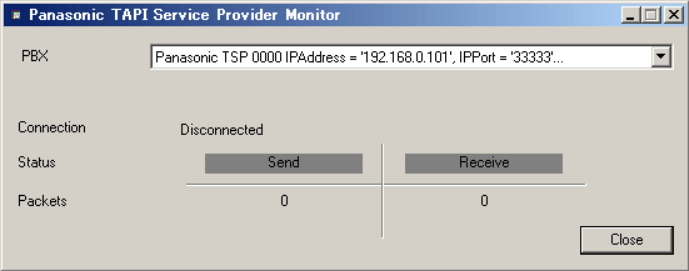
3) If the "Connection" status indicator is "Connect" and "Packets" counters display meaningful values then TSP driver works properly.
If you see the TSP driver doesn't work properly then please check the configuration parameters.
After you've installed the PBX-connector please restart your computer. PBX-connector Windows service should start automatically.
Check the PBX-connector is up and running:
1) Open the Windows <
2) Find the ProstieZvonki-Panasonic service.
3) Check that service state is <
You can start and stop PBX-connector service manually using the Windows "Services" snap-in.