Need to auto populate value based on the value of related field? For this requirement Auto Populate is the perfect solution. The advanced configuration tools allow you to clearly define what should happen whenever a related field value changes.
User Guide SuiteCRM 8.x
Steps For Using Auto Populate Fields Features :
Step 1:
To open the Administration Page, Click on Admin tab as shown in below screenshot.

Step 2:
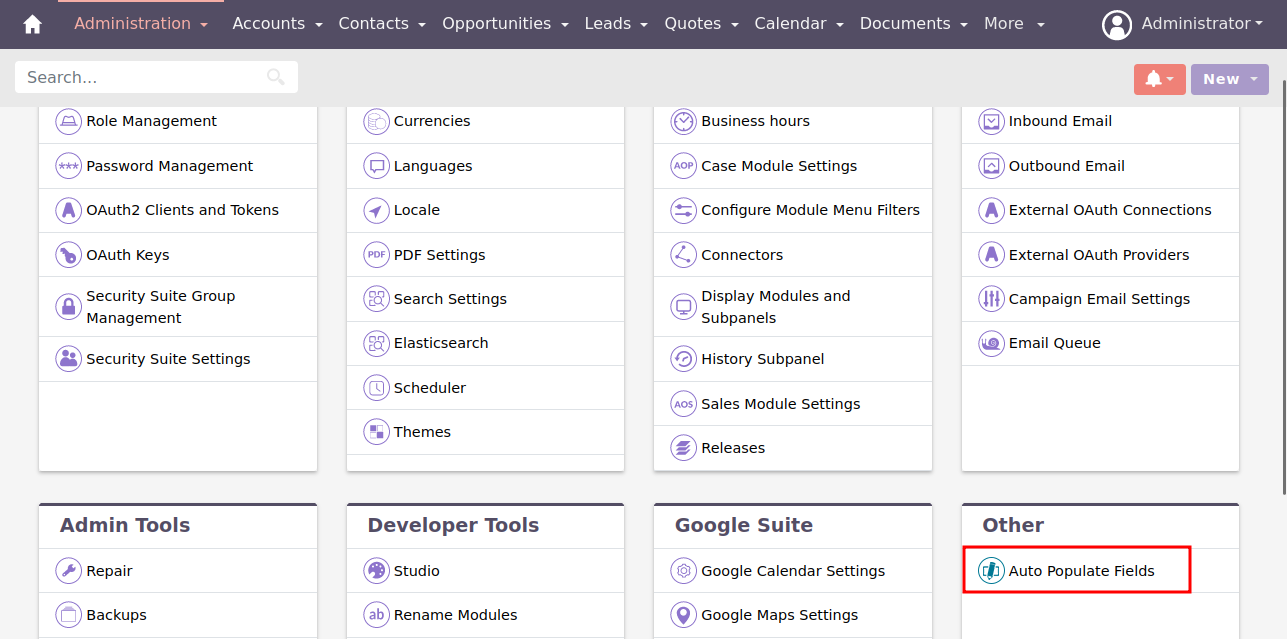
Open Administration page, Click on Auto Populate Fields from the Other section.
Step 3:
On click to “Auto Populate Fields” link, Auto Populate Fields Listview page will be open. (Note: If there is no record then it will show a message “You currently have no records saved.CREATE one now.” as shown in the below screenshot.

Step 4:
Enter all values and click on the “SAVE” Button to save a Auto Populate Fields Record.
Select Module (Click on NEXT Button to go to the Field Mapping Step)
Source Module(Copy Date To) : Select Module in which you want to Auto Populate Value.
Status : Select Status as Active/Inactive.

Field Mapping (Click on NEXT Button to go to the Calculate Field Step)
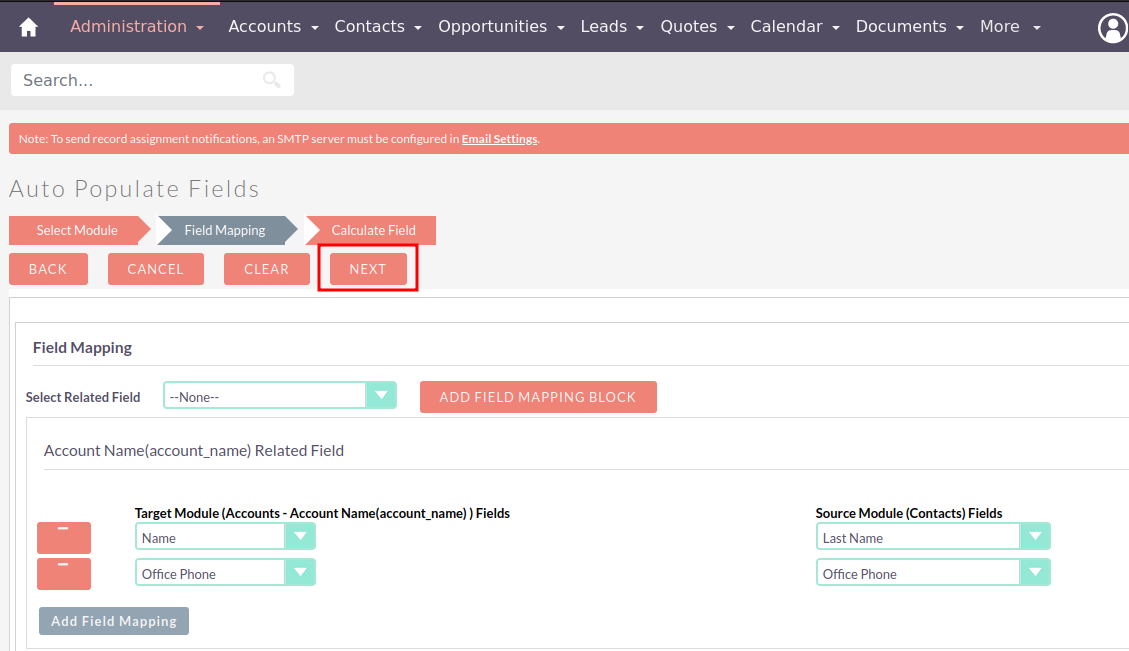
Once Click on the NEXT Button of Select Module Step, Field Mapping Step shown as per below screenshot. Select “Account Name(account_name)” Related Field and Click on the ADD FIELD MAPPING BLOCK Button as shown in the below screenshot.

Once Click on the Add Field Mapping Block Button, Field Mapping Block shown as per below screenshot. From the Field Mapping Block, you are able to Map Source Module(Contacts) and Target Module (Accounts-Account Name(account_name)) fields.
Calculate Field (Click on SAVE Button to Save Configuration)
Once Click on the NEXT Button of Field Mapping Step, Calculate Field Step shown as per below screenshot. Select “Account Name(account_name)” Related Field and Click on the ADD CALCULATE FIELD BLOCK Button as shown in the below screenshot.

Once Click on the ADD CALCULATE FIELD BLOCK Button, Calculate Field Block shown as per below screenshot.
Functions : Select any Mathematical/Logical function for Calculate Field of Related Module and Auto Populate Calculate Value in Source Module. Once you select a Mathematical/Logical function, it’ll auto populate the function formula in the Input Formula Textarea.
Target Module (Accounts-Account Name(account_name)) : Select Name field of Account Module and it’ll auto populate in the Input Formula Textarea. After that, add the Name field in the function formula.
Input Formula : It contains the function formula.
Source Module (Contacts) Fields : Select the field in which you want to Auto Populate the Calculate Field Value.

Step 5:
To update Auto Populate Fields Record, click on the pencil icon as shown in the below screenshot.

Step 6:
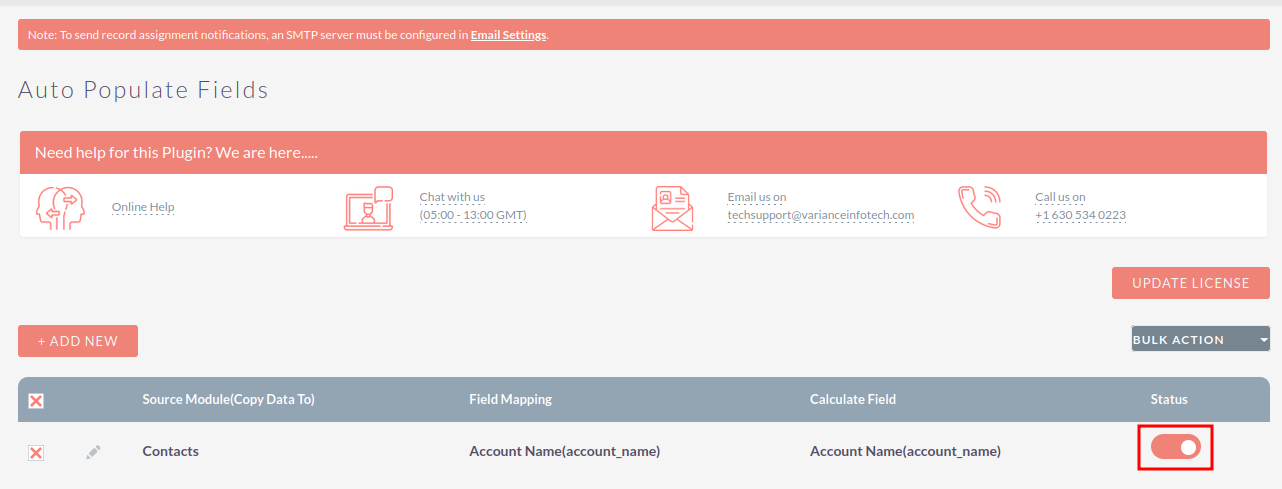
To Active / Inactive one or multiple Auto Populate Fields Records, you can select Records using the checkbox option on the left hand side of the view. After that select Active / Inactive action from the “BULK ACTIONS” Dropdown to Active / Inactive Record(s).
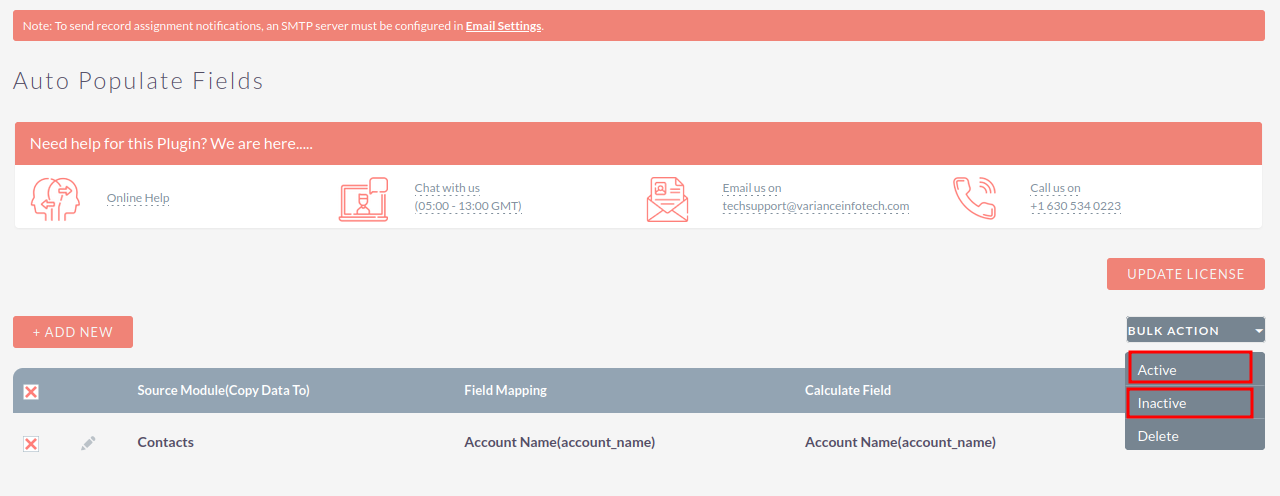
Also you can Active / Inactive particular one record using switch slider as shown in below screenshot.
Step 7:
To Delete one or multiple Auto Populate Fields Records, you can select Records using the checkbox option on the left hand side of the view. After that select Delete action from the “BULK ACTIONS” Dropdown to Delete Record(s).

Step 8:
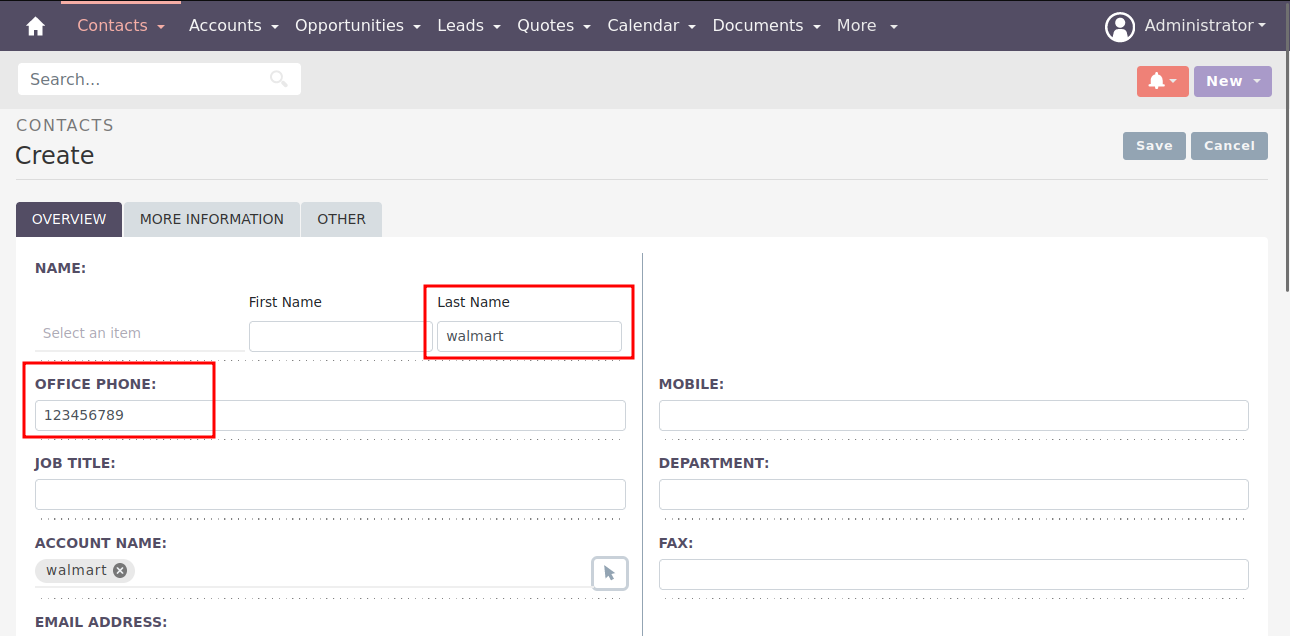
Open Create/Editview of Contacts Module and select existing Account from Account Name field using Select Account Icon as shown on below screenshot.
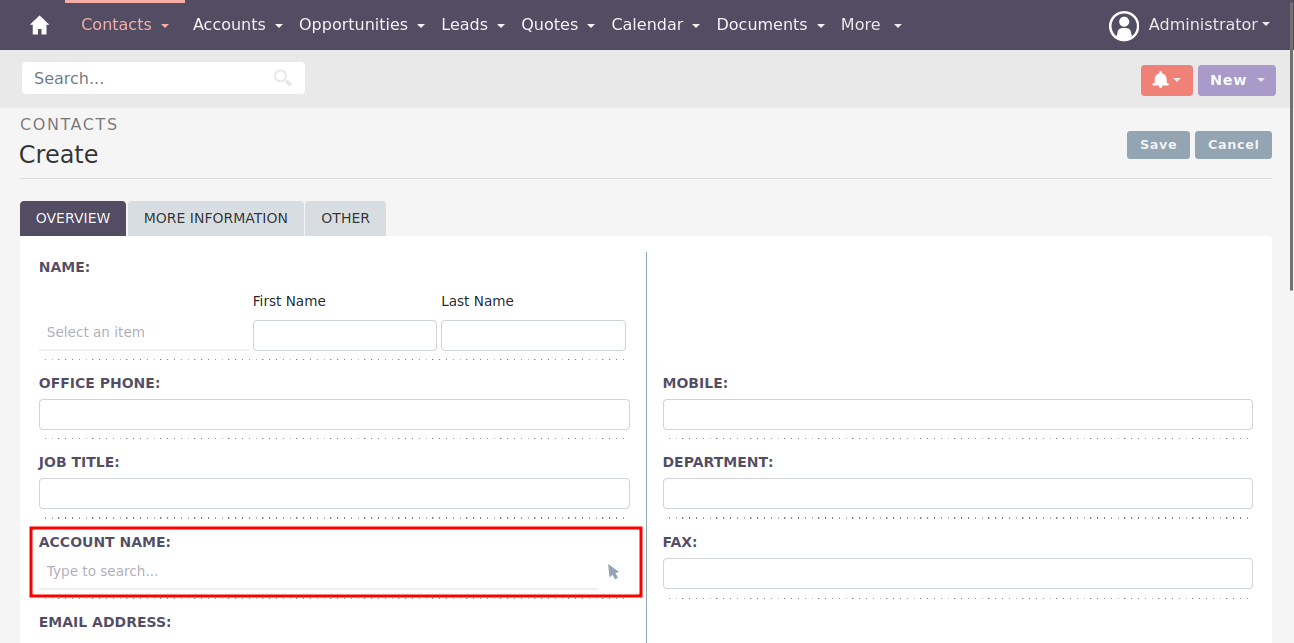
Once Click on the Select Account Icon, Account Module Popup will be open as shown in the below screenshot. From the Account Popup, Select any Account which you want to select.

As per configuration once you Select any Account from Account Name Related Field of Contacts Module, it’ll auto populate the Related Field Value which is Configured in the Field Mapping and Calculate Field Step.
