RecordCreator helps you create a related record from any module and define which fields should be copied over to the newly created related record. For example, if a user is on a Ticket record the use could create an Invoice record from that Ticket and copy over information such as the contact information or address.
User Guide
Steps For Using Related Record Creator Features:
Step 1:
To open the Administration Page,Click on Admin tab, as shown in the below screenshot.

Step 2:
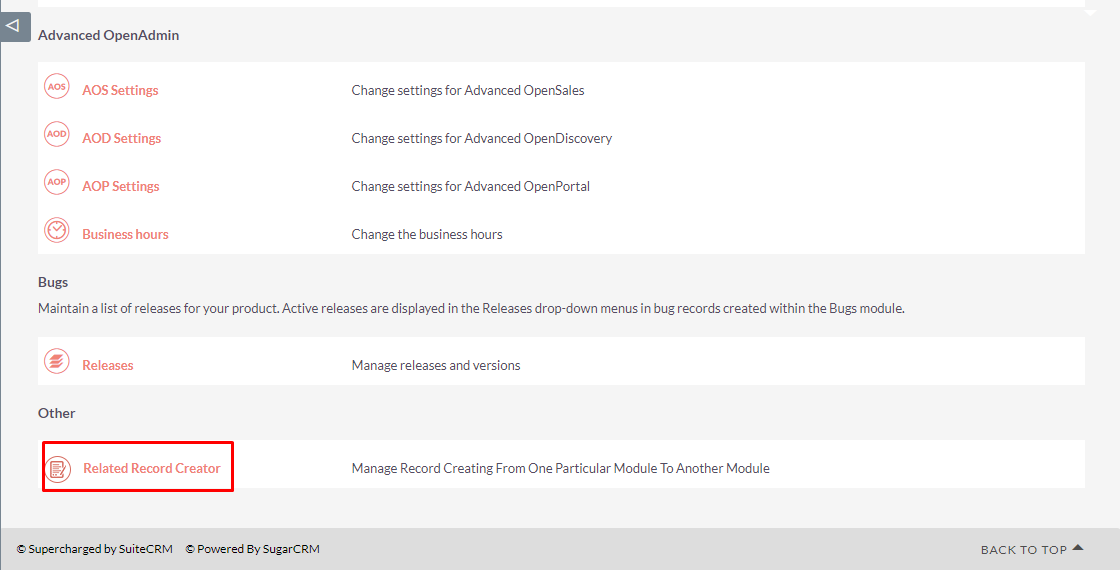
Open Administration page, Click on Related Record Creator from the Other section.
Step 3:
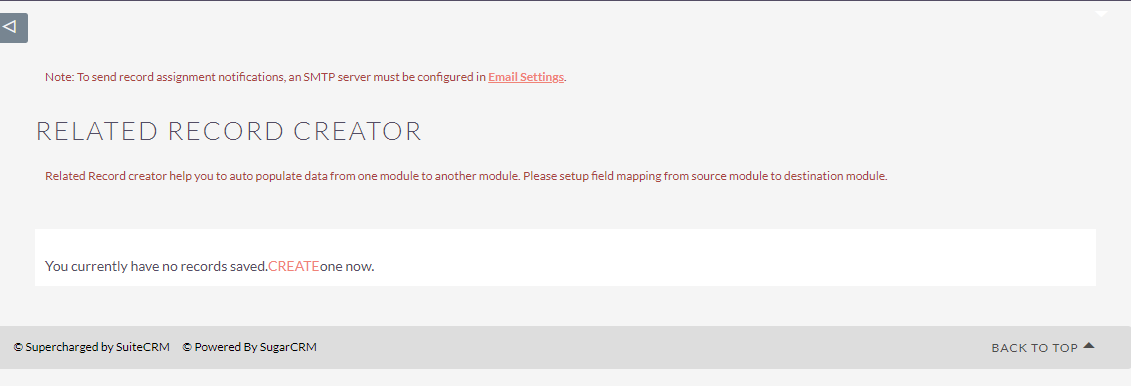
On click of the link, Related Record Creator list view page will be open. (Note: If there is no record, than it will show link “You Currently have no records saved. Create one now”. as shown in the below screenshot. Click on Create link to add new record.

Step 4:
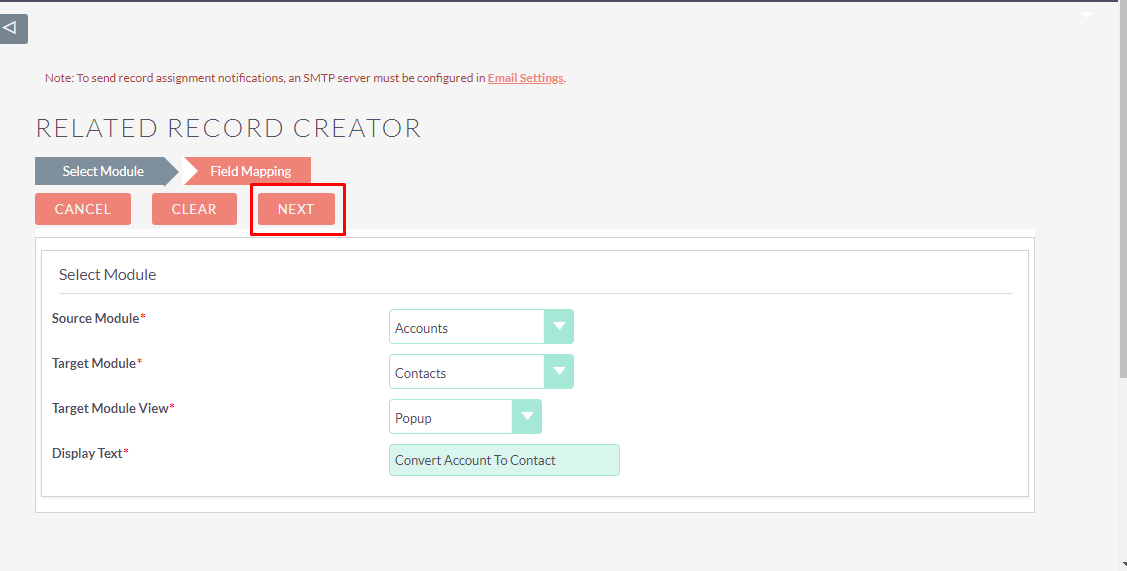
on click of CREATE link, Related Record Creator page will be open, as shown in the below screenshot. Select Source Module, Target Module, Target Module View and fill Display Text and then click on NEXT button to go to next step. (Note: you can also click on Field Mapping, to go to next step.) CANCEL button is used to redirect to the listview of the related record creator. CLEAR button is used to clear the data selected/filled from all the fields.
Step 5:
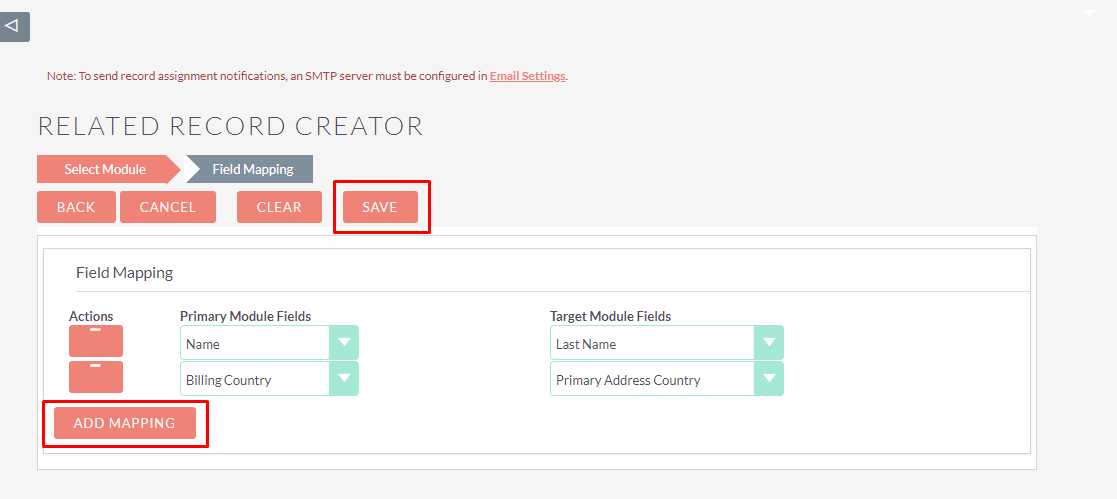
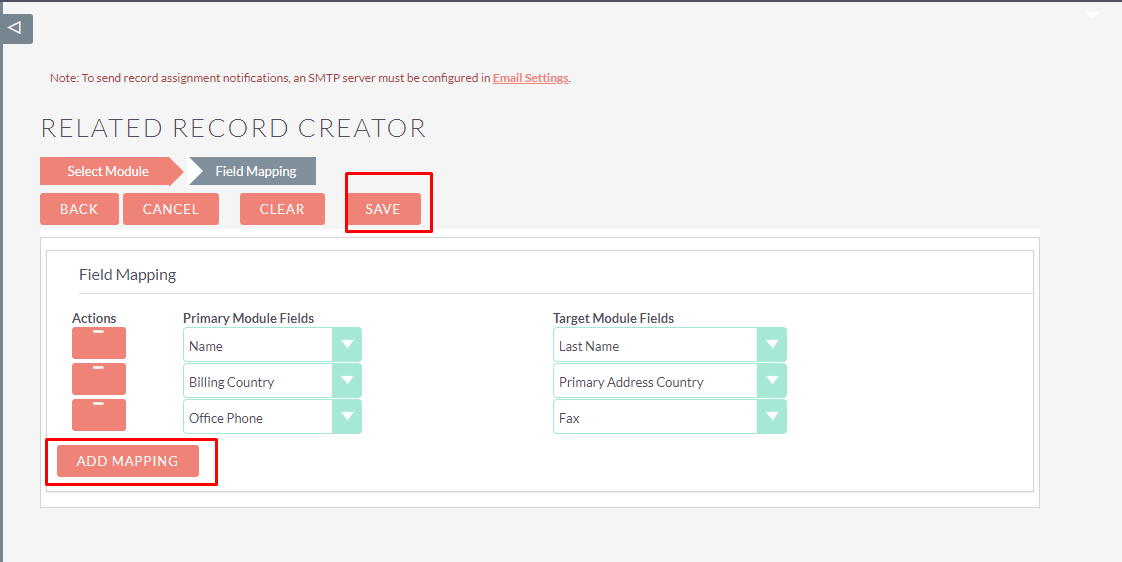
Click on ADD MAPPING button to add mappings between fields of source and destination modules as shown in the below screenshot and click on SAVE button. BACK button is used to go to previous step(Select Module) (Note: If Target Module View is Popup, then in Target Module Fields only quick create fields will be displayed).
Step 6:
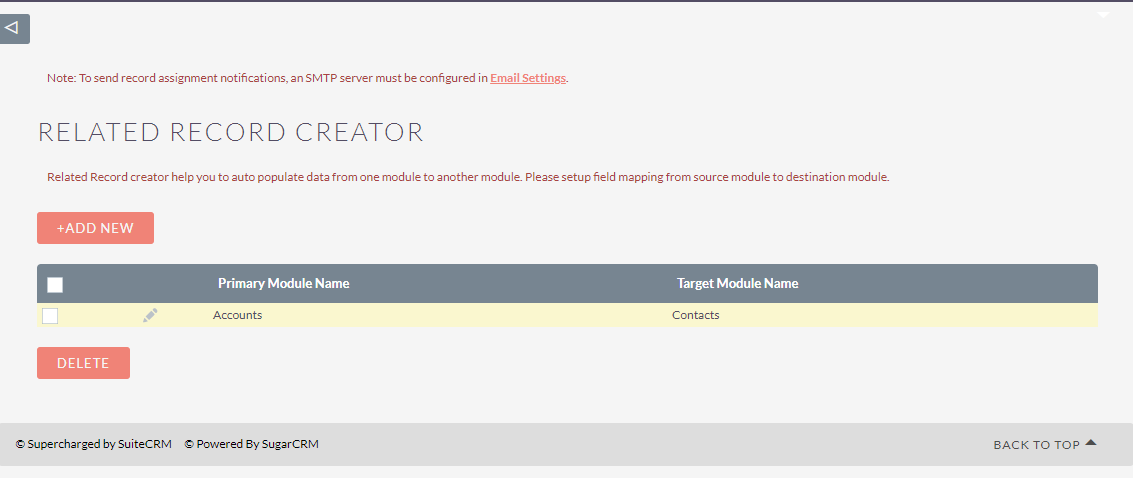
After clicking SAVE button, listview will be displayed as shown in the below screenshot.
Step 7:
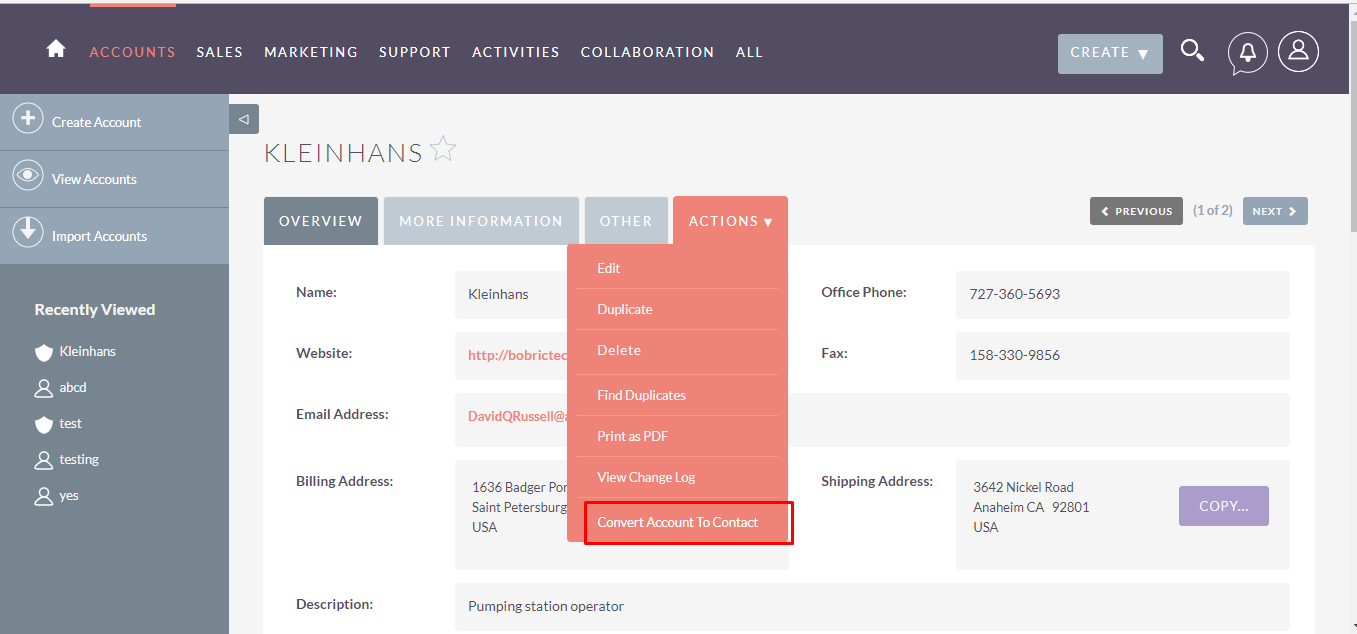
Now check in Accounts module, open detail view of the record, click on ACTIONS new action is created named as “Convert Account To Contact”.
Step 8:
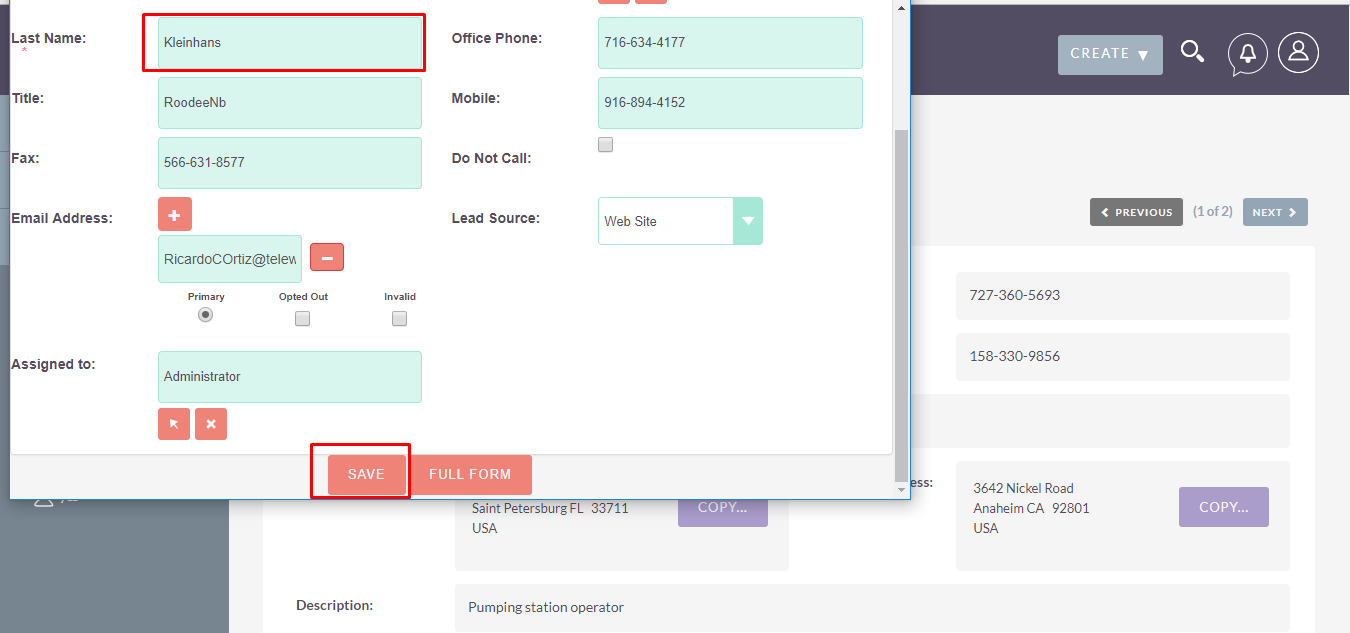
If you have selected Target Module View as “Popup”, then Popup window containing Quick Create Form of Contacts module will be open, showing Auto populated Last Name, as shown in the below screenshot. enter other values and click on SAVE button.
Step 9:
Now check in Contacts module,record is created as shown in the below screenshot.

Step 10:
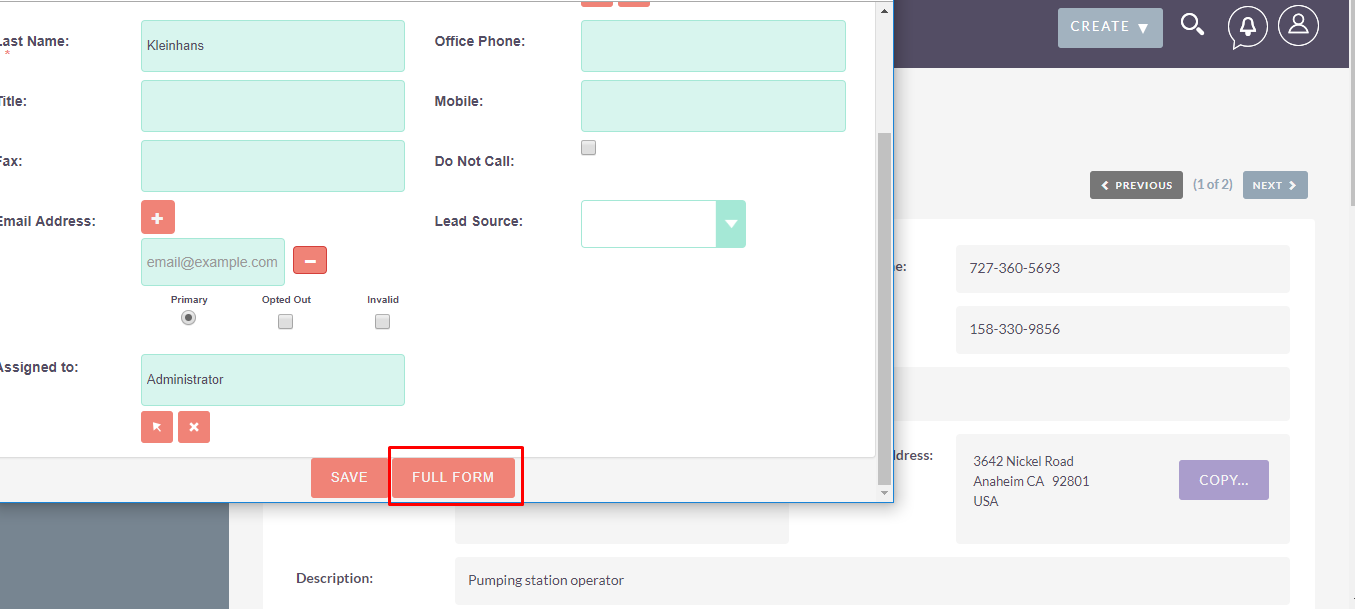
You can also click on FULL FORM button from the popup window, as shown in the below screenshot.
Step 11:
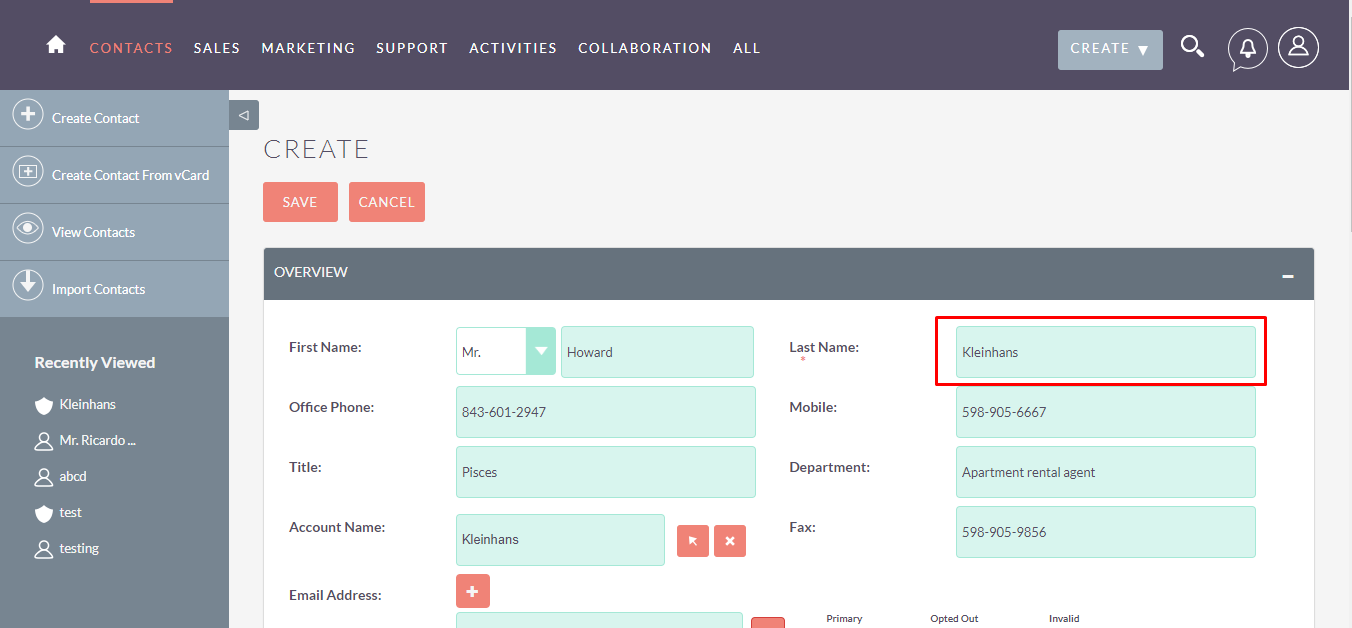
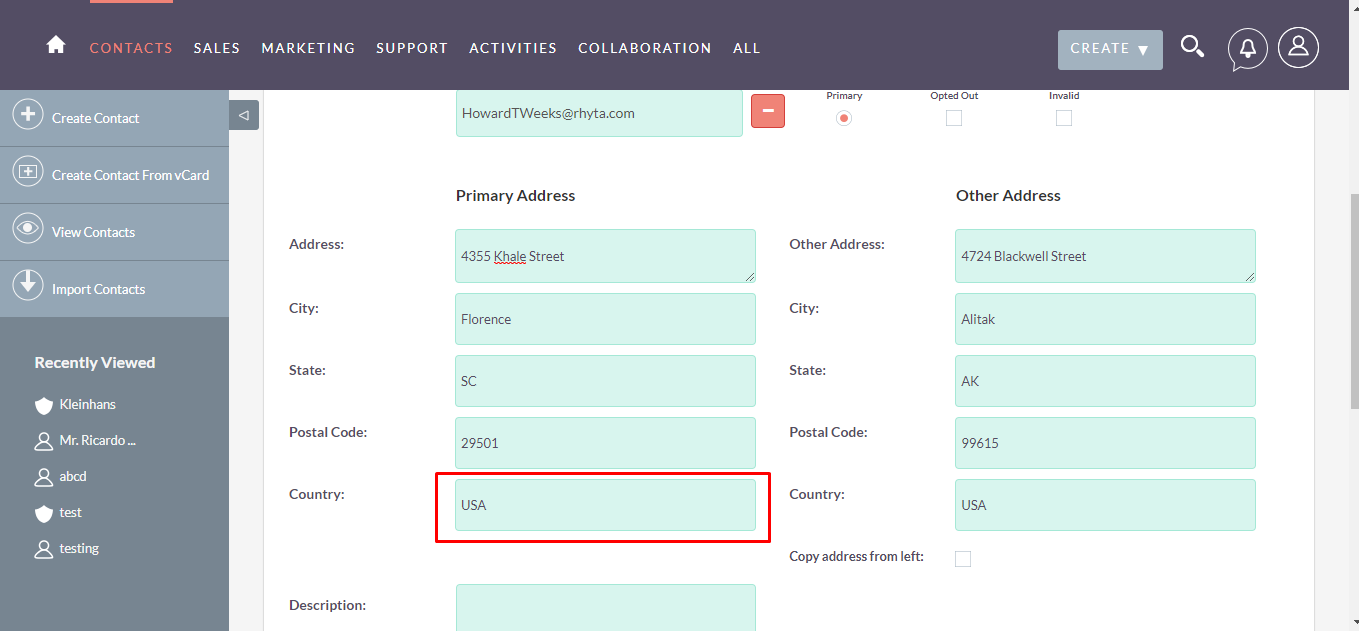
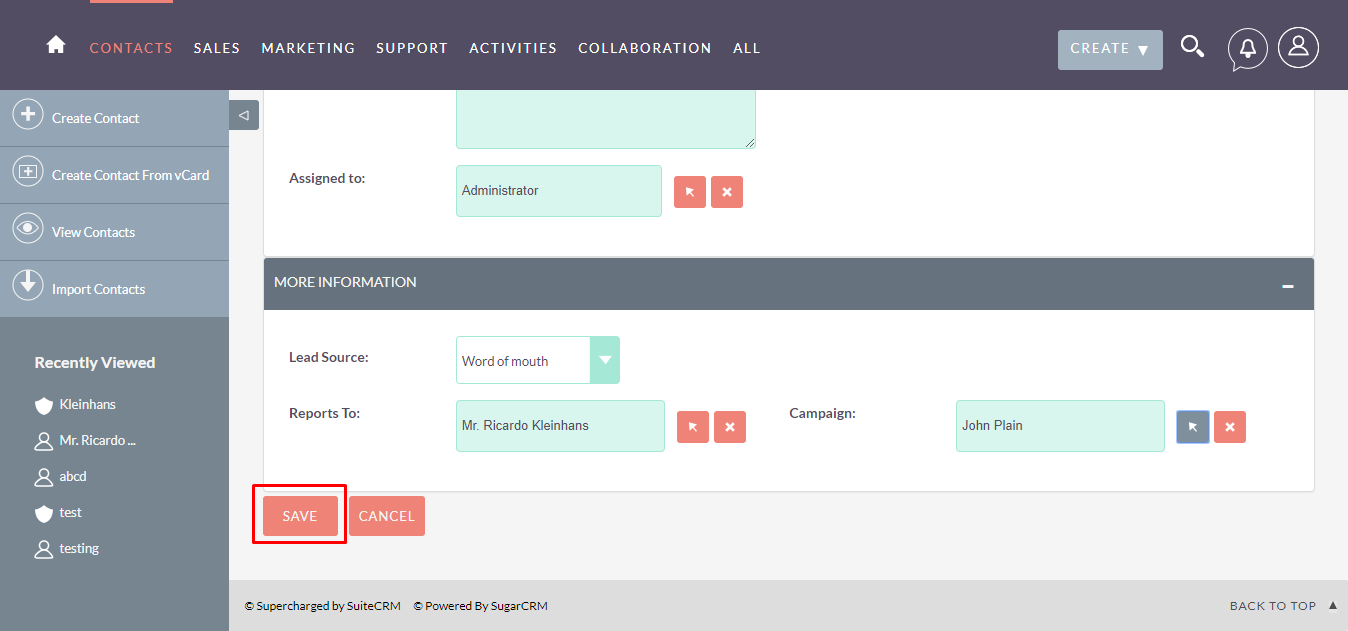
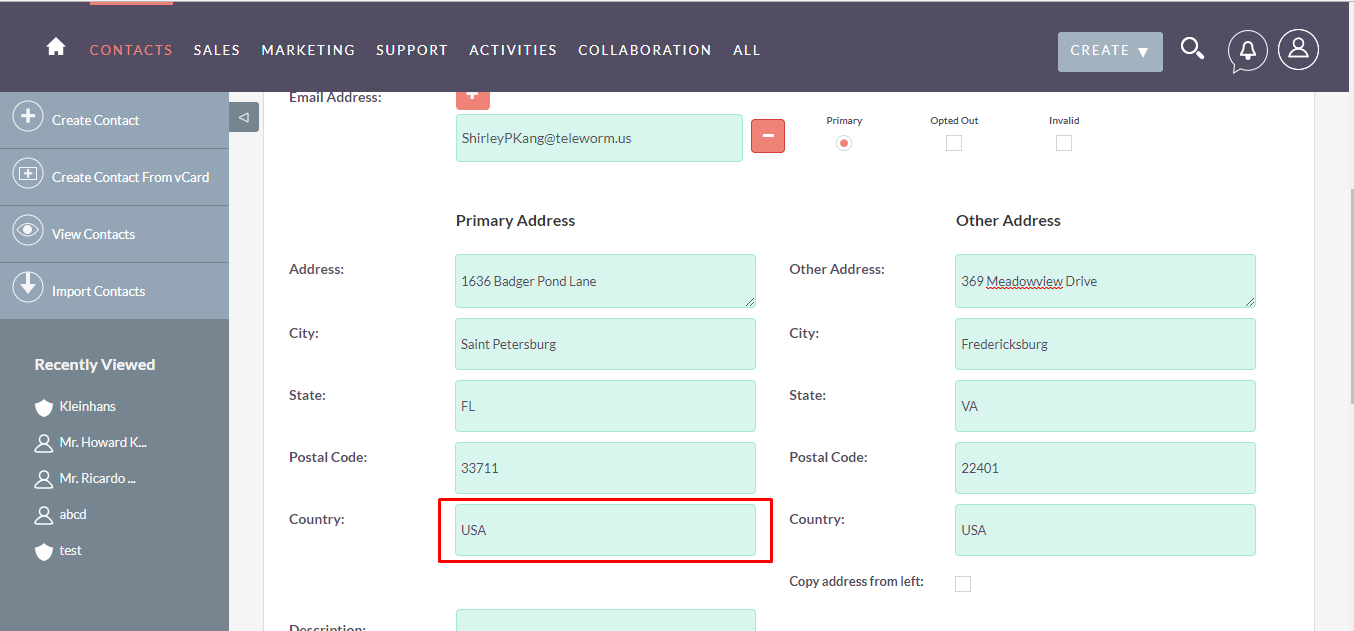
It will redirect to the Contacts module edit view as shown in the below screenshot. (Note: last name and primary address country values are auto populated, as per field mapping settings). Fill up the remaining fields and click on SAVE button to save the record.
Step 12:
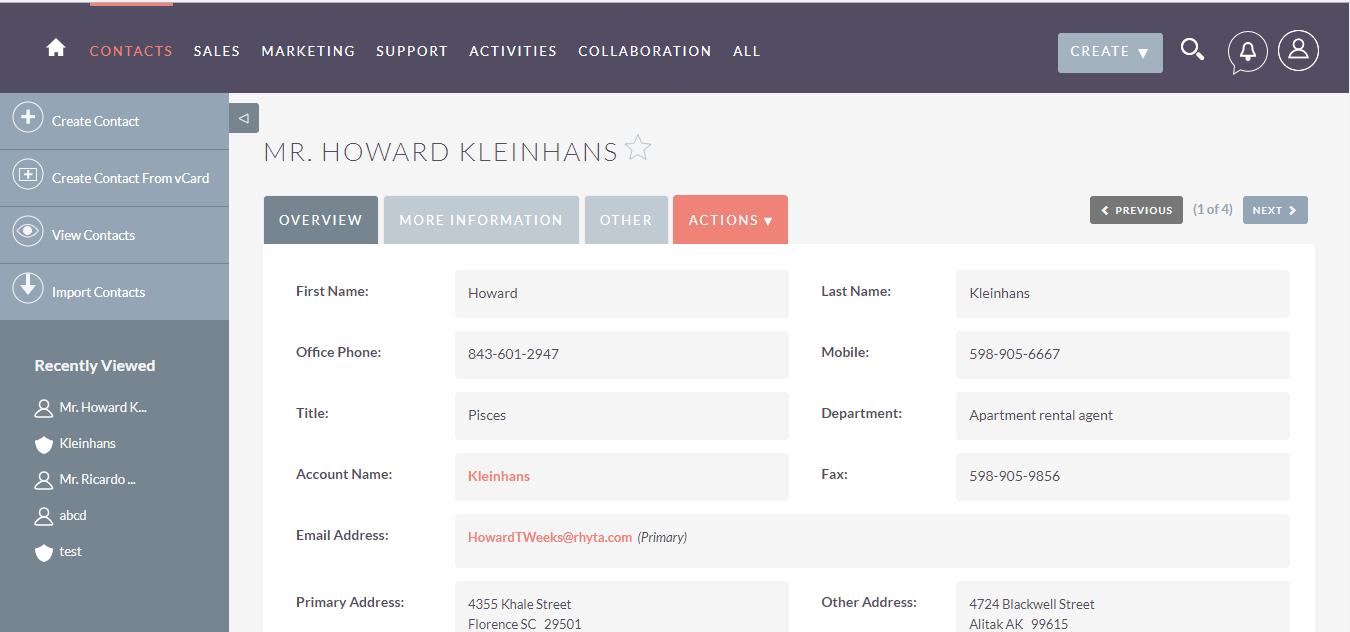
Now check in Contacts module, record is saved, as shown in the below screenshot.
Step 13:
To update the record, click on pencil icon as shown in the below screenshot.
![]()
Step 14:
To update the record, select values and click on Next and then Save it. (Note: Source Module and Target Modules are not updatable).
Step 15:
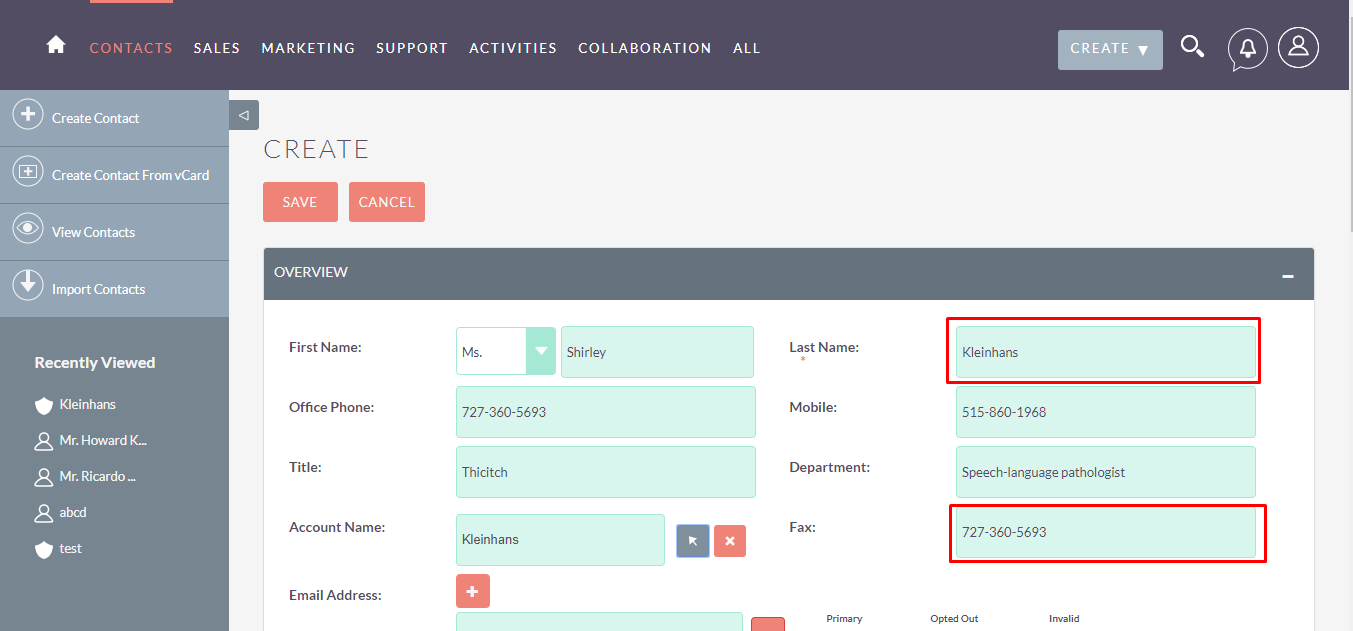
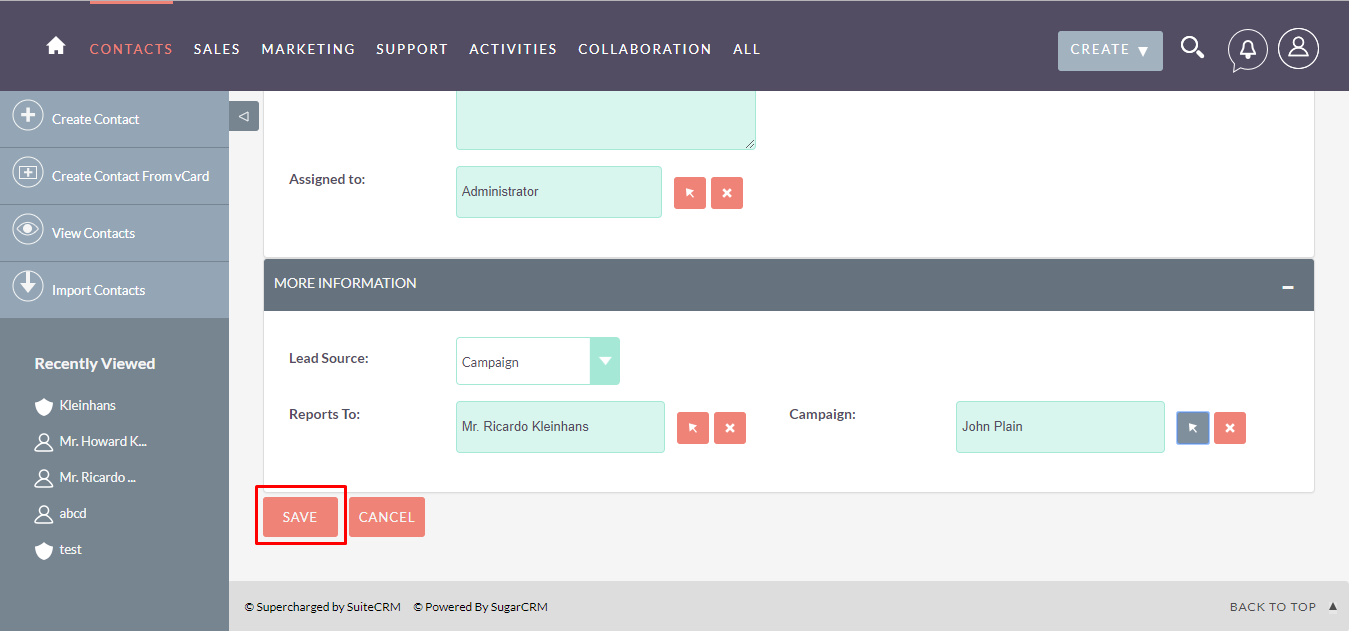
If you have selected Target Module View as “Redirection”, then on clicking of “Convert Account To Contact” action, will be redirected to edit view of Contacts module showing Auto populated Last Name,Primary Address Country and Fax, as shown in the below screenshot. enter other values and click on SAVE button.


Step 16:
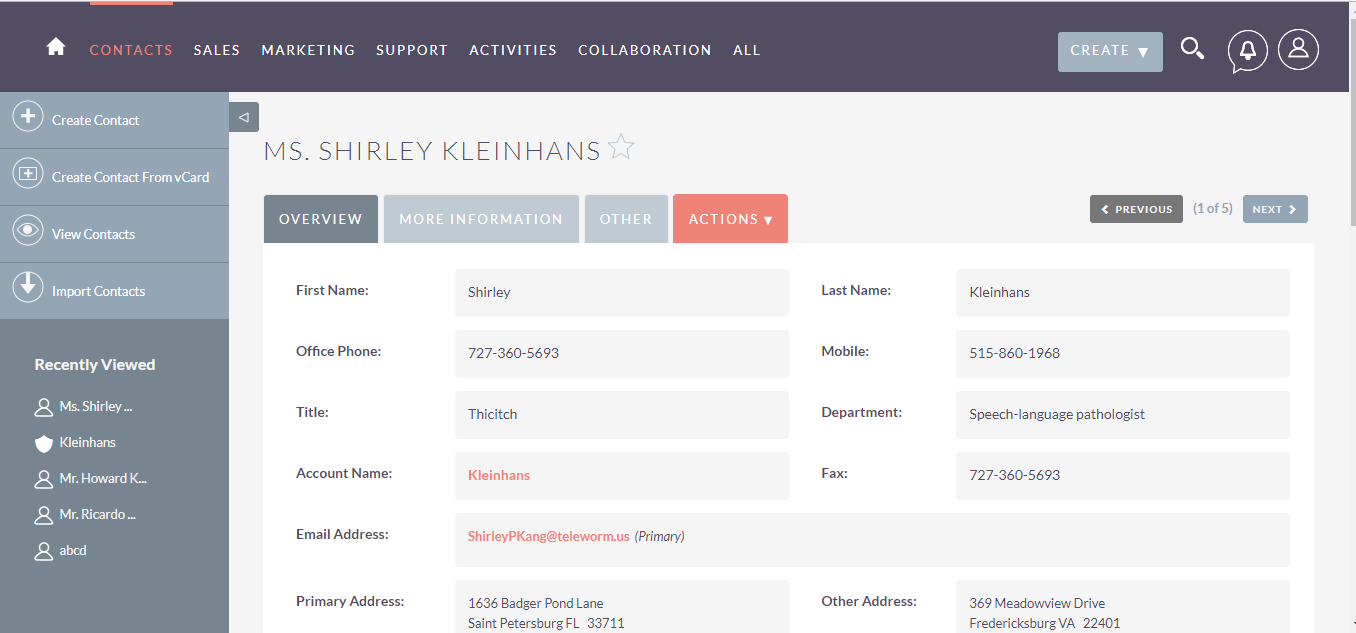
Now check in Contacts module, record is created as shown in the below screenshot.
Step 17:
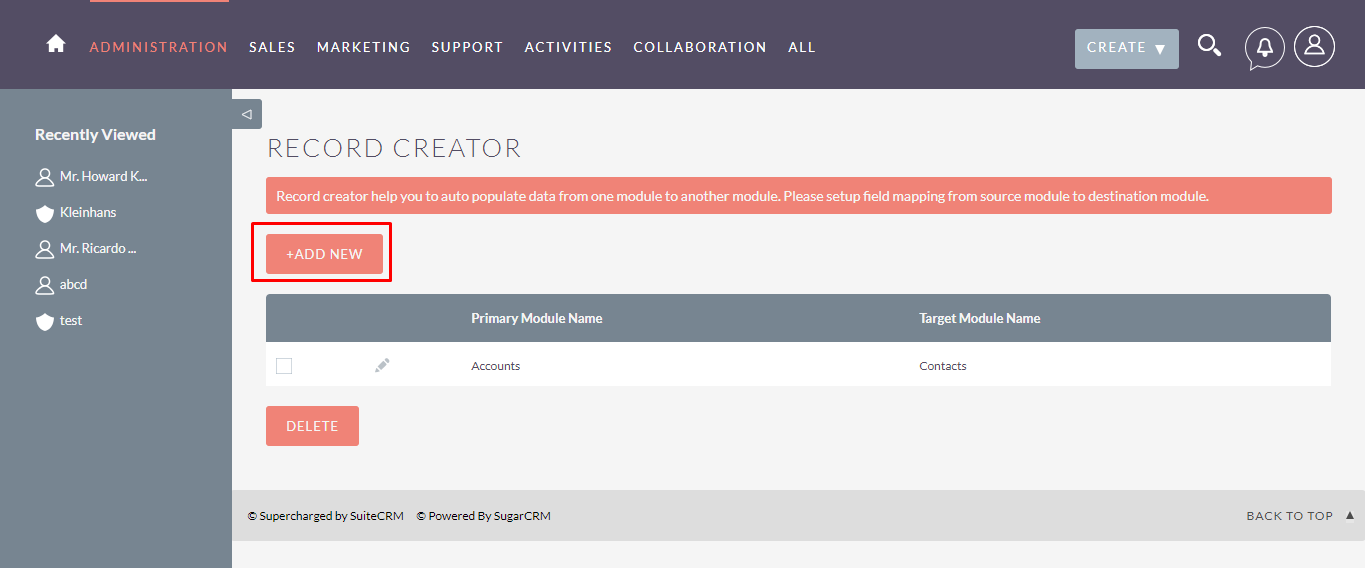
To add new record, click on ADD NEW button, as shown in the below screenshot.
Step 18:
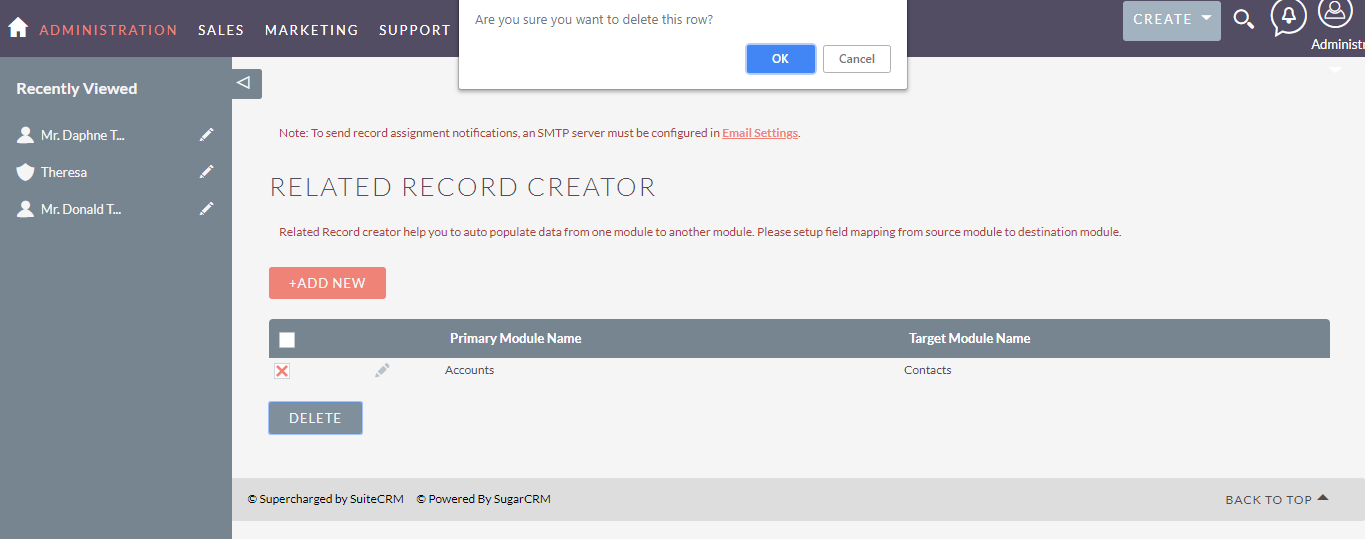
To delete the record, select records and click on DELETE button, as shown in the below screenshot.

