Give your team an upfront glance of where leads are in the sales cycle. The Progress Bar add-on prominently displays a quick overview that highlights the current stage of each record, and it can be configured with any SuiteCRM module.
Installation Guide
Steps For Installing Progress Bar Plugin
Notes: Before installing Progress Bar Plugin, please take your SuiteCRM and Database backup first.
Step 1
To open the Administration Page, Click on the Admin tab as shown in below screenshot.

Step 2
To install the Progress Bar plugin, Click on Module Loader from the Developer Tools section.

Step 3
In Module Loader Page → Click on the Browse button to select zip file → Click on UPLOAD button to upload the Progress Bar plugin(zip file).

Step 4
In Module Loader page → Click on the INSTALL button to install Progress Bar plugin.

Step 5
To accept the Terms and Conditions, click on Accept radio button → Click on COMMIT button.

Step 6
After successful installation → it redirects you to validate License Key → enter valid License Key and click on VALIDATE button → if key is valid then it will show CONTINUE button → click CONTINUE button.

Step 7
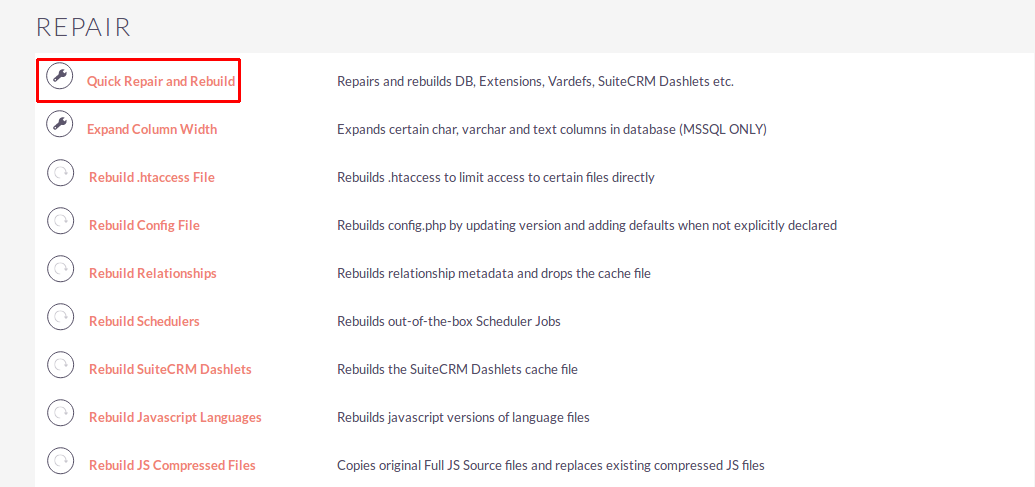
Open Administration page, Click on Repair from the System Section → Click on Quick Repair & Rebuild.


Step 8
After Installation you can see the Link “Progress Bar” on Administration page, as shown in the below screenshot.


