

MTS Highlight Field — highlight important SuiteCRM fields with custom background, text & border colours. Supports conditional formatting based on other fields (AND/OR, priority) across List, Detail and Edit views. No Studio needed.
Admin Guide
License settings
The license page has been redesigned in v1.1.0. Placeholders below — replace with your own screenshots before publishing.
Go to Admin > MTS Highlight Field License.
Enter License key and hit 'Validate'
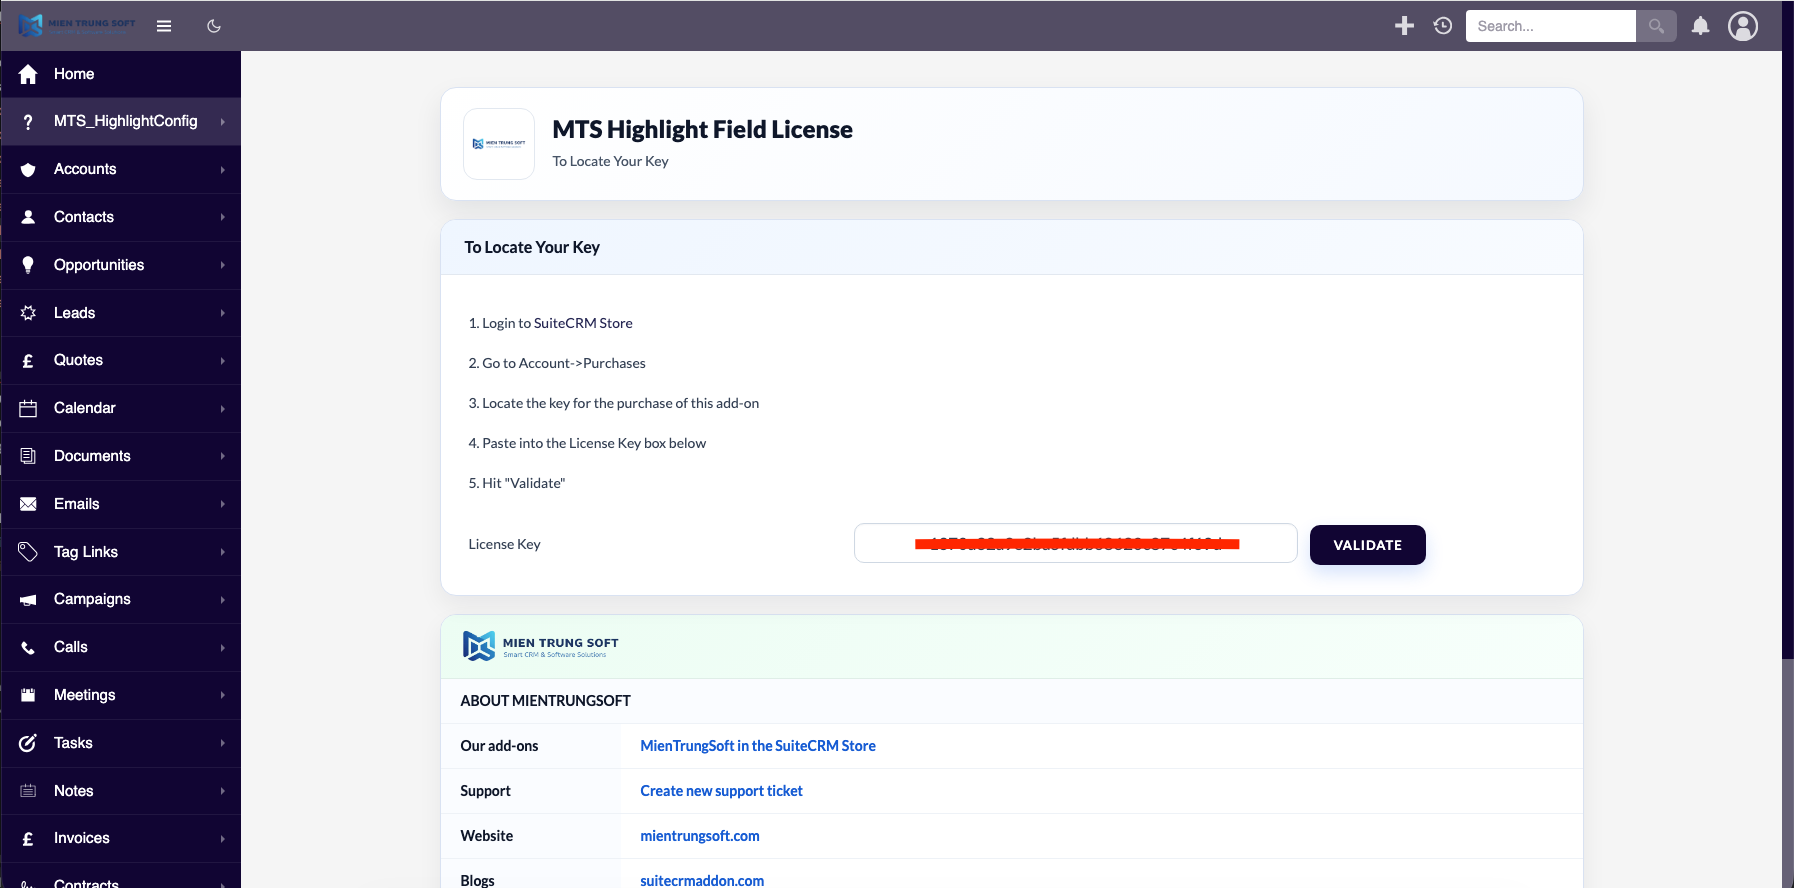
- After validate successful, click Continue button to go to setting page.
Configuration
Open Admin > MTS Highlight Field and select the module you want to configure. Each field in that module is shown as a card.
Placeholders below — replace with your own screenshots before publishing.
1. Enable a field and choose a configuration type
Toggle a field on to open its configuration panel, then choose a type:
- Static color — always apply one background/text (and optional border) colour.
- Value-based (per option) — for dropdown fields, pick a colour per option value.
- Conditional — apply a colour only when conditions on other fields are met.
A single field can hold several configurations — click + Add configuration to add more (for example a static base colour plus one or more conditional rules).
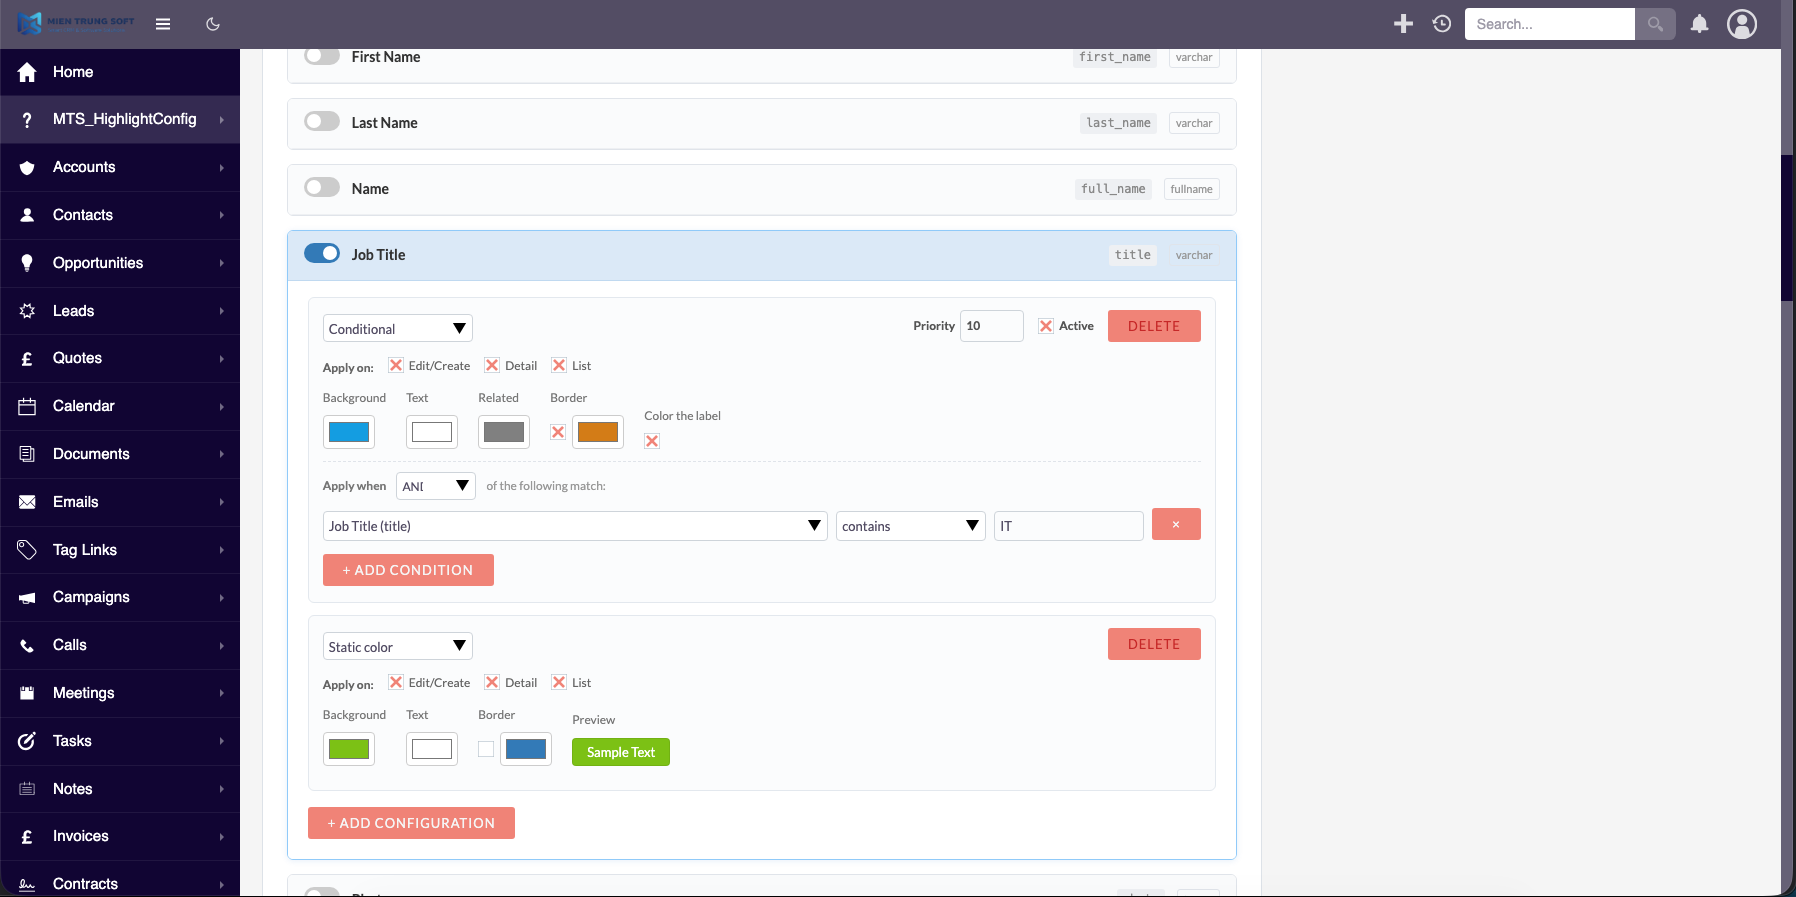
2. Build a conditional rule
Inside a Conditional configuration:
- Set the Background, Text, optional Border and Related colours, and (optionally) tick Color the label.
- Choose Apply on: Edit/Create, Detail, List (any combination).
- Set Apply when to AND (all must match) or OR (any matches), then add one or more conditions:
[ field ] [ operator ] [ value ]— e.g.Do Not Callis checked. - Set a Priority (higher wins when several rules match) and the Active toggle.
- Click Save — a spinner shows while changes are applied, then a success toast appears.
Operators available: equals, not equals, is checked, is not checked, is empty, is not empty, contains, greater than, less than, is one of (comma-separated).
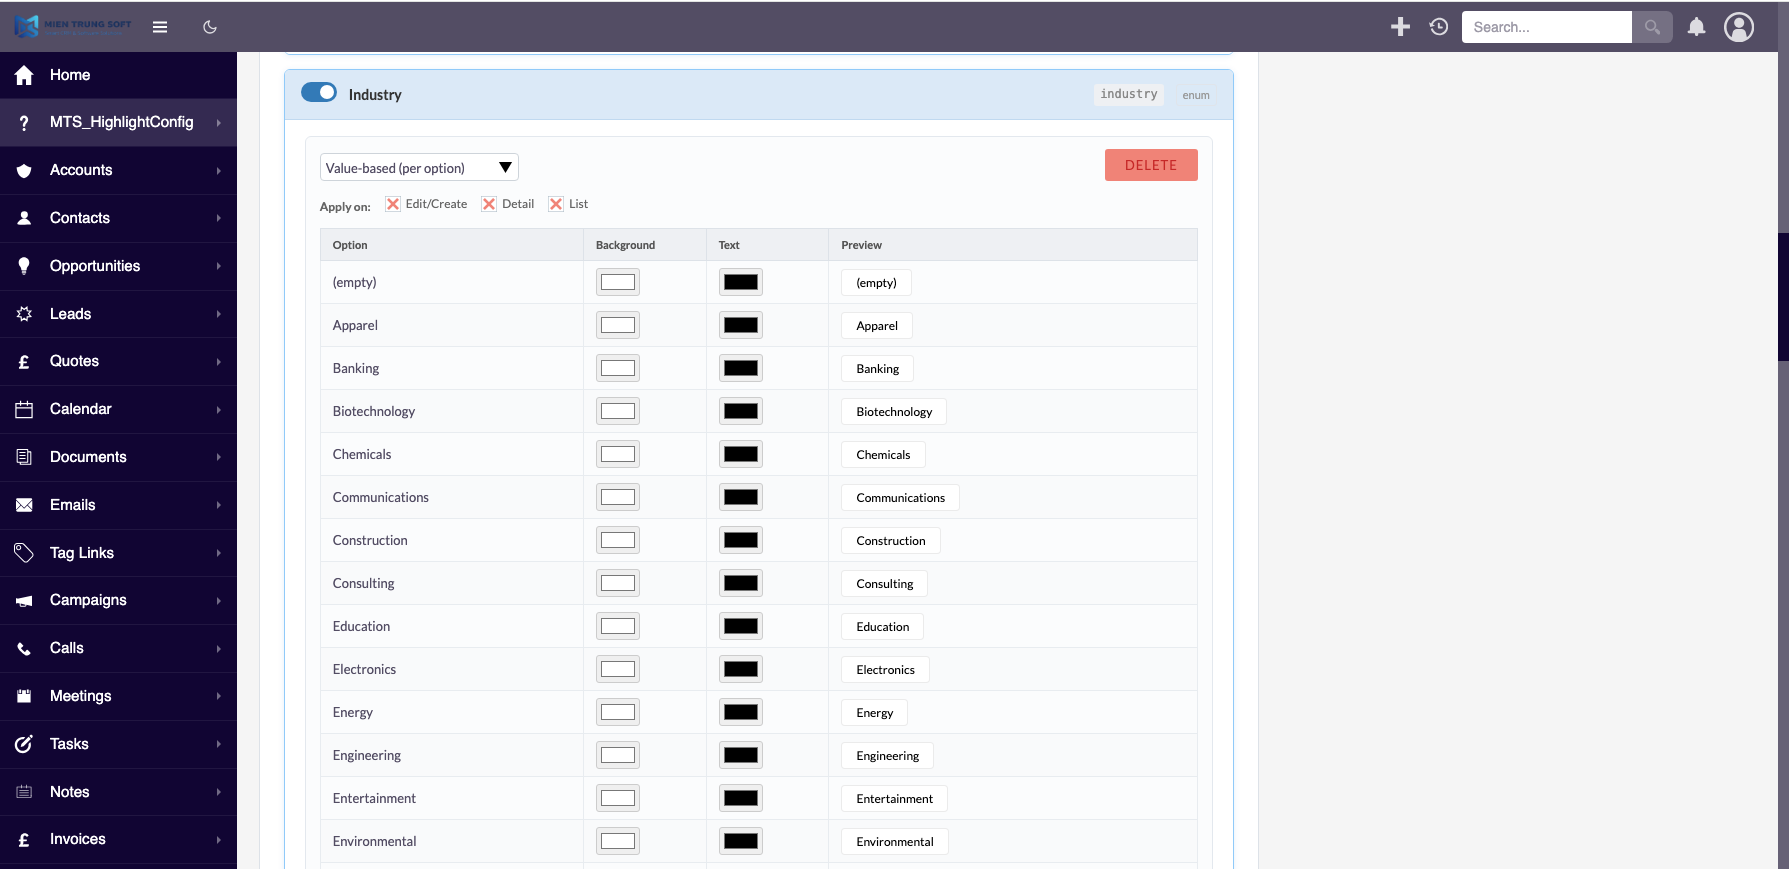
3. Value-based (dropdown) configuration
For a dropdown field, choose Value-based and set a colour for each option.
4. See the result
Open a record List or Detail view (and Edit/Create if enabled for the rule) to see the highlighting applied automatically.
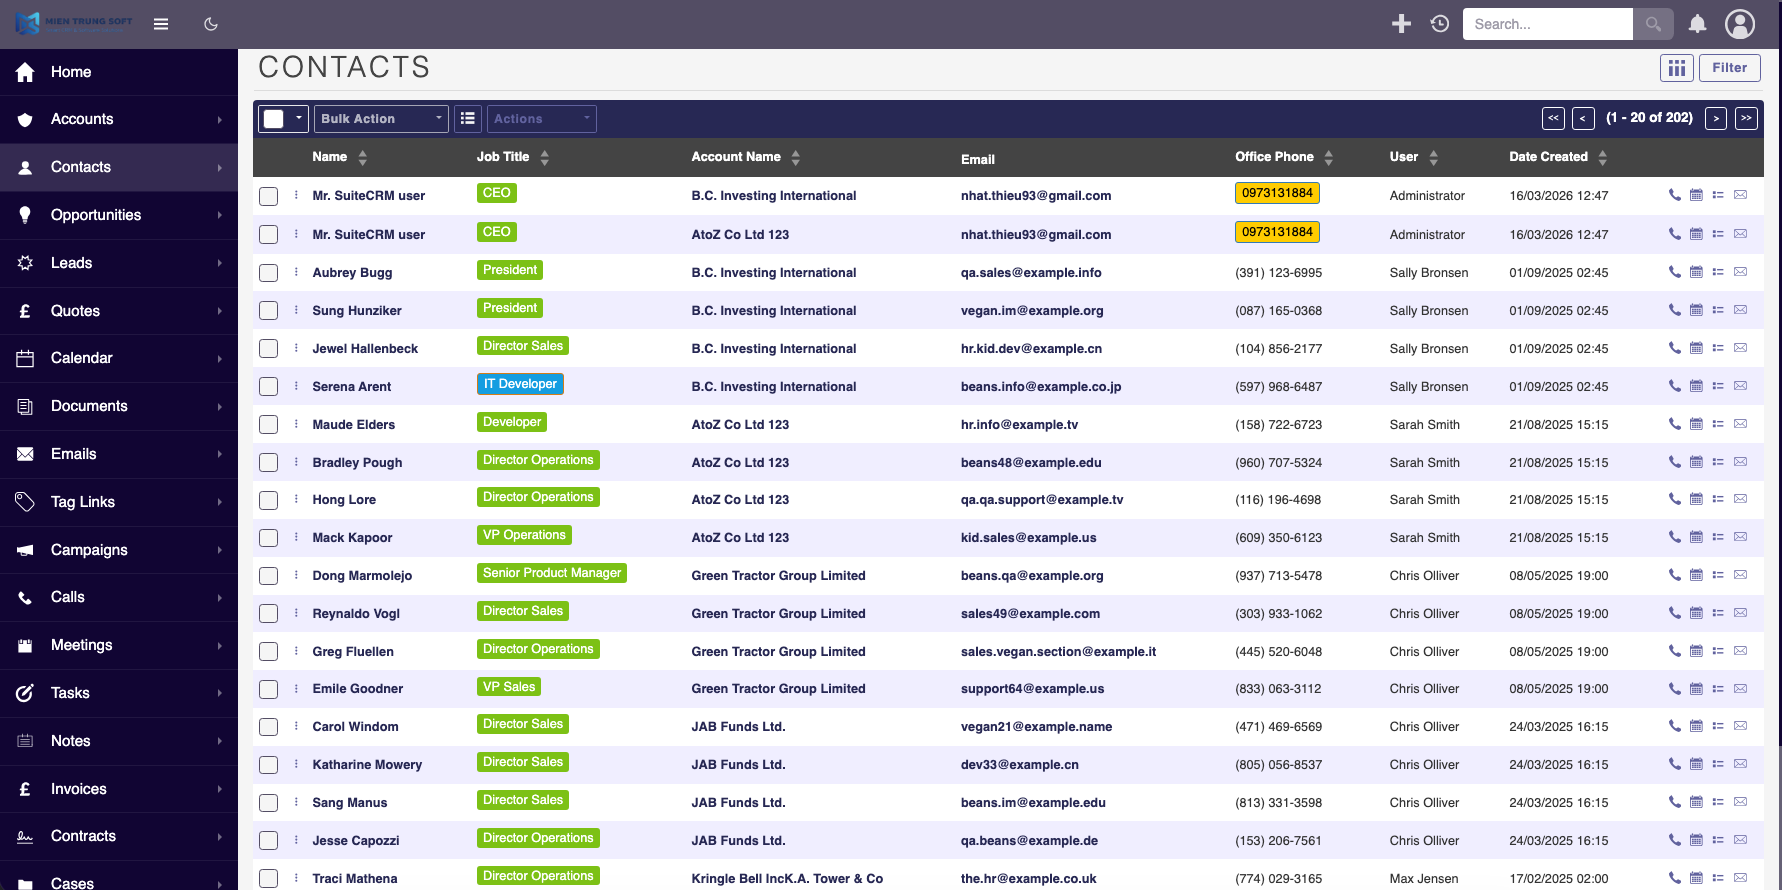
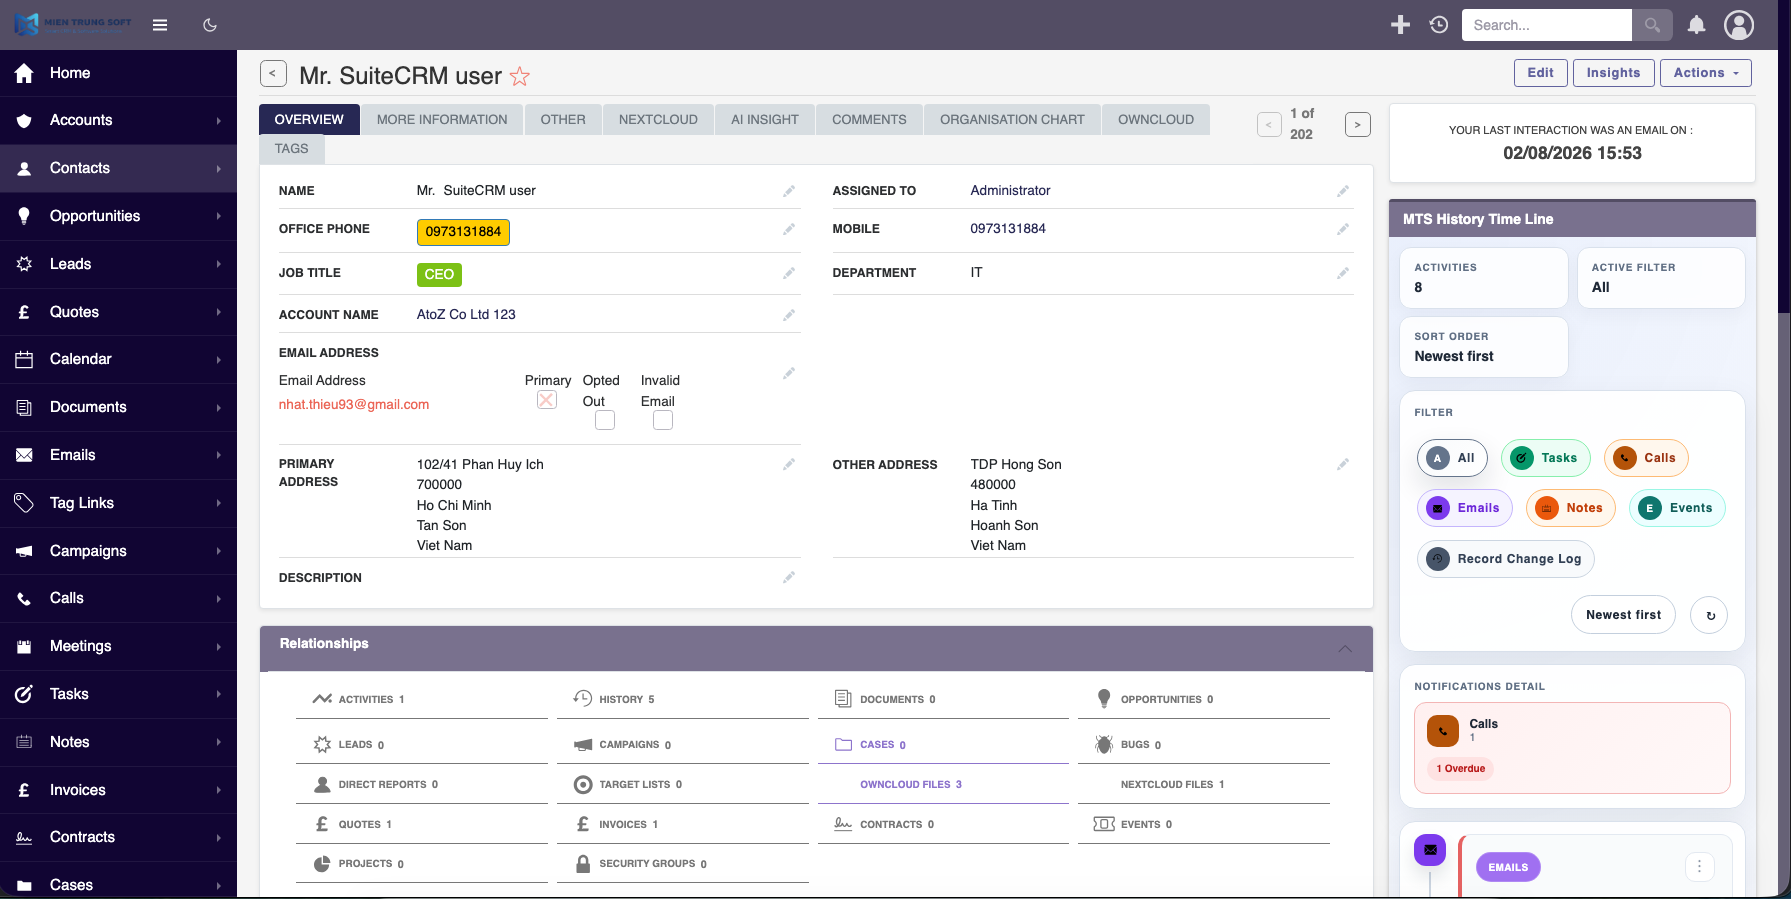
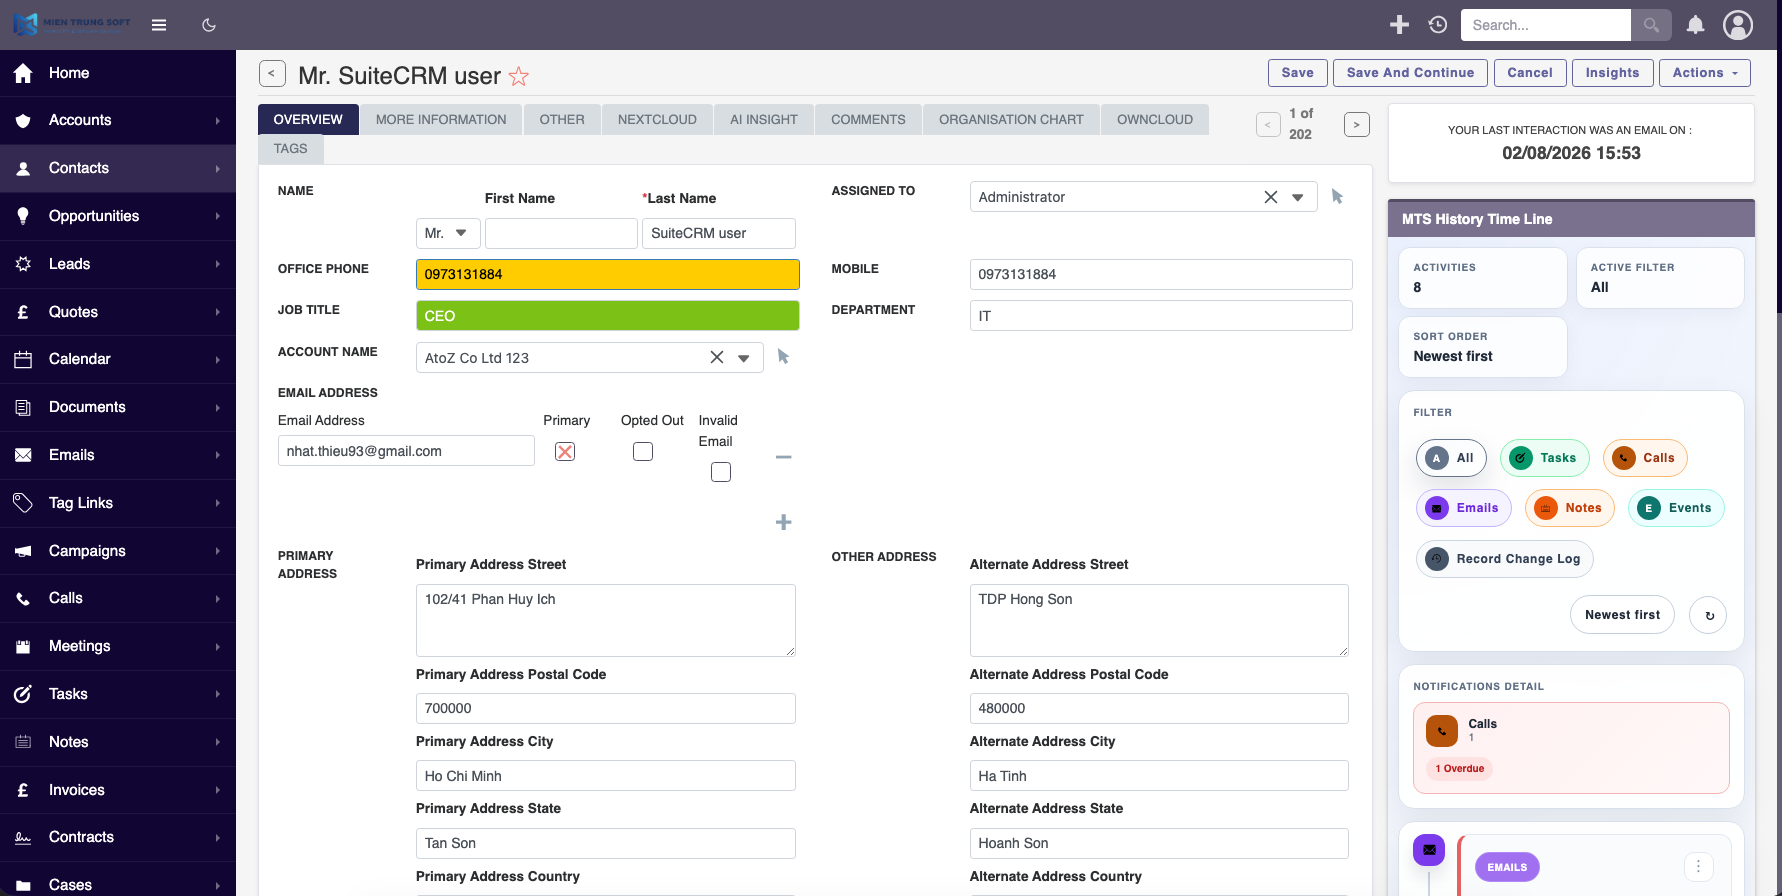
Priority & fallback: when multiple conditional rules match, the highest Priority wins. If no conditional rule matches, the field falls back to its static or value-based colour (if configured).
Licensing: highlighting only applies while the licence is active. If the licence is invalid, the configuration screens and highlighting are disabled until it is re-validated.
Notes: If you prefer a walkthrough, follow the demo video on the About page.
 Saving Comment...

-
""Does exactly what it says it does and does it well." Im a fan. I am able to add conditional color to items in a record and it works in li..." - dwaynecasey
Read More Reviews
 hansjarlo