Accelerate your sales and marketing efforts while browsing the web by directly connecting your SuiteCRM contacts from Gmail using the Gmail Chrome Tool for SuiteCRM.
Google Chrome User Guide
Steps For Using Gmail Chrome Tool for SuiteCRM in Chrome Browser Using Gmail:
Step 1:
Open Google Chrome Browser & Click on the “Apps” and search “Gmail Integration for SuiteCRM” Extension as per below screenshot. Once you find it, click on the “Add to Chrome” Button.

Step 2:
After Adding to Chrome Browser, Open Gmail Account and Open any Email from Inbox as per below screenshot.

Step 3:
Once Open any Email from Inbox, “GSync for Gmail” feature shown as per below screenshot.

Step 4:
If SuiteCRM URL, Username or Password is not entered then it’ll show a message like below screenshot.


Step 5:
Enter SuiteCRM URL, Login Username & Password for Login into SuiteCRM from Gmail.

Step 6:
Once a user tries to Login into SuiteCRM from Gmail, If SuiteCRM URL is wrong then it’ll show the message as per below screenshot.

Step 7:
Once a user tries to Login into SuiteCRM from Gmail, If SuiteCRM Instance doesn’t install “GSync for Gmail” add-on then it’ll show the message as per below screenshot.

Step 8:
Once a user tries to Login into SuiteCRM from Gmail, If SuiteCRM Instance doesn’t Enable “GSync for Gmail” Feature then it’ll show the message as per below screenshot.

Step 9:
Enable “GSync for Gmail” feature from SuiteCRM as per below screenshot

Step 10:
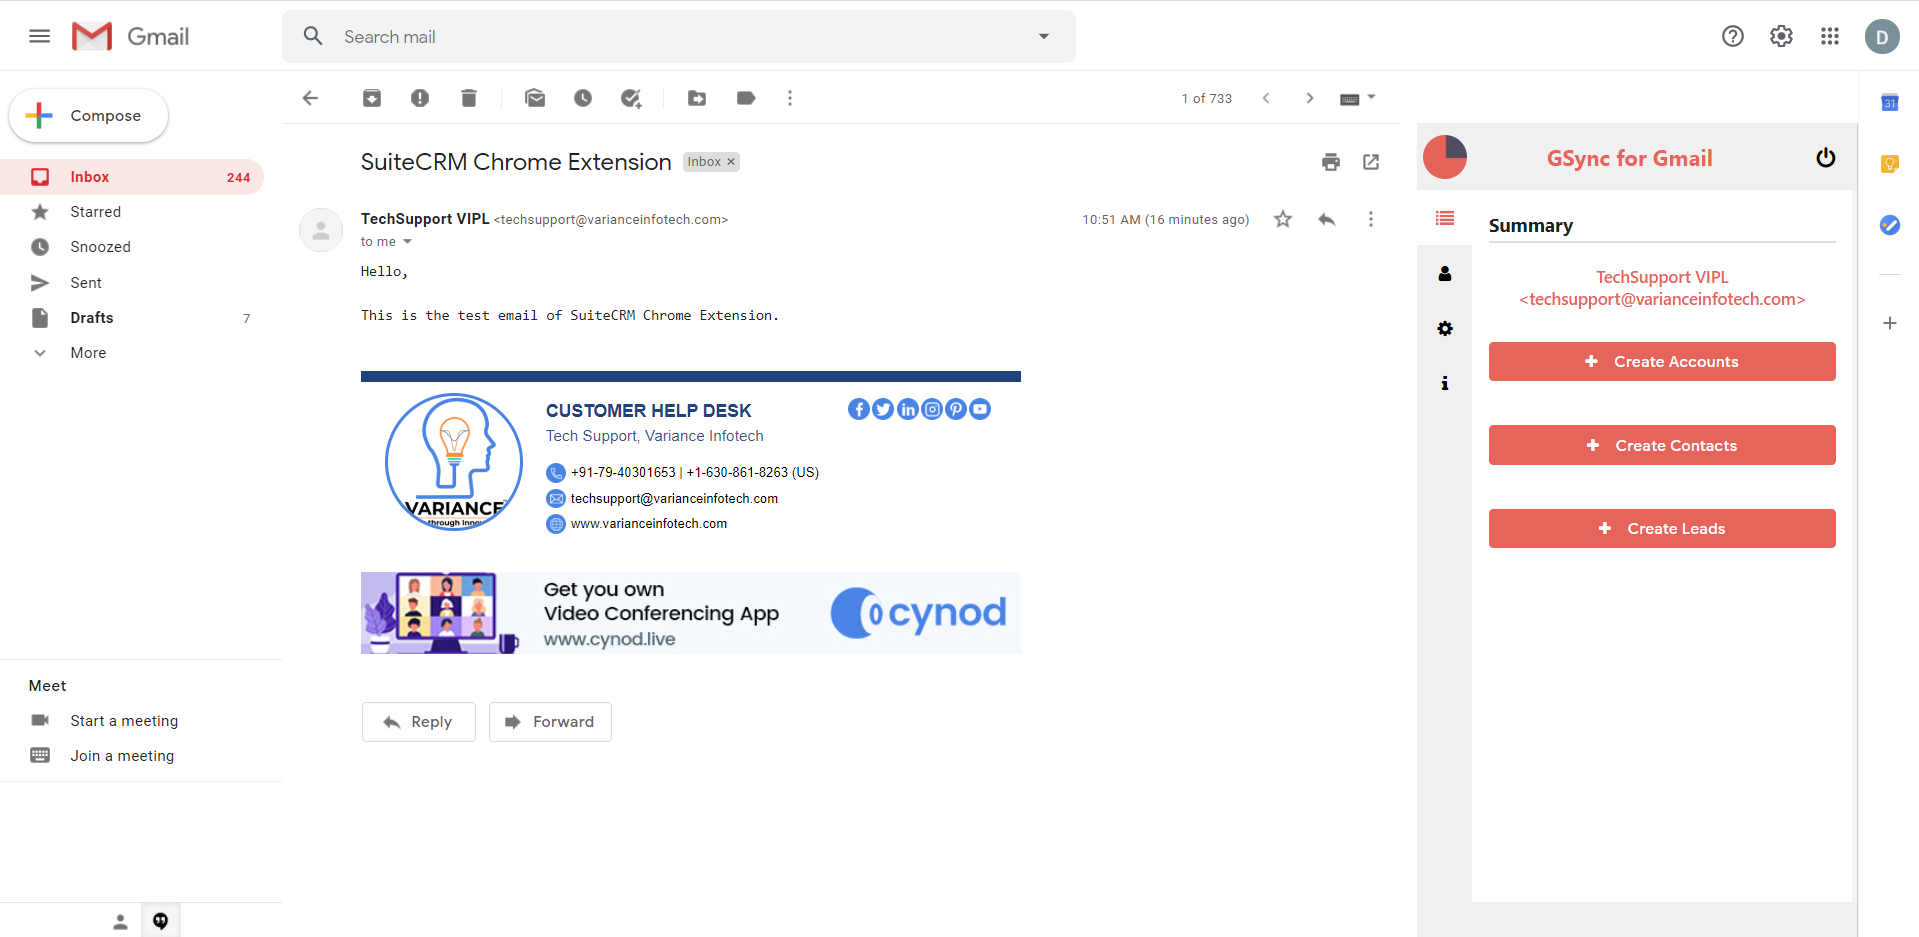
Once Enable features from SuiteCRM & Successful Login into SuiteCRM from Gmail, it’ll look like the screenshot below.
Step 11:
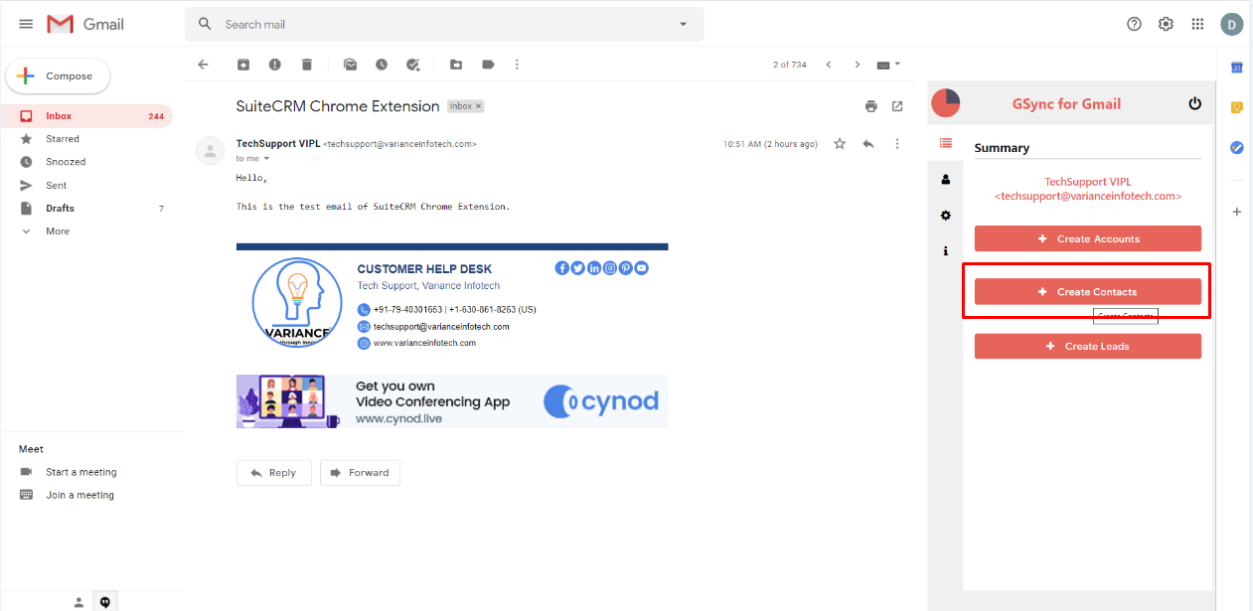
Users Can Create Leads/Contacts/Account for the Email. Currently there is no Leads/Contacts/Account Created for the Email which shown in the below screenshot. So Click on the “Create Contact” Button.
Step 12:
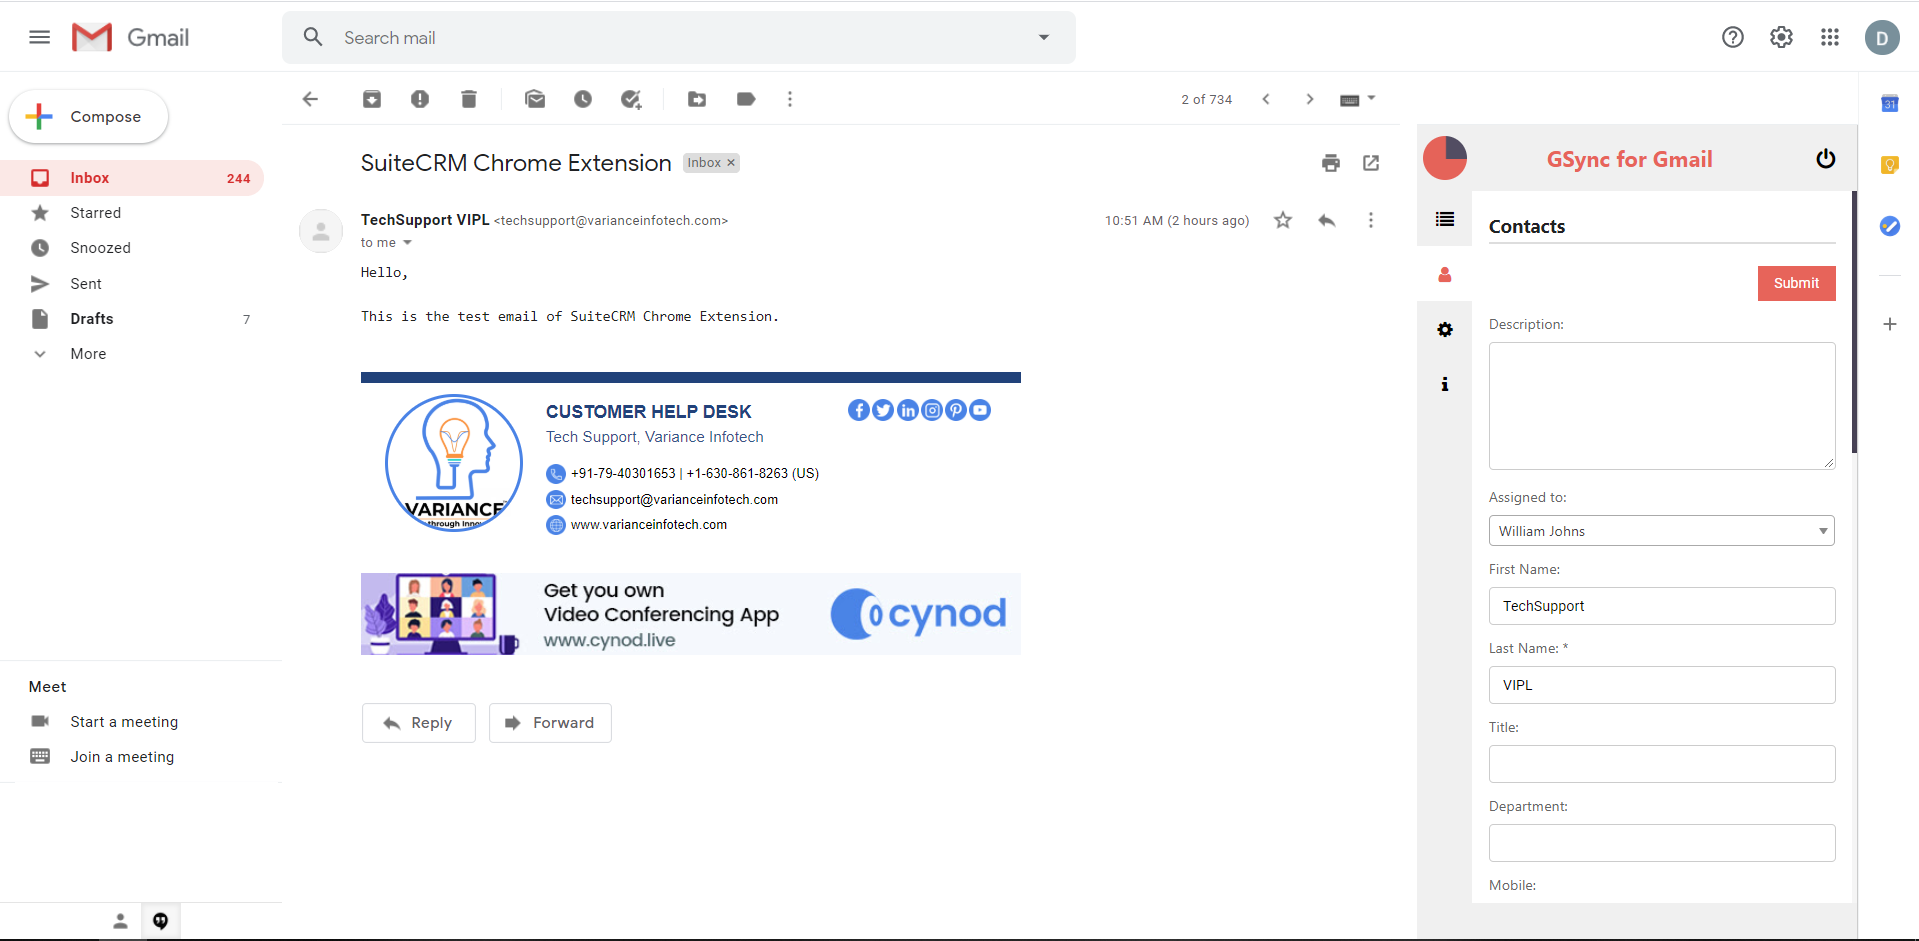
Once User clicks on the “Create Contact” Button, the Add Record form will be opened as shown in the below screenshot.
Step 13:
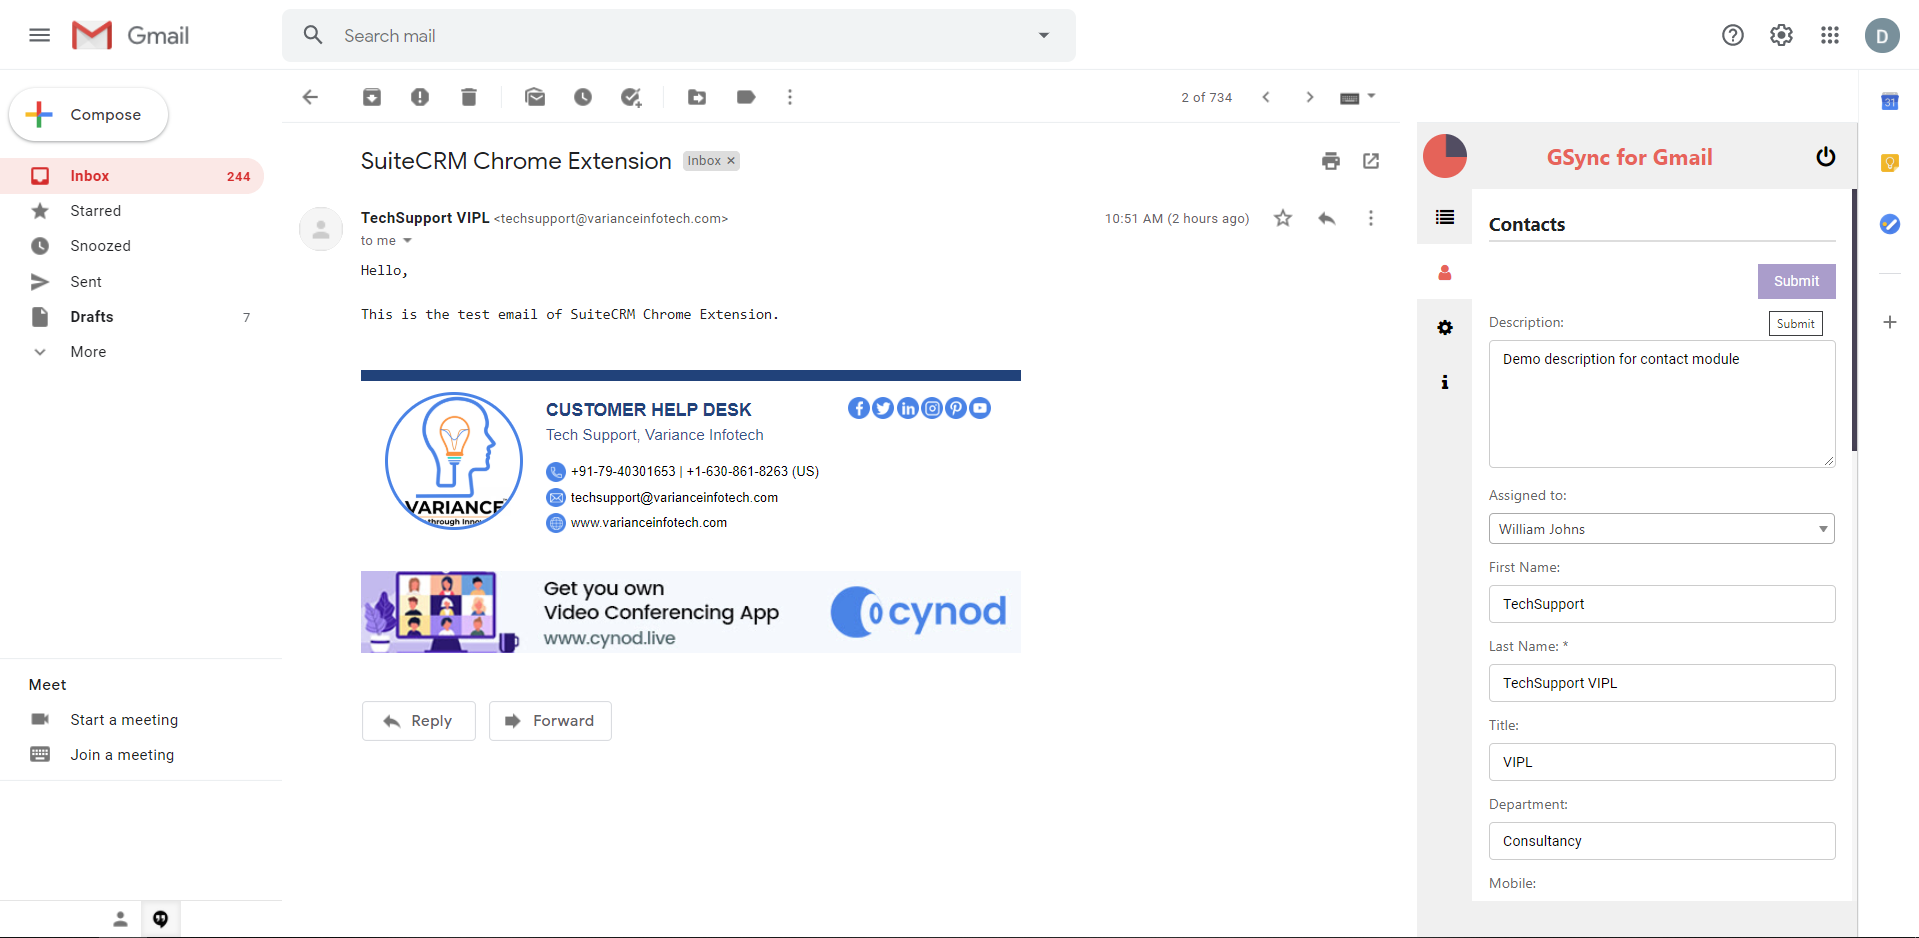
Once User fills up all the necessary details and clicks on the Submit Button, it’ll Create an Contact in SuiteCRM against Email from which you open “GSync for Gmail” feature and Details shows in Gmail as per the screenshot below.

Step 14:
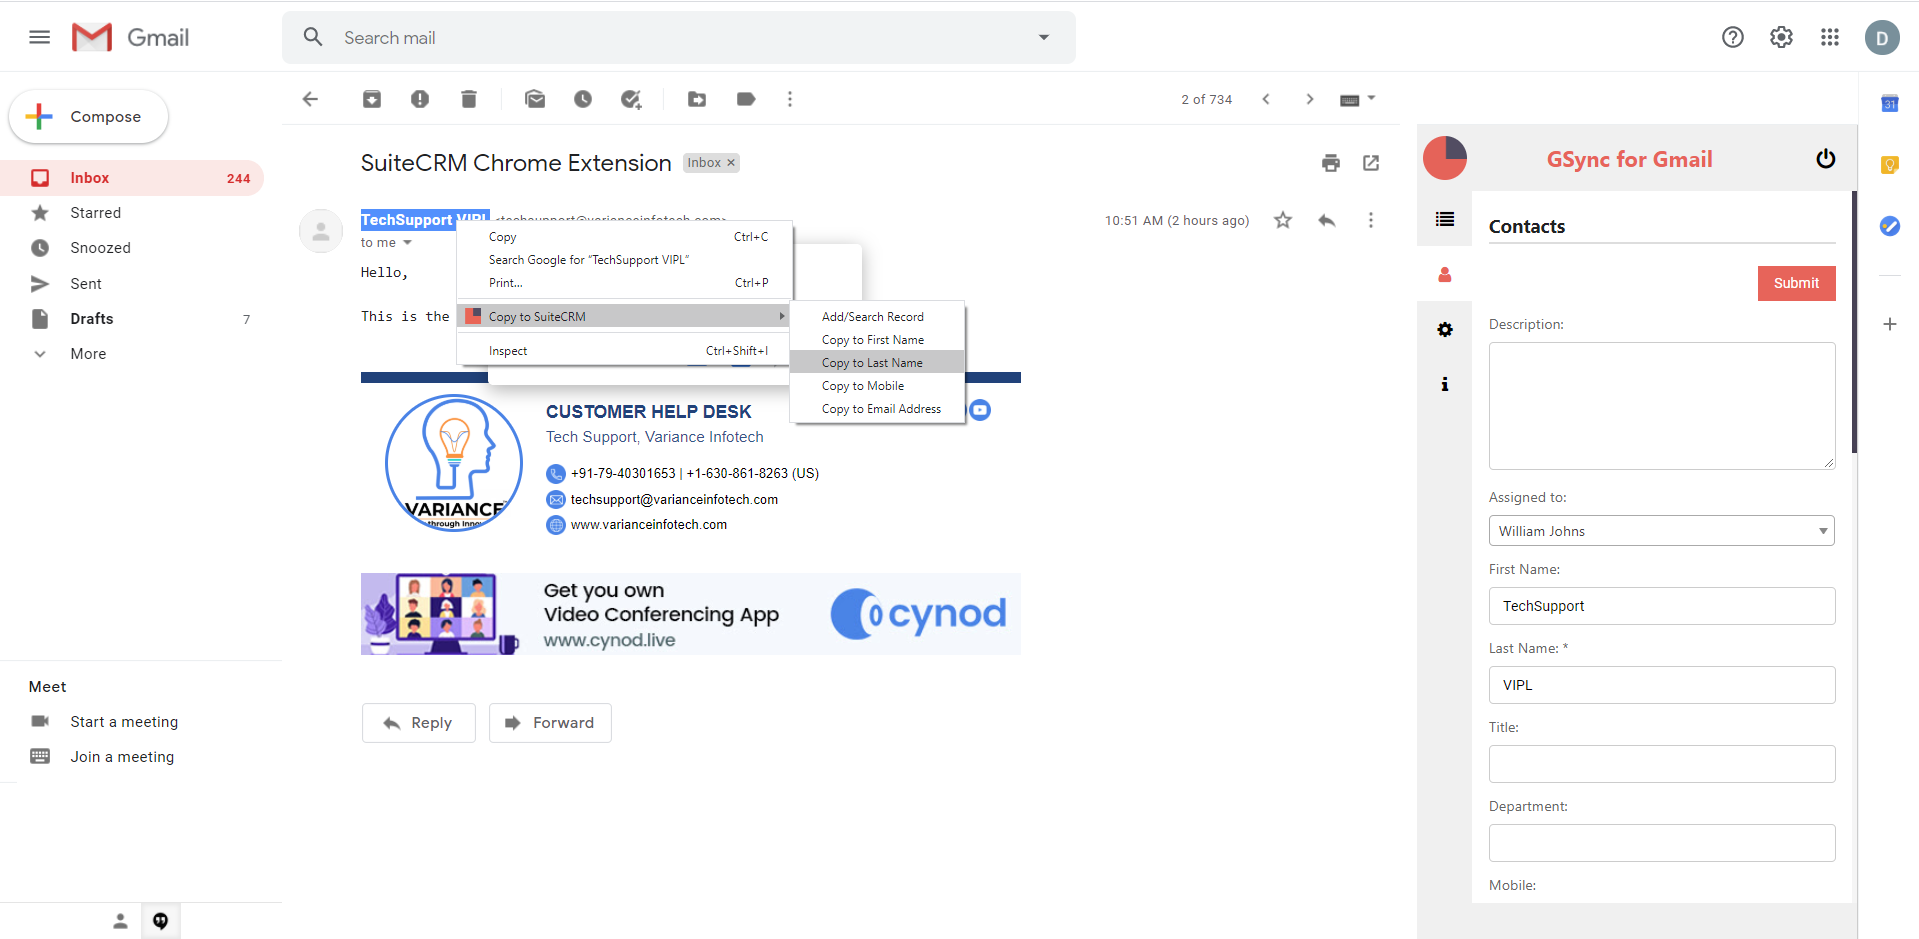
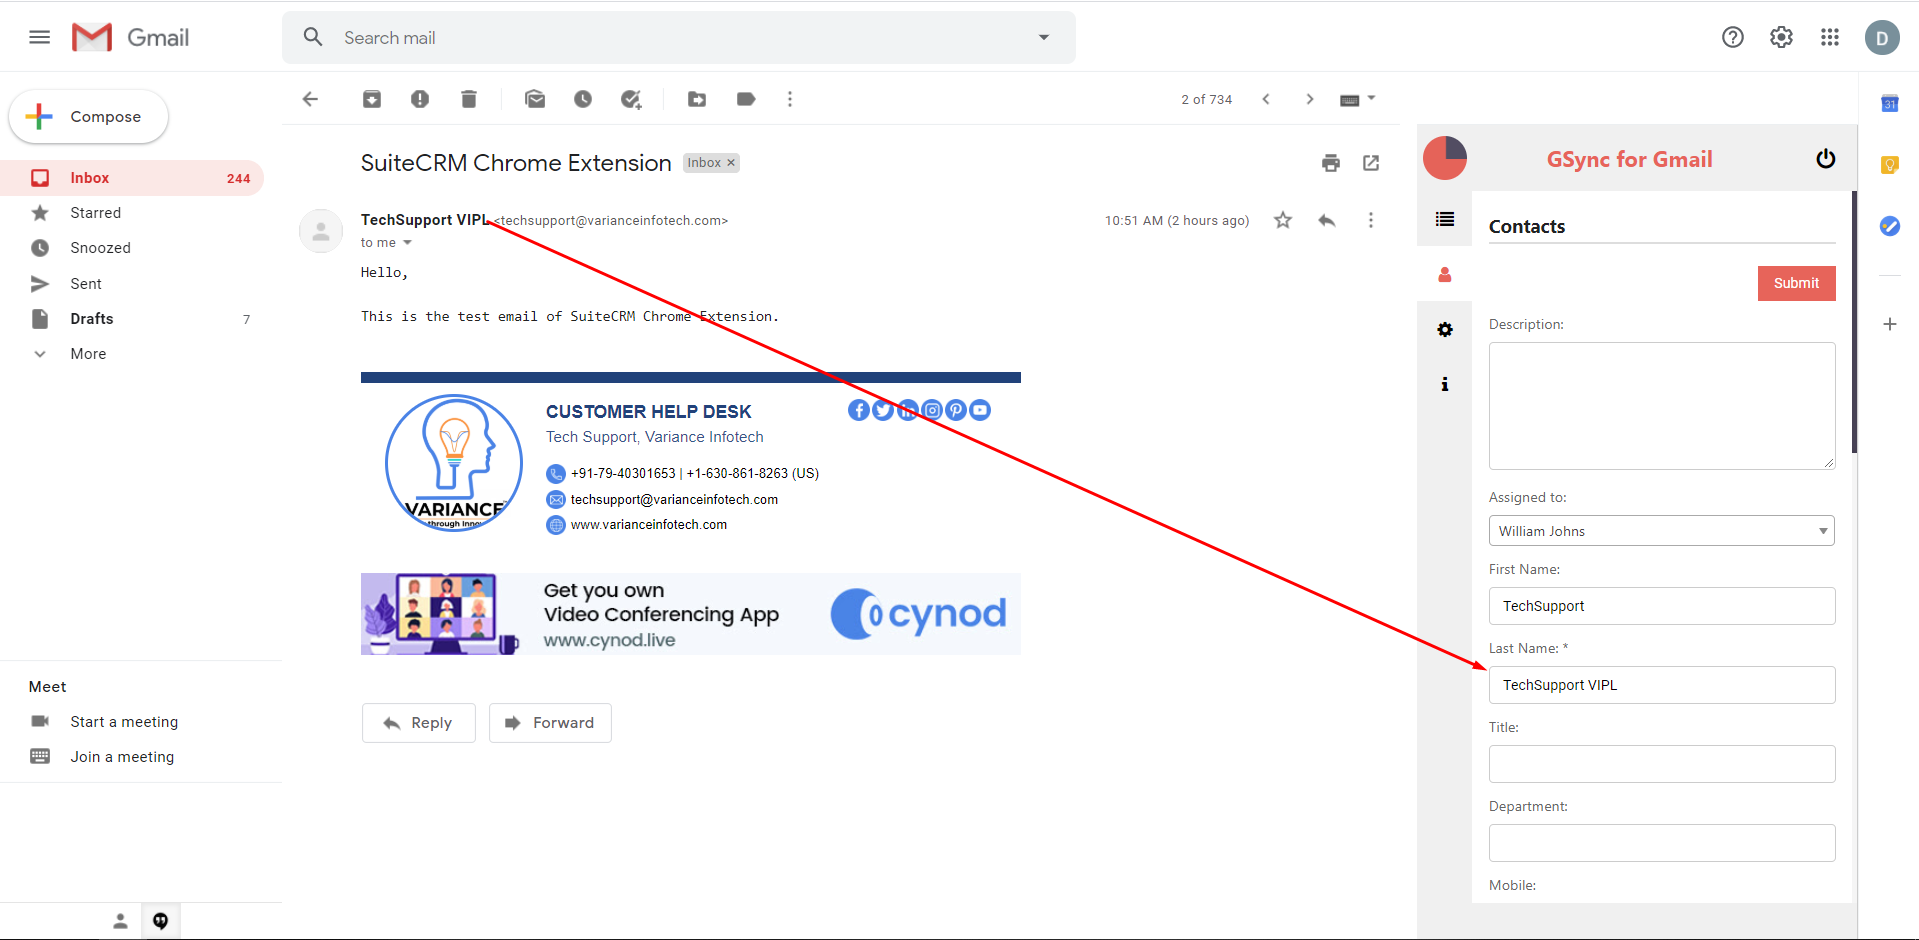
If you want to copy Text/Email/Mobile Number from Email to First Name/Last Name/Email/Mobile field of Module then you can select particular content & Right Click on it and you will see the option of “Copy to SuiteCRM” as per below screenshot.
Step 15:
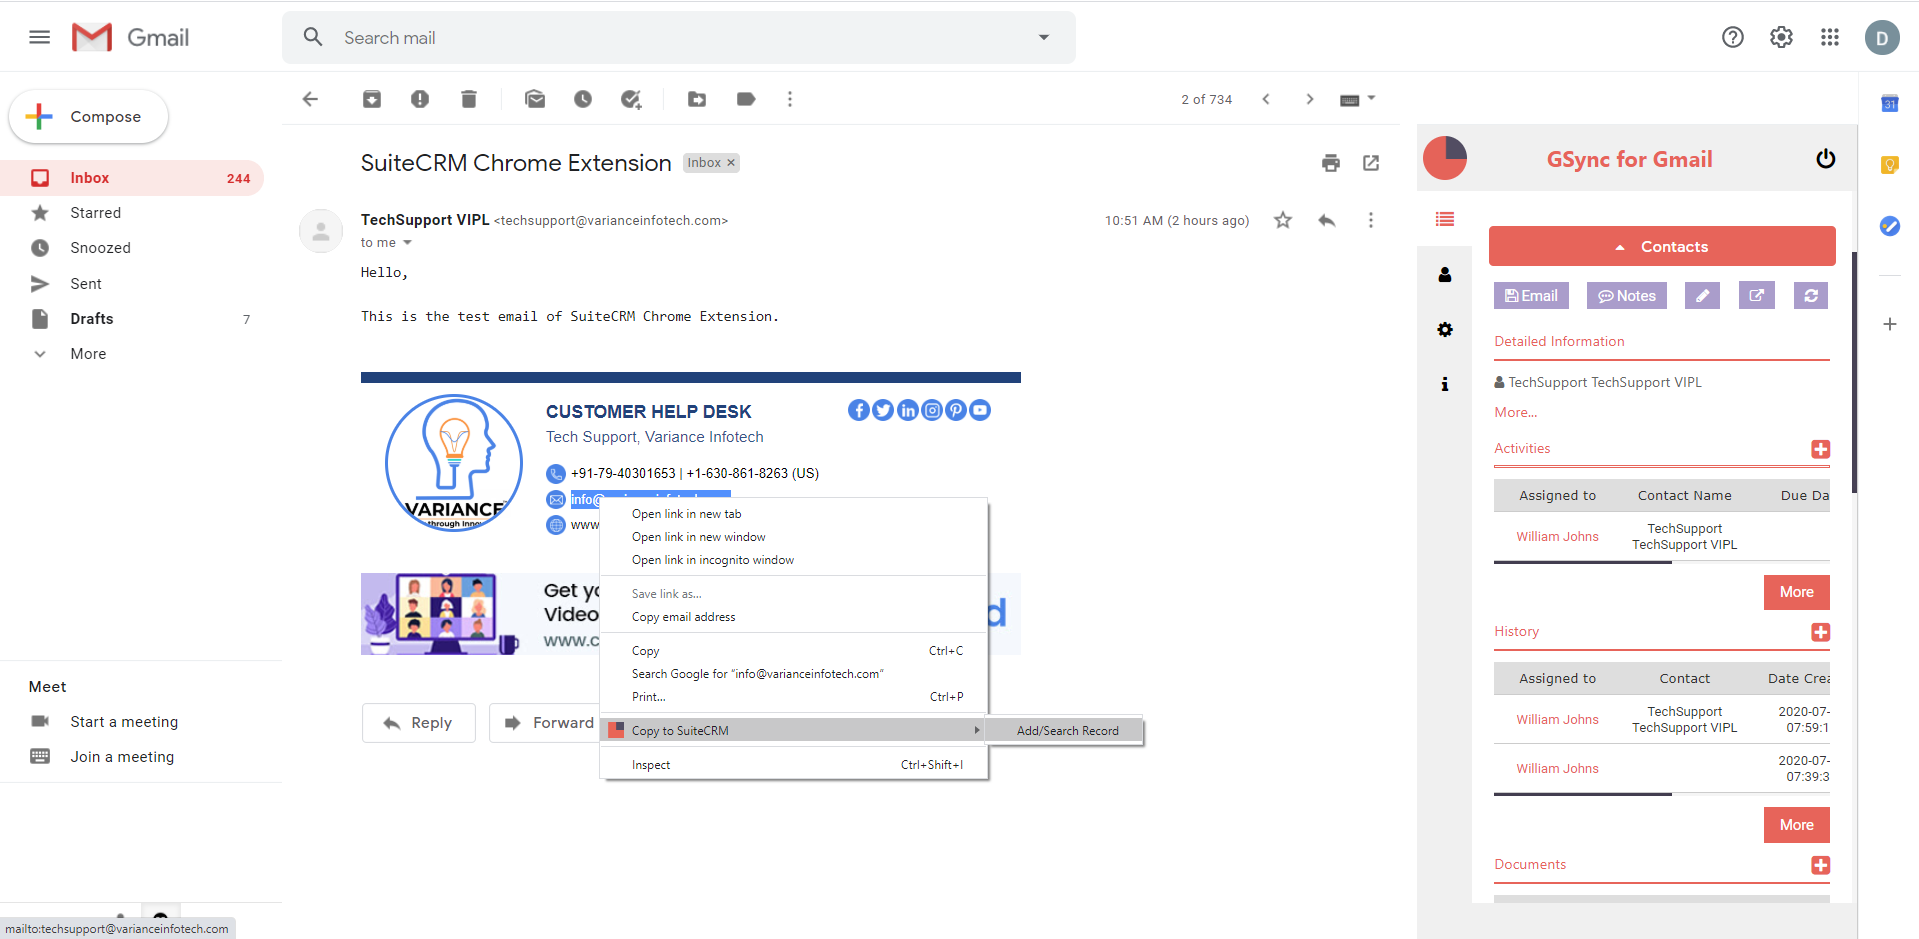
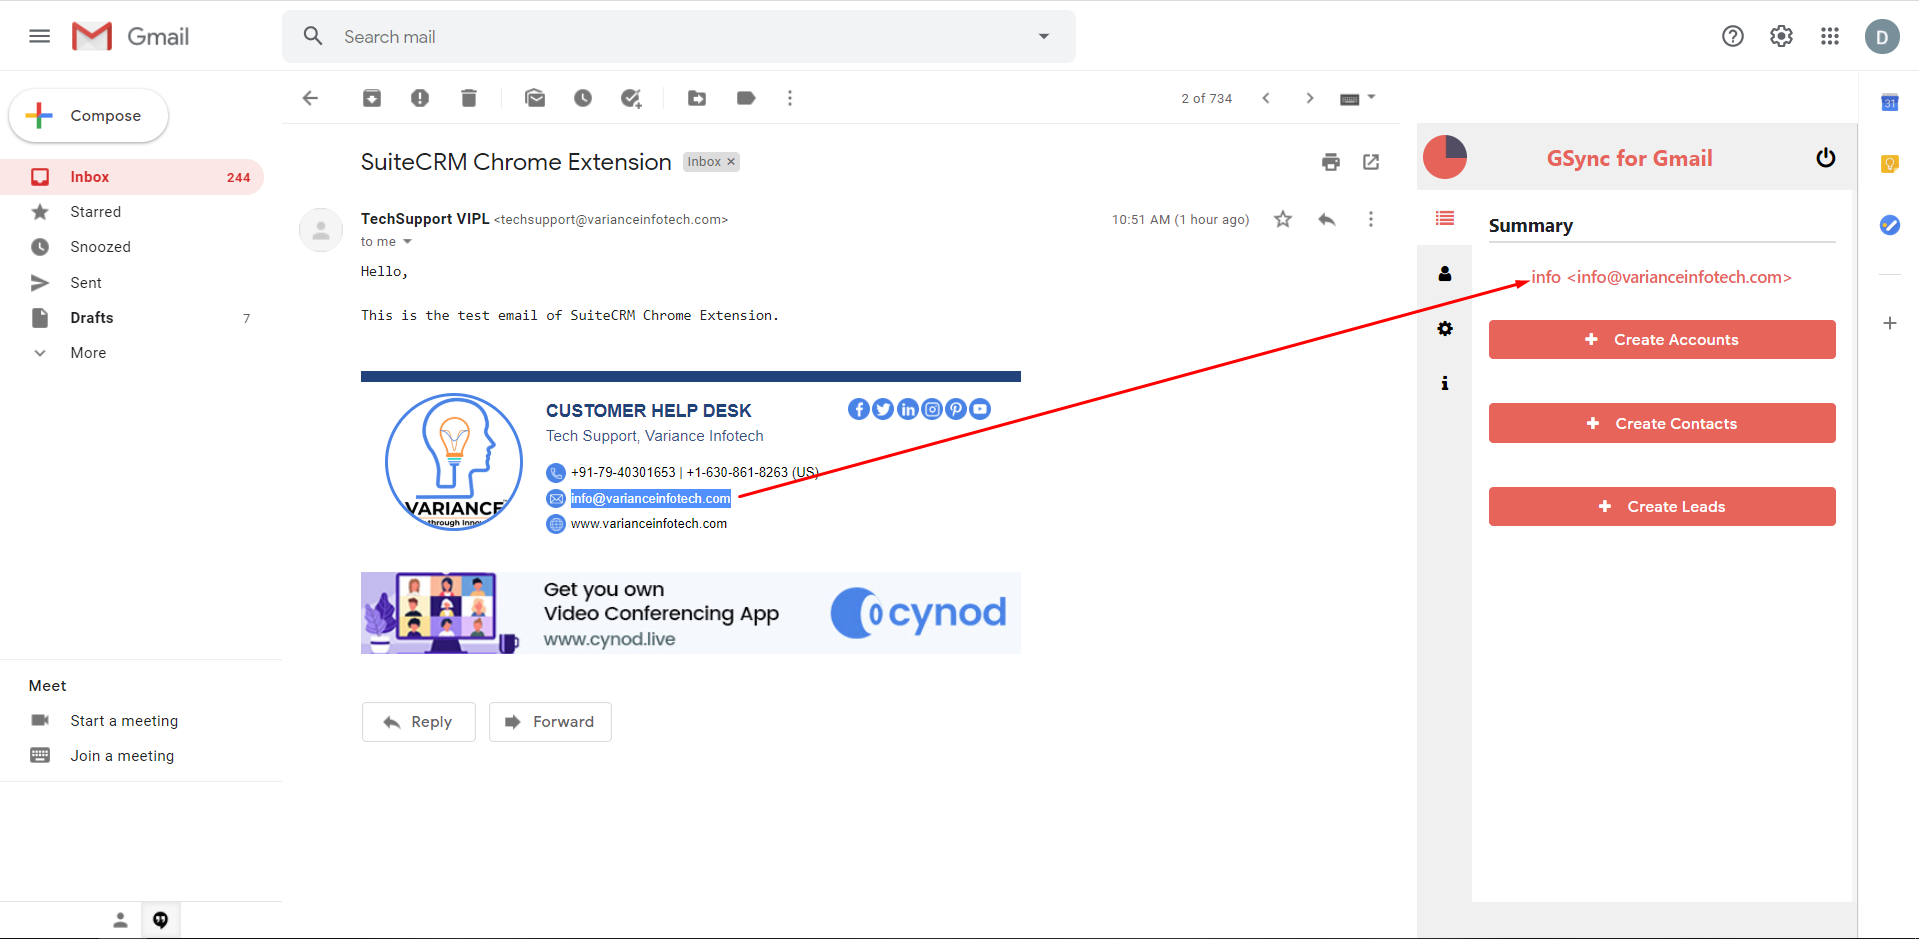
If you want to search any record using Email Address then Select Email from Email Body & Right Click on it and you will see the option of “Copy to SuiteCRM” as per below screenshot.
Step 16:
Once Click on the “Email” Button from Detail View of Contacts, It’ll send Email to the User. It’ll send the Email to the user from which you opened the “GSync for Gmail” Feature.

Step 17:
Once Email Send, it’s Attached against the Contacts in “History” Subpanel as shown in the below screenshot.

Step 18:
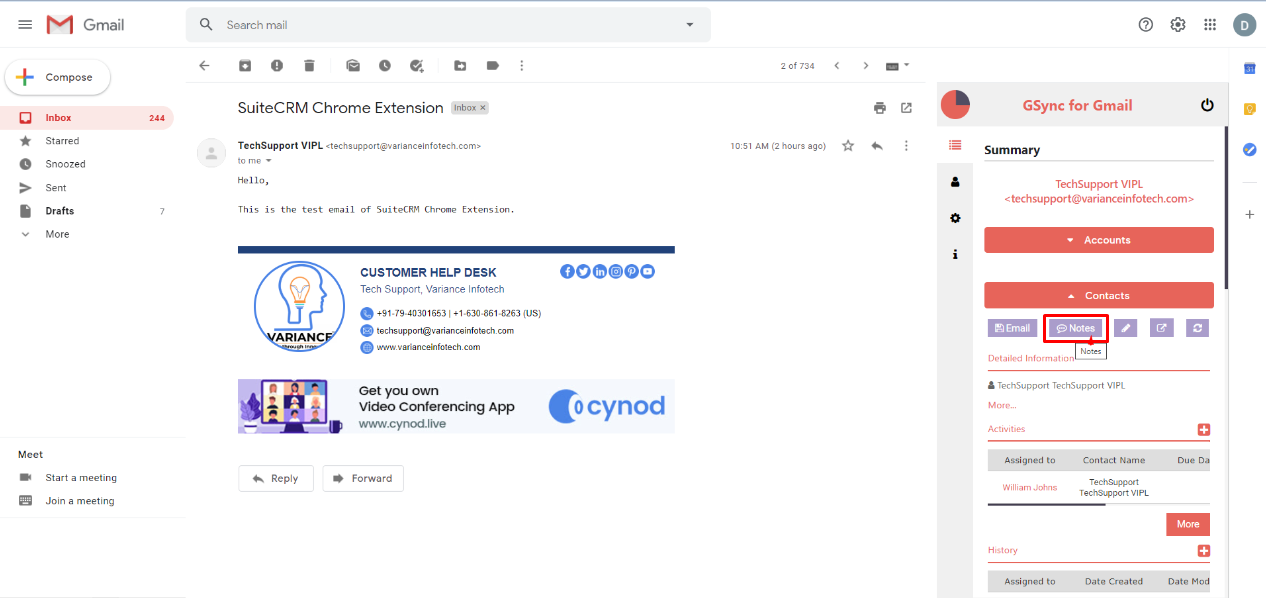
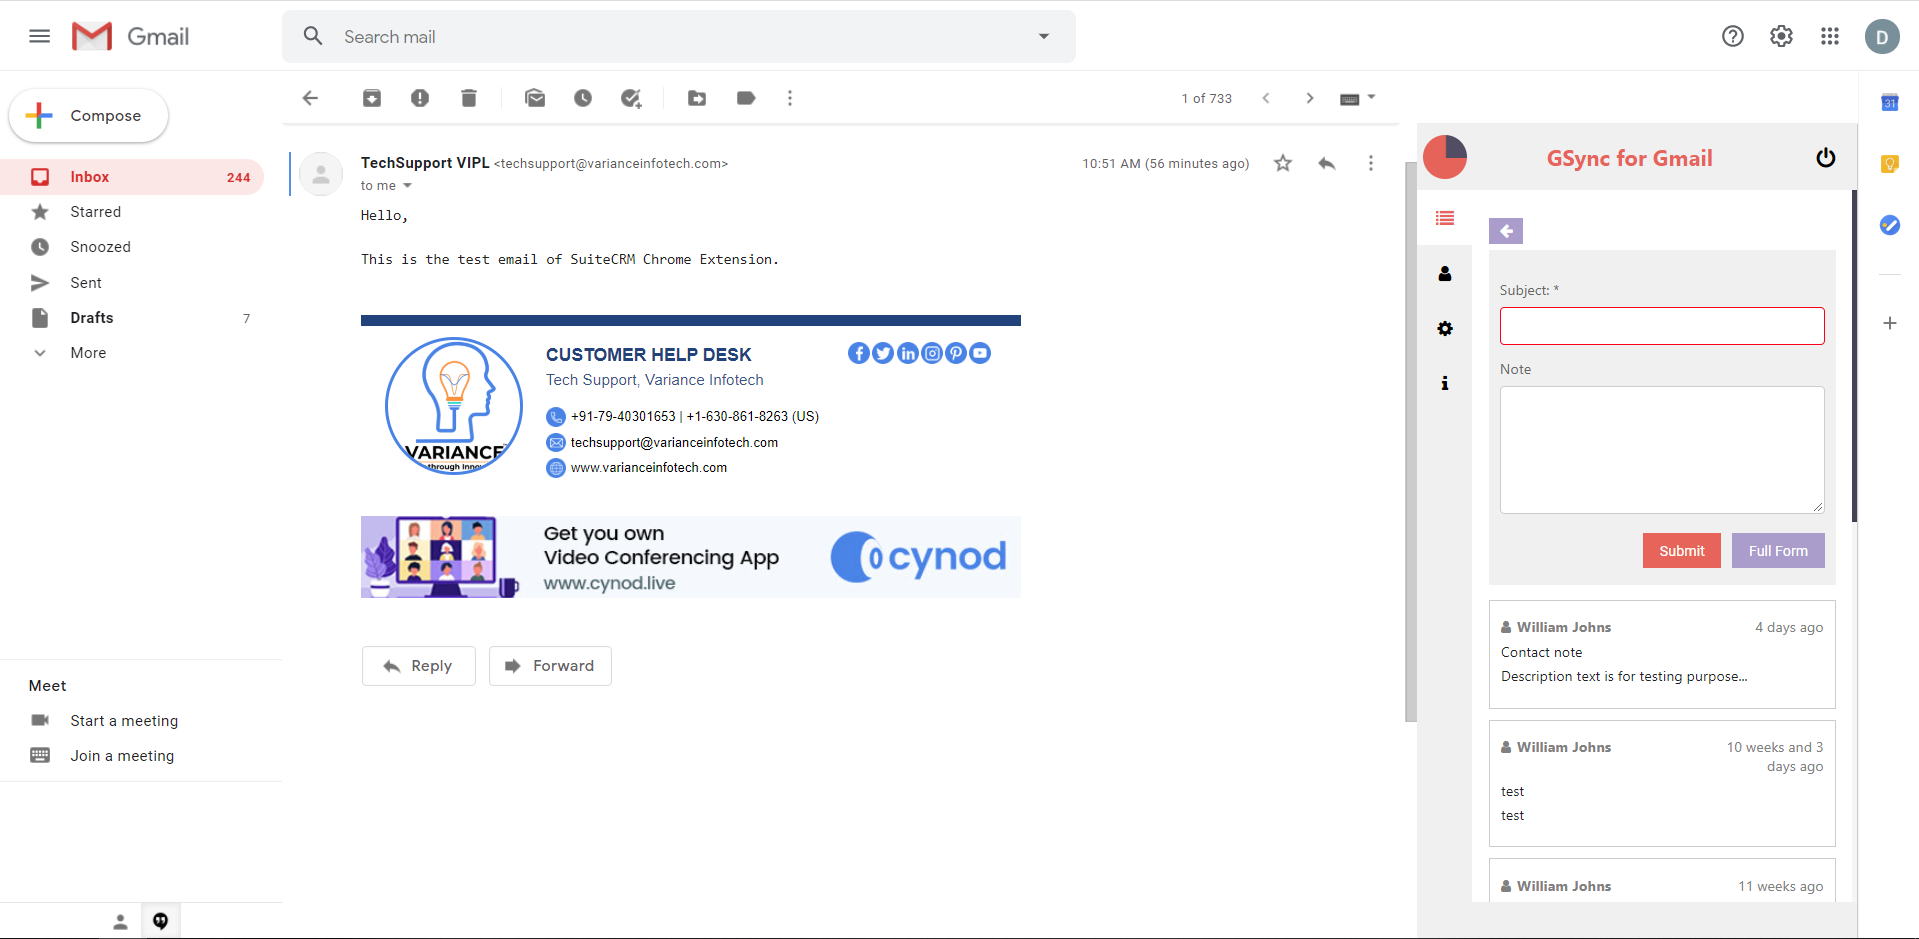
Once Click on the “Notes” Button from Detail View of Contacts, It’ll open the Quick Create form and add Notes against the Contacts.
Step 19:
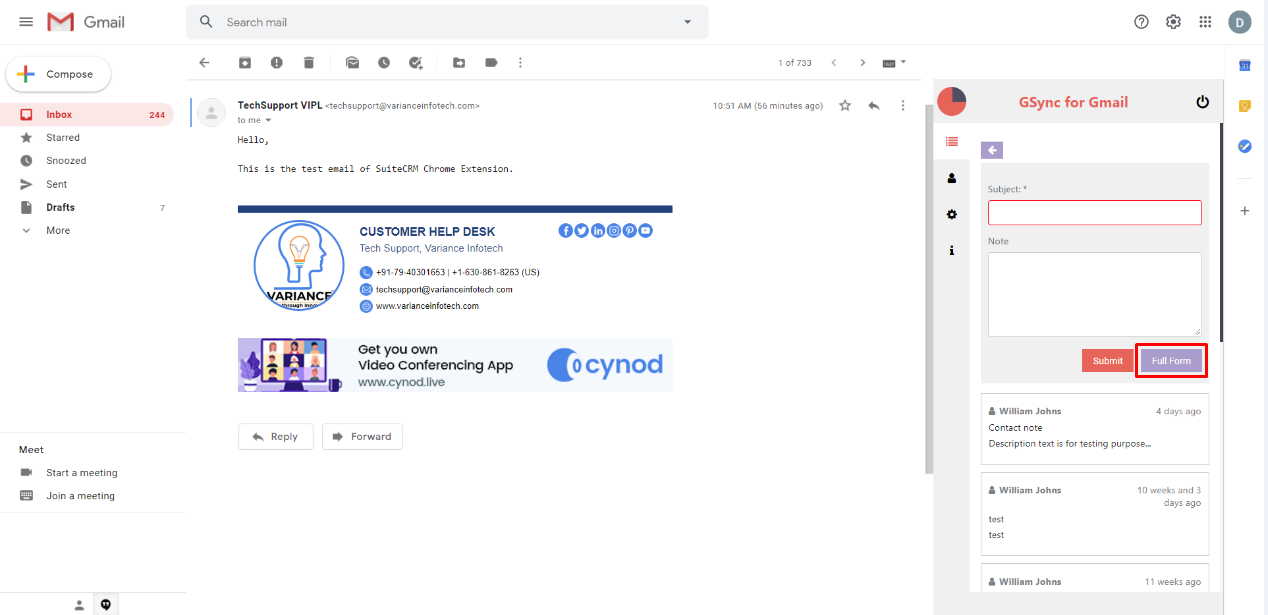
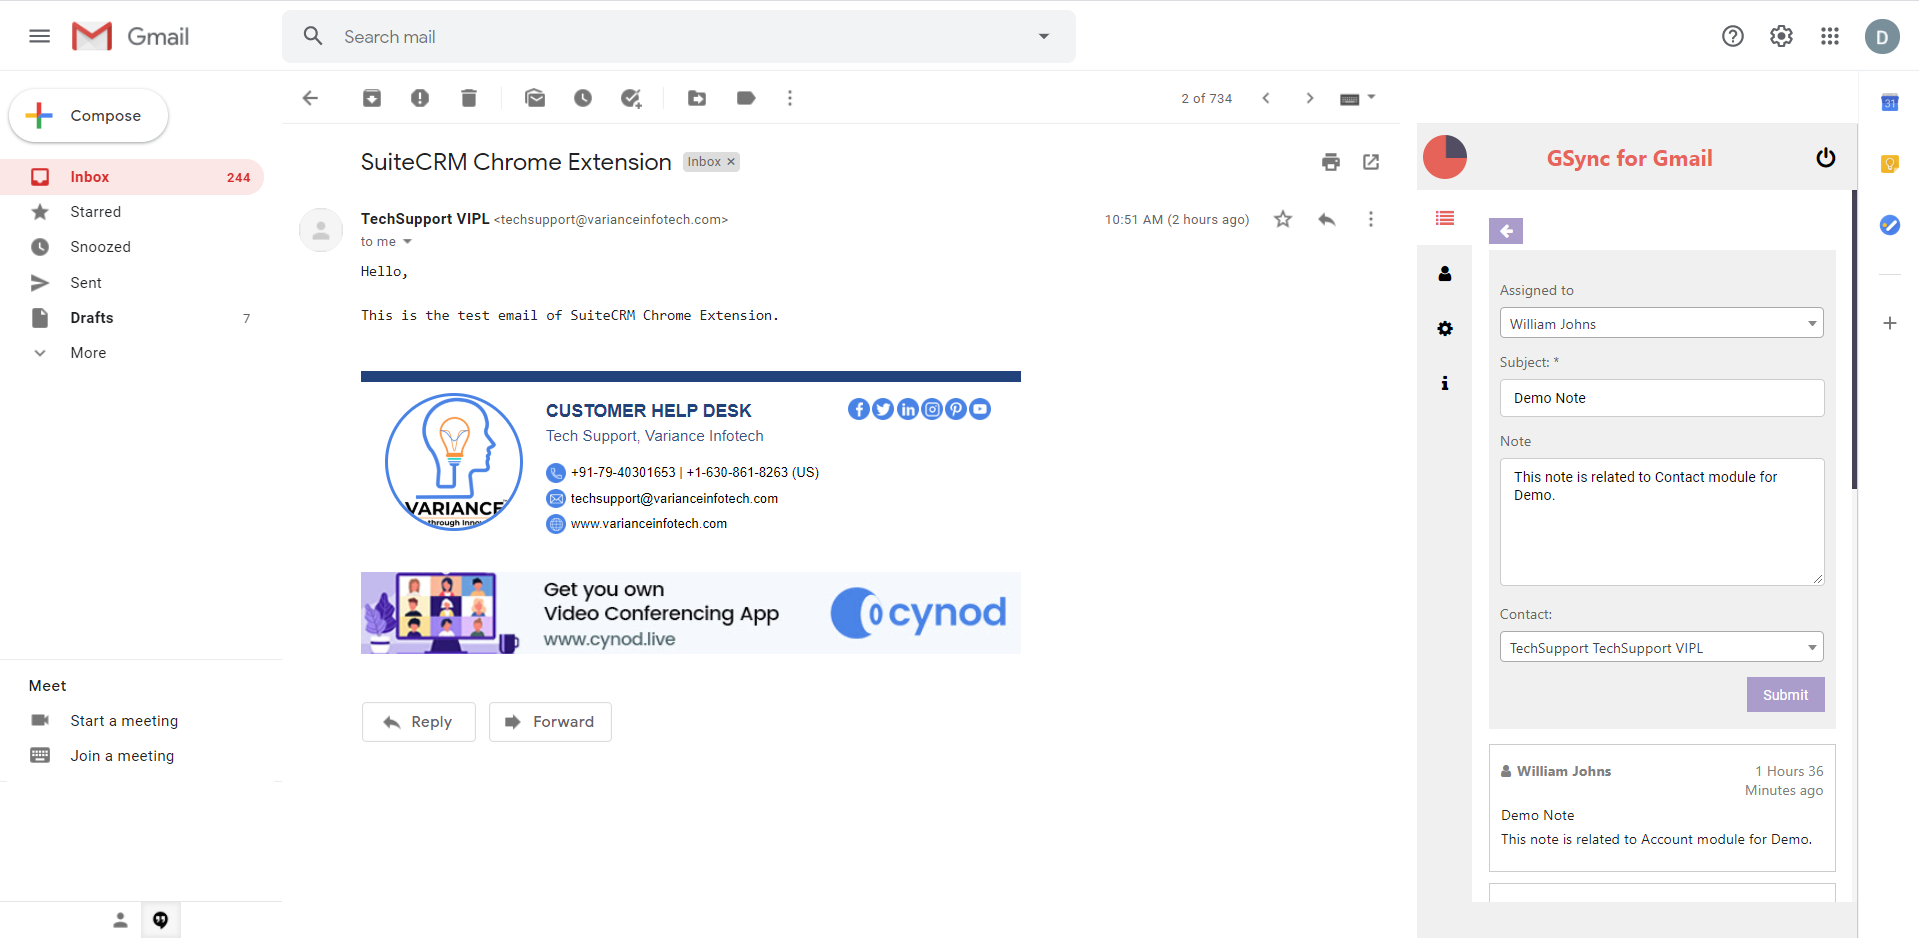
If User clicks on the “Full Form” Button then it’ll open the “Full Form” of Notes and fills up all the necessary details & click on the Submit Button as per below screenshots.
Step 20:
If User wants to Edit the Record then Clicking on the “Pencil” Icon & it’ll open the Edit form.


Step 21:
If User wants to redirect to Contact Record from Gmail and wants to see more detail then click on the icon which is highlighted in the screenshot below. It’ll redirect to the SuiteCRM.

Step 22:
Once User redirects to the Contact Record, it looks like the below screenshot.

Step 23:
If User wants to see More Details of the Account Record then click on the “More...” as per below screenshot.

Step 24:
Also users can click on the “+” icon from Gmail for redirecting to the SuiteCRM to see the More details about the Account.


Step 25:
If users needs any help regarding add-on then click on the “info(i)” icon as shown in the below screenshot

Step 26:
If users want to see the profile then click on the “Settings” icon as shown in the below screenshot.


