

Custom Login Page is a SuiteCRM add-on that enables you to transform the default CRM login page into a modern, more meaningful page that complements your company’s branding.
User Guide SuiteCRM 8.x
Steps For Using Custom Login Page Features :
Step 1:
To open the Administration Page, Click on the Admin tab as shown in below screenshot.
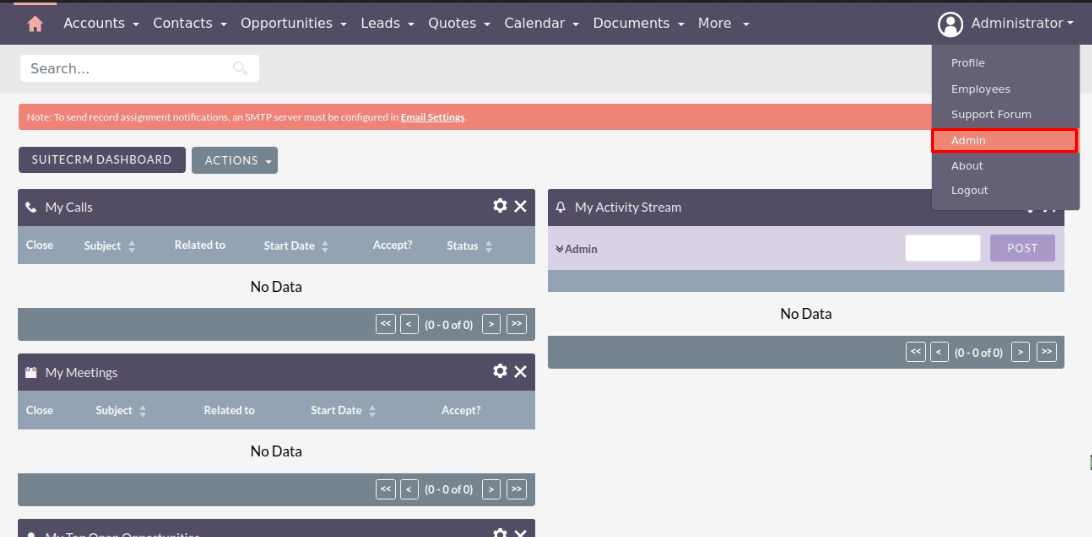
Step 2:
Open Administration page, Click on Custom Login Page from the “Other” section.
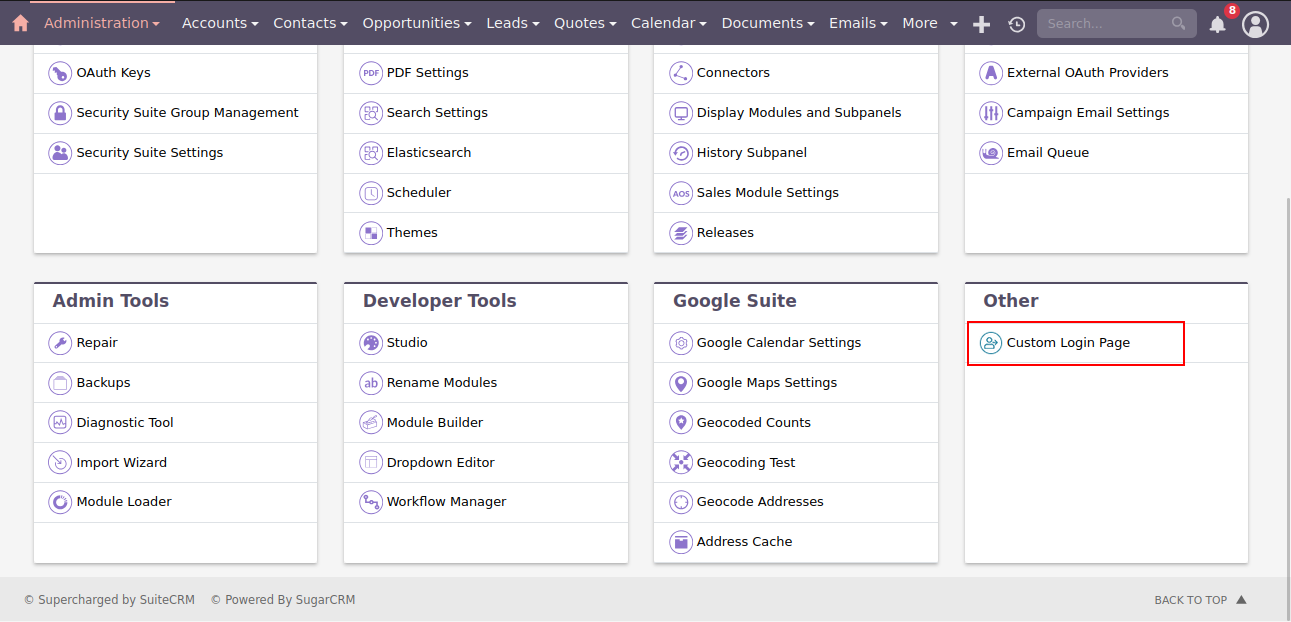
Step 3:
On click of the Custom Login Page Link, the Listview page will be open. (Note: If there is no record then it will show a link “You Currently have no records saved. Create one now”) Click on “CREATE” Link to add a new record.
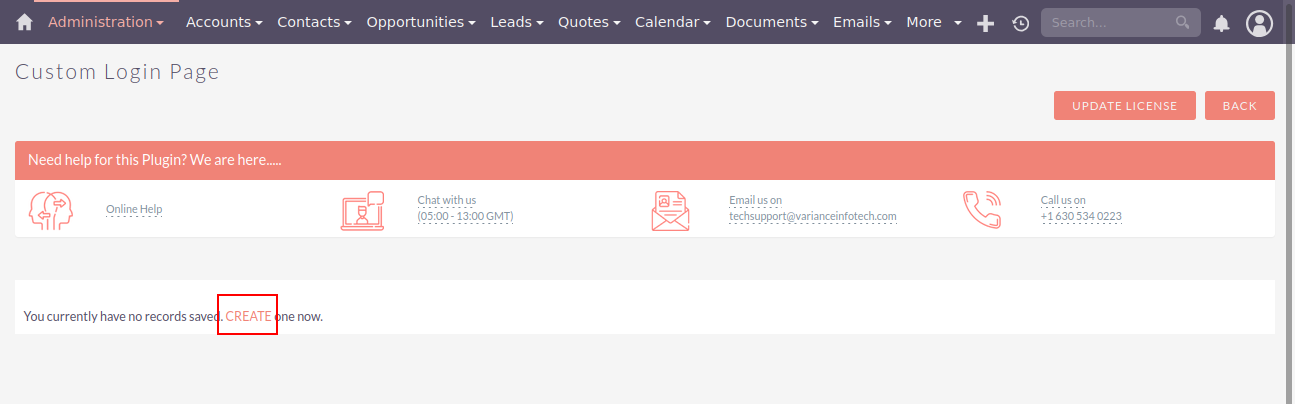
Step 4:
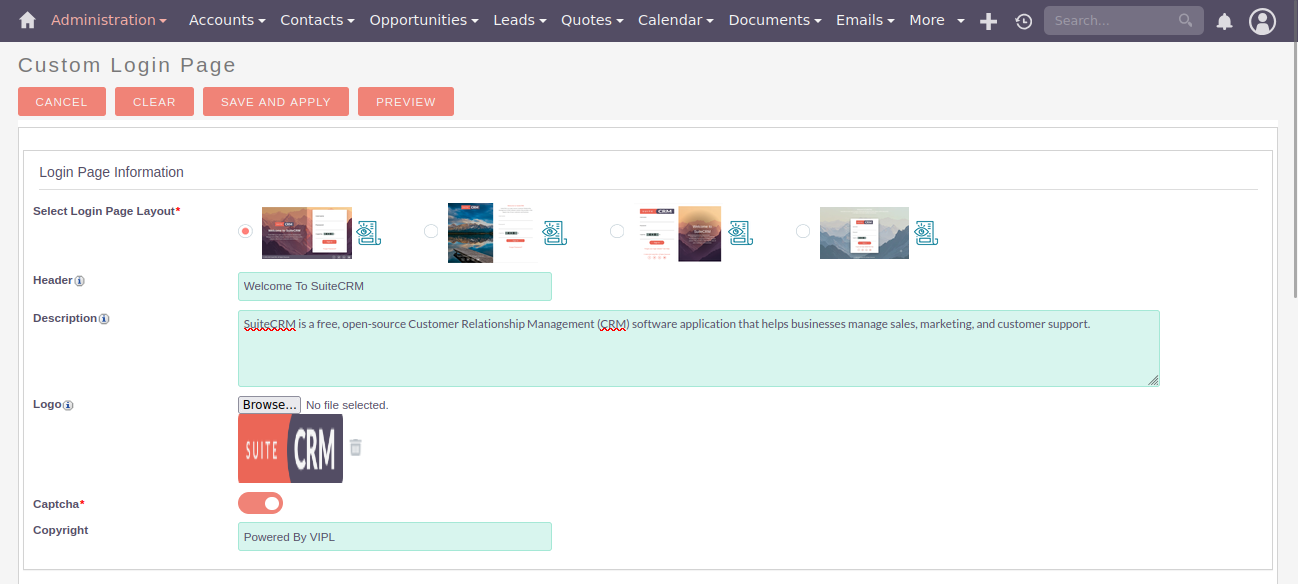
Once Click on the “CREATE” Link, Add Custom Login Page will be open.
Login Page Information
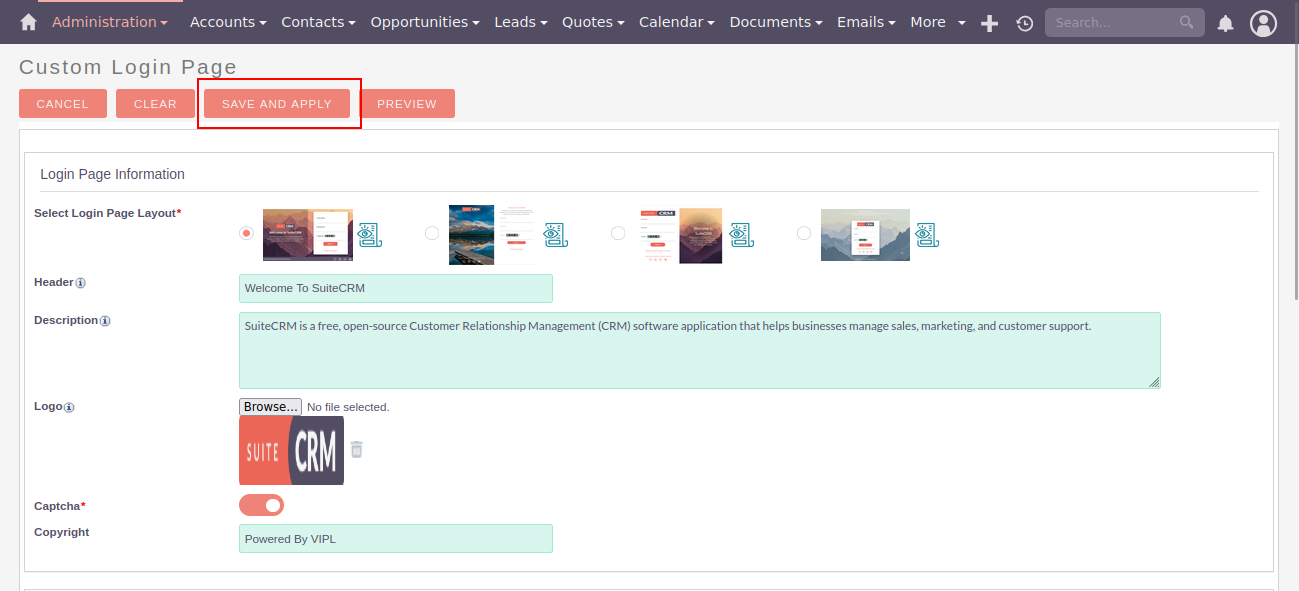
Select Login Page Layout : Select Layout from the list of predefined Layout for Custom Login Page. Header : Enter the Header Text which you want to display in the selected Custom Login Page Layout. Description : Enter the Description Text which you want to display below the Header in the selected Custom Login Page Layout. Logo : Upload the Logo which you want to display in the selected Custom Login Page. Captcha : Enable/Disable the Captcha for Custom Login Page. If you Enable Captach then it’ll display the Captcha in the selected Custom Login Page and it’s predefined mathematical Captcha. Copyright : Enter the Copyright Text which you want to display in the selected Custom Login Page Layout.
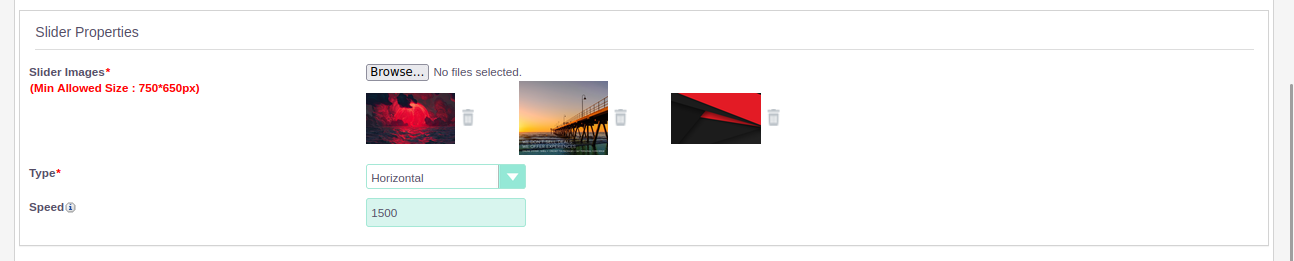
Slider Properties
Slider Images : Upload up to 5 Slider Images which you want to display in the Selected Custom Login Page Layout. Type : Select the Slider Movement like Horizontal, Vertical, Fade. Speed : Enter the Slider Speed in MilliSeconds.
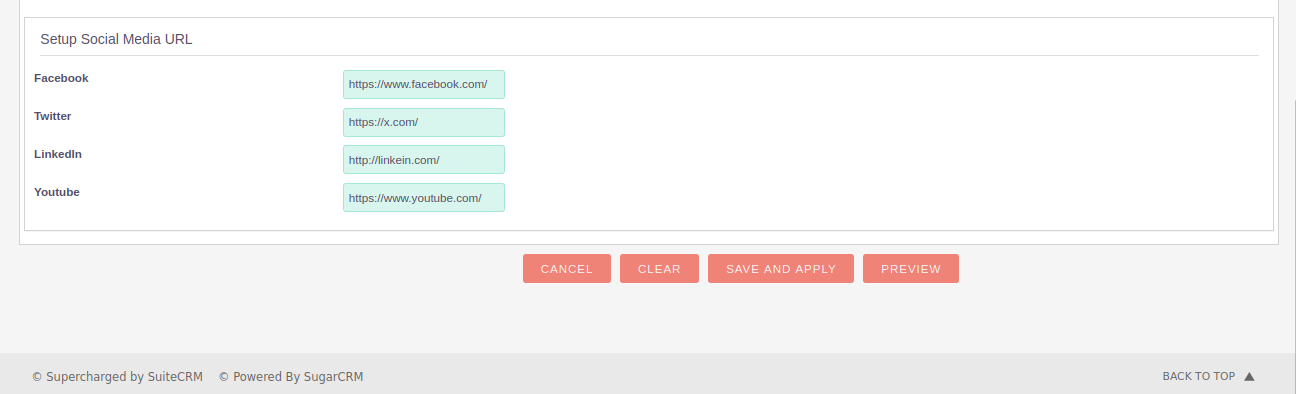
Setup Social Media Url
Facebook : Enter the Facebook URL which you want to add for your selected Custom Login Page Layout. Twitter : Enter the Twitter URL which you want to add for your selected Custom Login Page Layout. LinkedIn : Enter the LinkedIn URL which you want to add for your selected Custom Login Page Layout. Youtube : Enter the Youtube URL which you want to add for your selected Custom Login Page Layout.
Step 5:
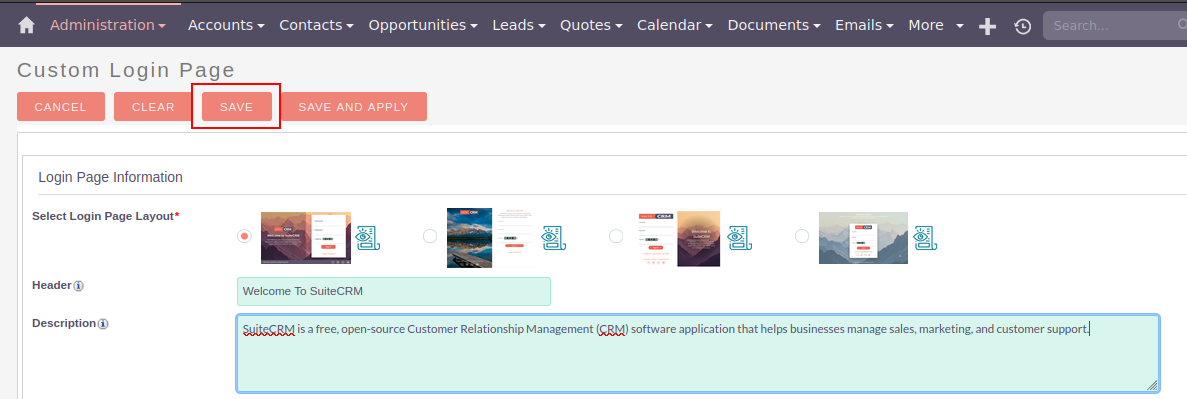
After filling up all the Details, you can click on the SAVE or SAVE AND APPLY Button. SAVE Button : It only saves the Configuration of the Custom Login Page. SAVE AND APPLY Button : It saves the Configuration and applies as well.
Clicking on the “SAVE” Button, Listview will be displayed as shown in the below screenshot.
Step 6:
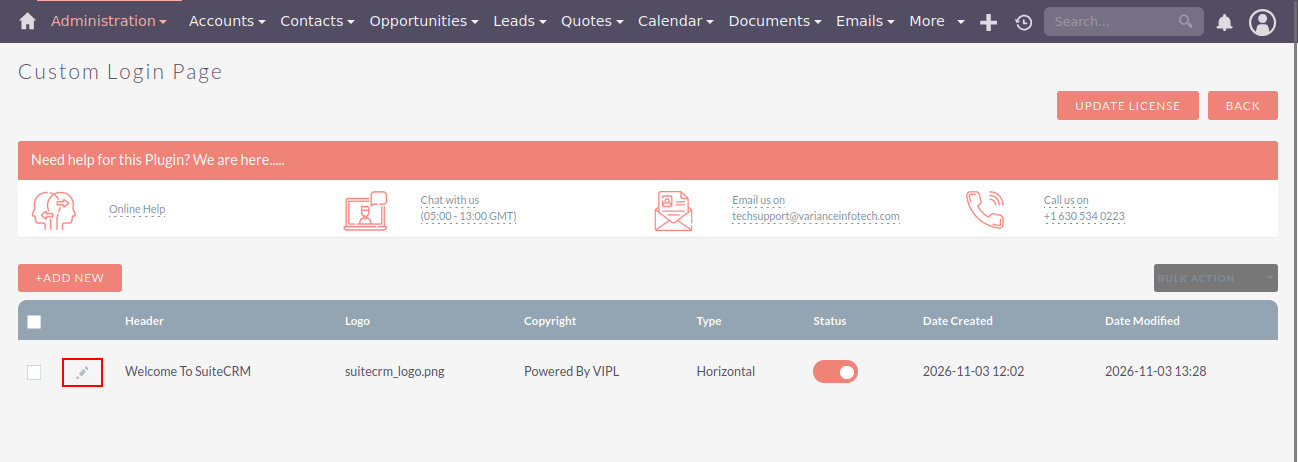
To Update record, click on the pencil icon as shown in the below screenshot.
Step 7:
To Apply Custom Login Page on SuiteCRM Login Page, click on the “SAVE AND APPLY” Button.
Step 8:
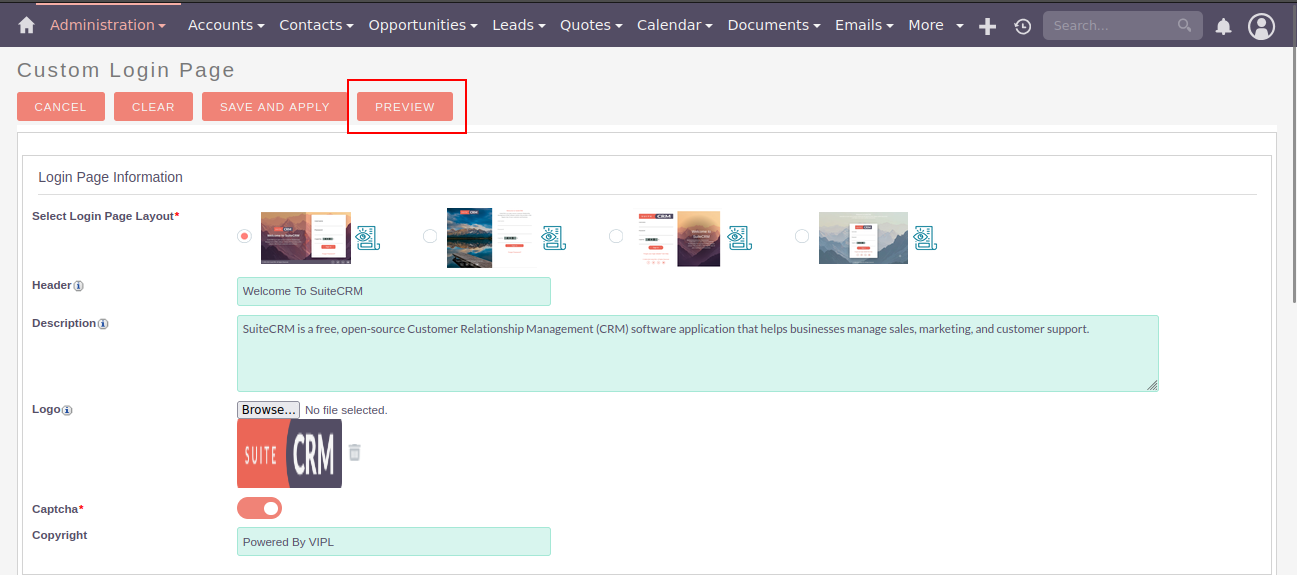
After clicking on “SAVE AND APPLY” Button, PREVIEW Button will be displayed as shown in the below screenshot.
Step 9:
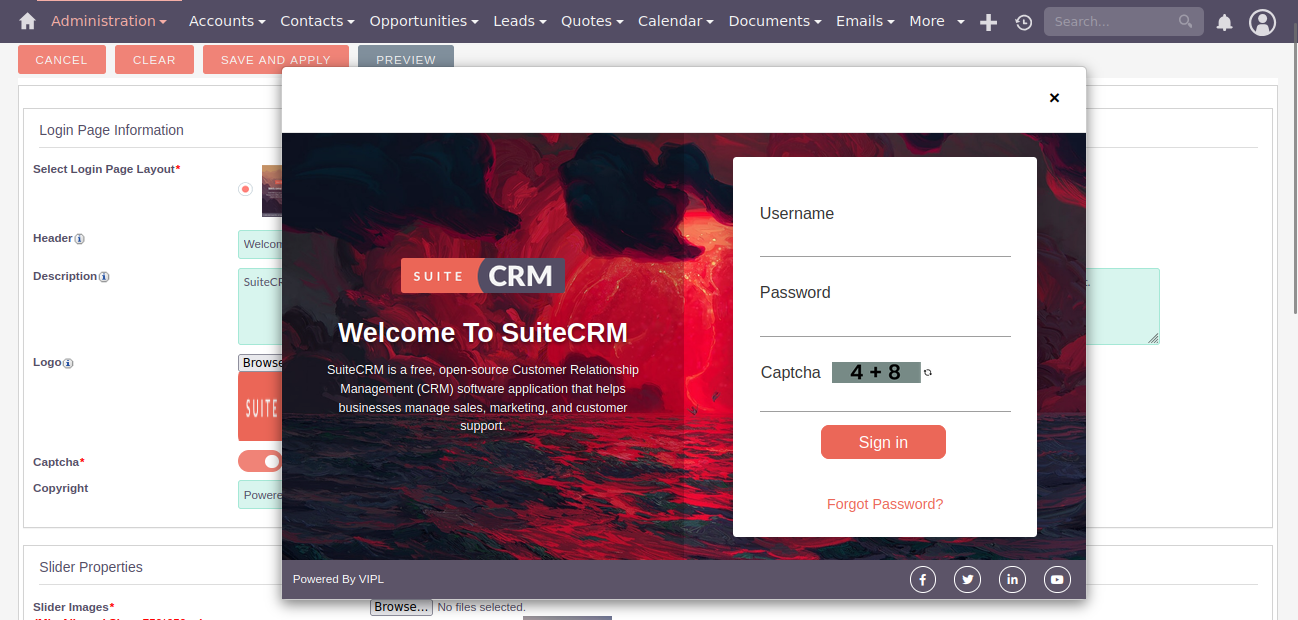
Once clicked on the “PREVIEW” Button, It will show the Preview of Selected Custom Login Page Layout like below screenshot.
Step 10:
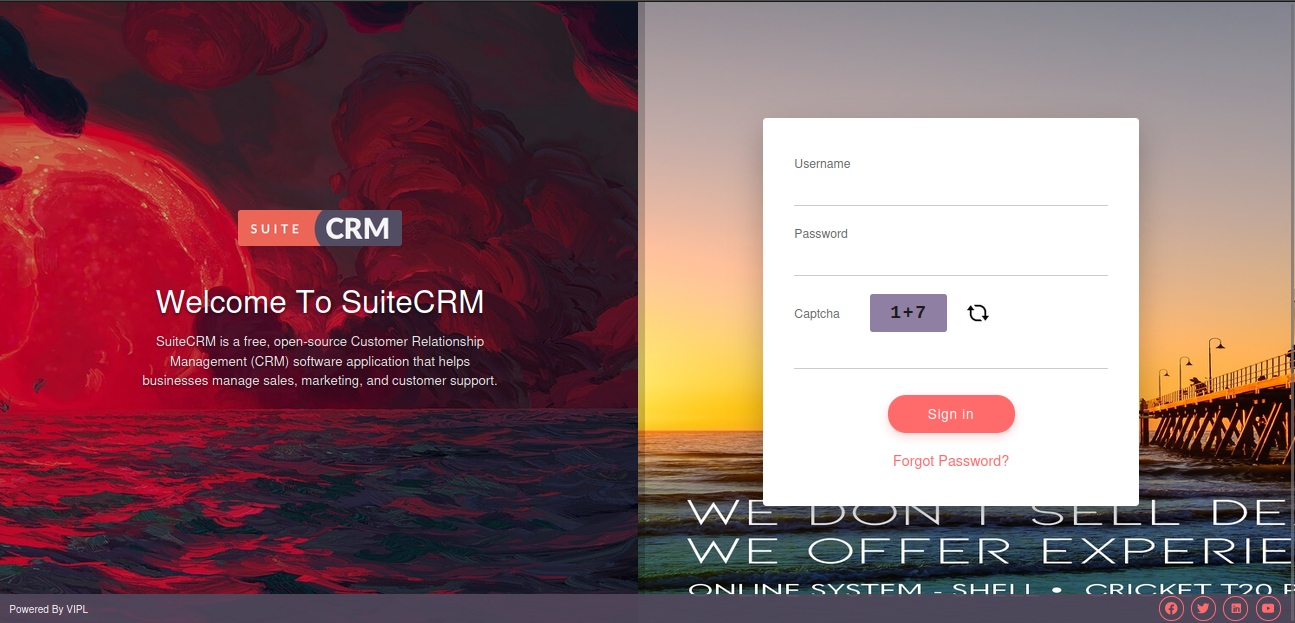
After applying configuration, It will show the login page like in the below screenshot.
 Saving Comment...