Alfresco Plugin Configuration
CRM Plugin Configuration
- Step 1: License Management
- Step 2: Alfresco Connection Configuration
- Step 3: Make sure if CRM job exists in crontab
- Step 4: Setting up Users & Access
- Step 5: Setting up Alfresco paths
Alfresco Plugin Configuration
NO configuration is needed on Alfresco Side
CRM Plugin Configuration
Step 1: License Management
Alfresco integration module has it's own license system. Upon proper validation You will gain access to the Alfresco settings available in Administration panel.
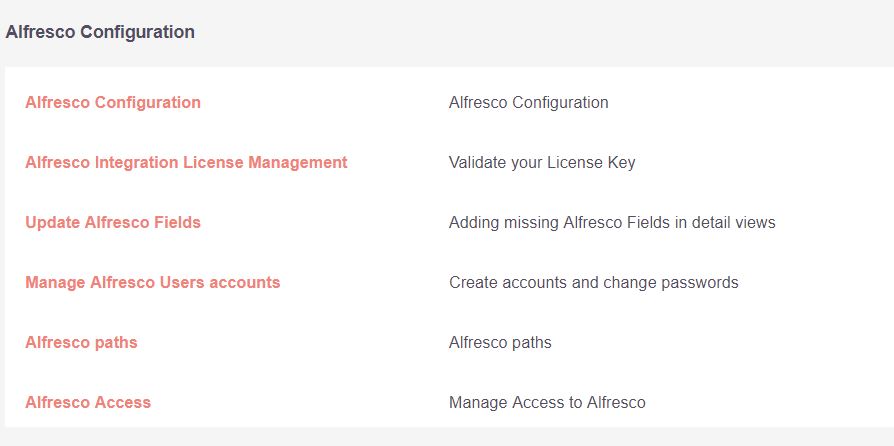
- In Administration go to Alfresco Integration License Management
- Enter Your key in License Key field
- Press Validate to see if your key is correct. You should see "Success" message
- Click Save
Keep in mind that without proper license key (or with expired one):
- You won't be able to setup anything in newly added Alfresco panels in administration module.
- You won't have access to the alfresco widget in subpanels for which You've defined paths.
- Changes You’ve made to the record names won't map in Alfresco, which further on means that You will need to fix this later on Your own in Alfresco, since CRM cron will create new folders upon detecting that there are some new records which haven't been mapped yet in Alfresco
|
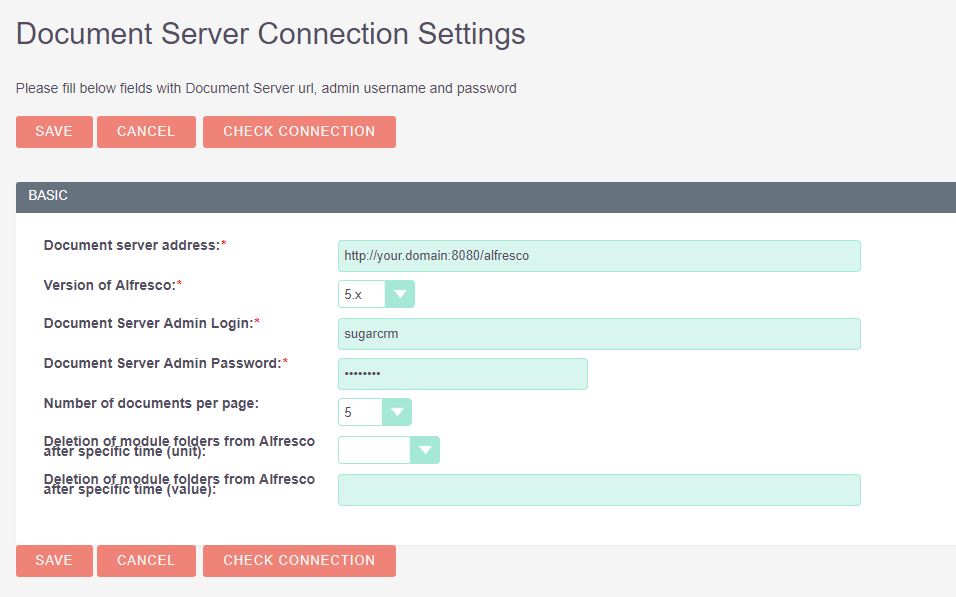
Step 2: Alfresco Connection Configuration
- Go to Administration panel
- Scroll down to the section Alfresco Configuration and click on Alfresco Configuration.
- Insert Alfresco login information.
Keep in mind:
- Document server address: Url must be inserted in form /alfresco – without protocol
- Document Server Admin Password: in case of importing data from database enter password manually in this field, as some characters might be lost during export/import sql.
- Providing incorrect url such like: http://1.1.1.1:8080/alfresco will trigger popup with information:Cannot connect to the Document Server, this error will be thrown even if Your address is handled correctly in webbrowser. You need to insert url in form: 1.1.1.1:8080/alfresco.
|
|
Step 3: Make sure if CRM job exists in crontab
Go to Administration Panel and enter Schedulers section. On the end of the list You’ll see To Setup Crontab section.
Copy the line beginning with *. Now depending what kind of Access You’ve got to Your host You’ll need to add the line You’ve copied into background job manager.
For example On Apache server with SSH access, where Apache system user is www:data:
You can simply enter command:
crontab -e -u www-data
And add :
* * * * * cd /var/www/crm; php -f cron.php > /dev/null 2>&1
With other servers there may be some kind of GUI in hosting panel. For instance:
 Keep in mind:
- Some hosting panels might not have crontab settings in directadmin, if such situation will occur You’ll either need co contact Your administrator or hosting support.
- Crontab panel presented above might vary from the one in Your hosting panel.
- Servers running on Windows have different mechanism for background task.
|
Step 4: Setting up Users & Access
For each CRM user you have to set up related Alfresco user. There are two ways of doing that.
If CRM user has already got an Alfresco account
- Go to account profile Settings and click Edit
- Go to External Accounts tab and click Create
- From Application list select Alfresco and enter Your login and password for Alfresco
- Click Connect and on next page click Save
|
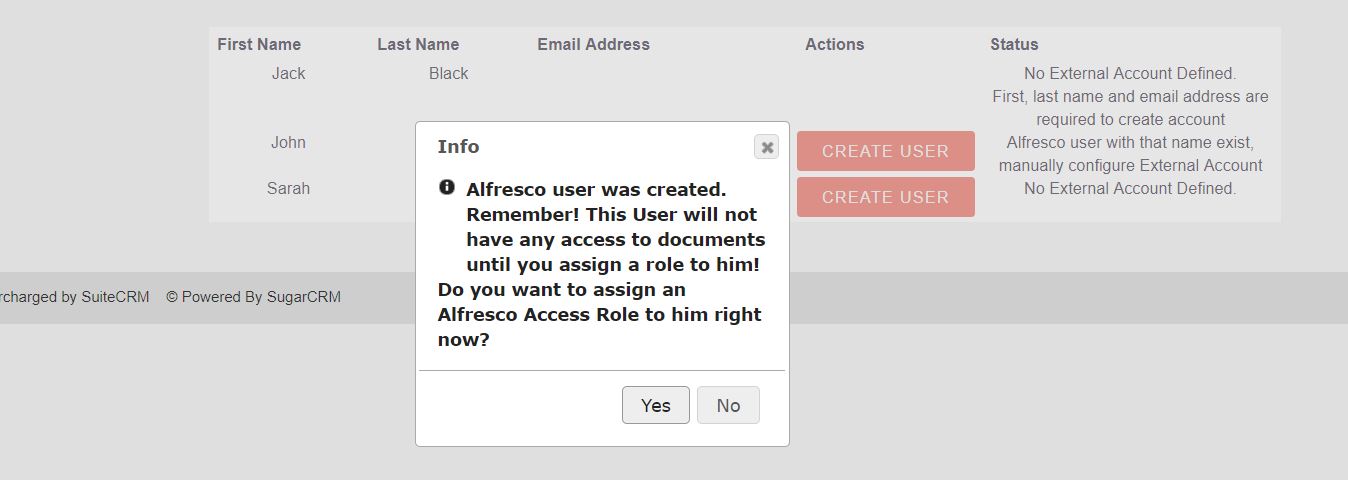
If you need to create an Alfresco account for CRM user
Go to Alfresco section in administration panel and pick Manage Alfresco Users accounts and press Create user in action column.
In the new message popup You can decide whether You want to assign certain role to new user or not.
 Keep in mind:
- If You’ll assign Your Alfresco admin credential to any other user, its full access will overwrite any role setting which this user should inherit from access groups he belongs to, which furthermore means that no matter what restriction You’ll put upon that user, his account will first be using full administration access.
- As mentioned above, for new users You need to provide information that are entered upon first login, otherwise You won’t be able to create new account, and Alfresco Accounts panel in CRM wont have action button:
|

|
Roles Configuration
Once You've mapped CRM account to Alfresco via Manage Alfresco Users accounts panel, You can set user permissions to Alfresco Sites by assigning role to account. Alfresco Roles GUI works in simmilar way to CRM Role Management module. Go to Administration panel/Alfresco Access and create role. In Detail View you can configure Alfreasco Role for each already defined Path and assign Users in subpanel.
Keep in mind:
- Remember to click Save for corresponding section in which You make changes
- One user can be assigned to more than one Roles group in Alfresco Access panel. User will then acquire the privileges with less restrictions which mean that the group with Collaborator Role will overwrite group which has Consumer role setup.
- Each role provides set of predefined rules, about which You can read on: https://docs.alfresco.com/5.2/references/permissions_share.html
|

|
From now on, once You assign role to the new user, you can start using alfresco integration functionality.
Step 5: Setting up Alfresco paths
With this step You will set folders mapping so that CRM can see their content.
|
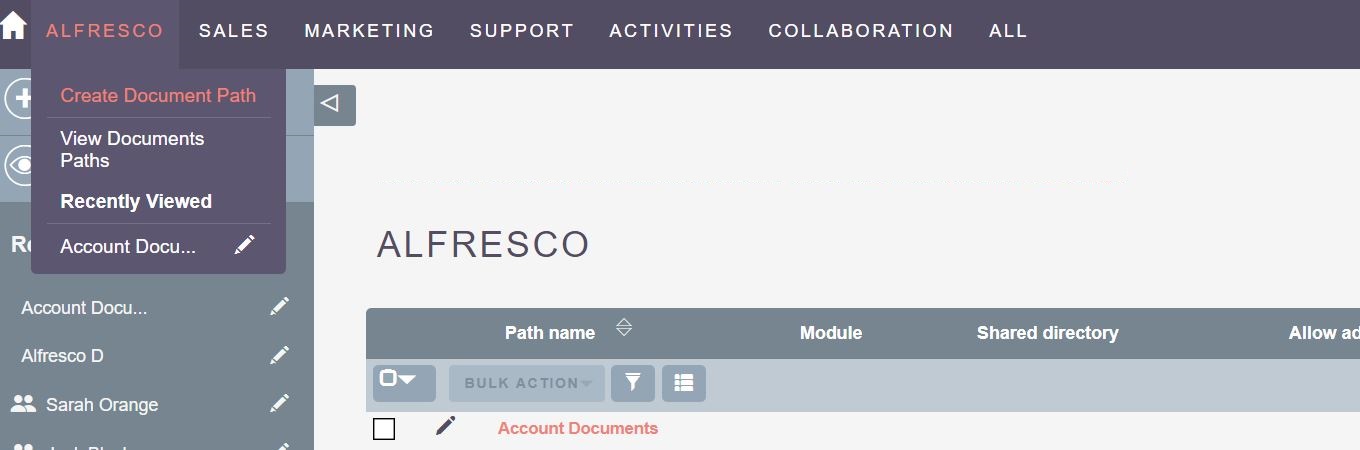
- Go to Administration Panel/ Alfresco section, and click on Update Alfresco Fields
- Next in order to add a new path click on small arrow next to module name and pick up Create Document Path
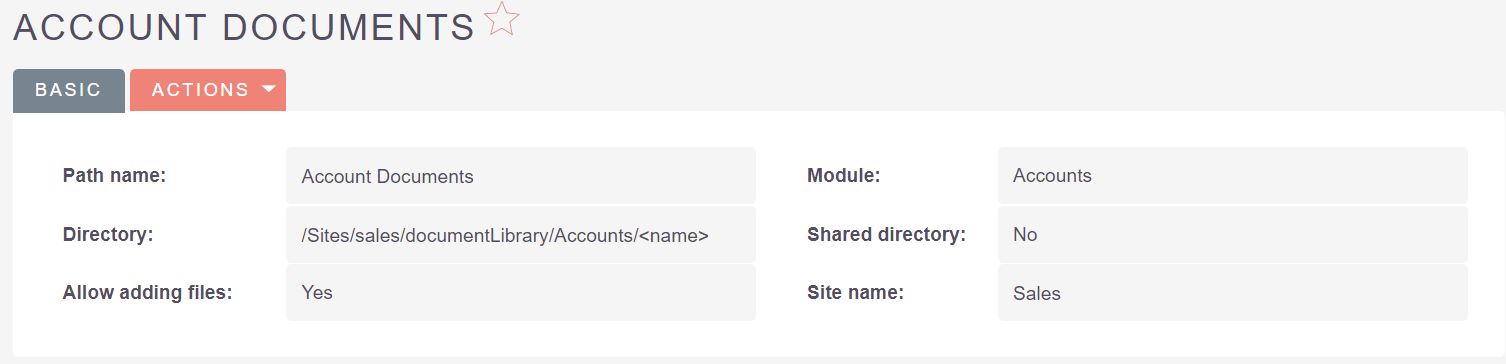
- Fill the form:
- Path name: Used to display on paths in dropdown in Alfresco Widget under record if you have more than one path defined per module
- Module: Module for which we want to enable integration. All standard modules are available as well as custom modules
- Directory: Path schema to directory in Alfresco that will be created for each record from related module. It may contain variables in form of field names from related module surrounded with < >
- Allow adding files: Decide whether files can be added via subpanel for given path or not (It does not affect ability to do that via Alfresco Share)
- Shared directory: Decide if records with the same values for variables in path should share the same folder. If not for duplicated paths system will automatically add postfix in node folder name :"_1", "_2" etc
- Site name: Site name that You have created in Alfresco
|
|
Keep in mind that:
- Form should be filled up with data similar to this below, and that especially means that Directory should have form such as
/Sites/YourSiteName/documentLibrary/YourFolderName/< name >,
- < name > is the variable available in the vardefs.php file of module for which path is created. You can use other variables but they need to exist in Vardefs (each one must be placed in separated <> tags )
- YourSiteName is the site name created in Alfresco,
- YourFolderName in this case is a static grouping folder,
- Site that you are mapping must exits, otherwise You might’ve problems with setting up permissions for given folder.
- You might notice that only records created* after adding specified paths will have access to Alfresco folders. You can fix that by accessing Administration Panel and pressing Update Alfresco Fields.
- If You’ve enabled folder sharing, and You’ve already have records that share some folders then upon changing settings in Alfresco Paths these records will still share the same folder. You’ll need for example to change the names of records and turn them back as they were – this way new separated/private folders will be created in Alfresco. In this situation even if You remove one record with the same name, shared folder on Alfresco will remain untouched.
|