BV Report Tweaks Integration offers enhanced data customization capabilities within SuiteCRM, empowering users to generate insightful reports.
Generate powerful report insights from your SuiteCRM data
Brainvire Infotech’s Report Tweaks Integration offers enhanced features, giving users greater control over data analysis and reporting within SuiteCRM. They can define custom date ranges, exclude specific data types, and hide fields as needed. Scheduled reporting via email is now streamlined, providing users with efficient and tailored reporting options.
Product Features
1. Custom Date Ranges: Users can now specify their own date ranges for data analysis, allowing for more precise reporting based on specific timeframes.
2. Excluding Data Types: The "Does Not Contain" operator enables users to exclude particular data types from reports, refining the data included in generated reports.
3. Default Field Visibility: By default, all module fields are set to "Yes" for display in reports, simplifying initial report setup.
4. Dynamic Field Visibility: Studio now dynamically adjusts module field visibility based on user preferences, ensuring that only relevant fields are displayed in reports.
5. Hiding Module Fields: Users can hide individual module fields by setting them to "No" in Studio, providing flexibility in report customization.
6. Scheduled Reporting: The scheduler feature allows users to schedule and generate reports to their specified email IDs, automating the reporting process.
7. Report Format Options: Text Email and CSV Report Formats: Reports can be generated in either email format or CSV format, providing flexibility in how users receive and analyze their data.
How it Works
Step: 1. Click on Report Module--Create a Report.
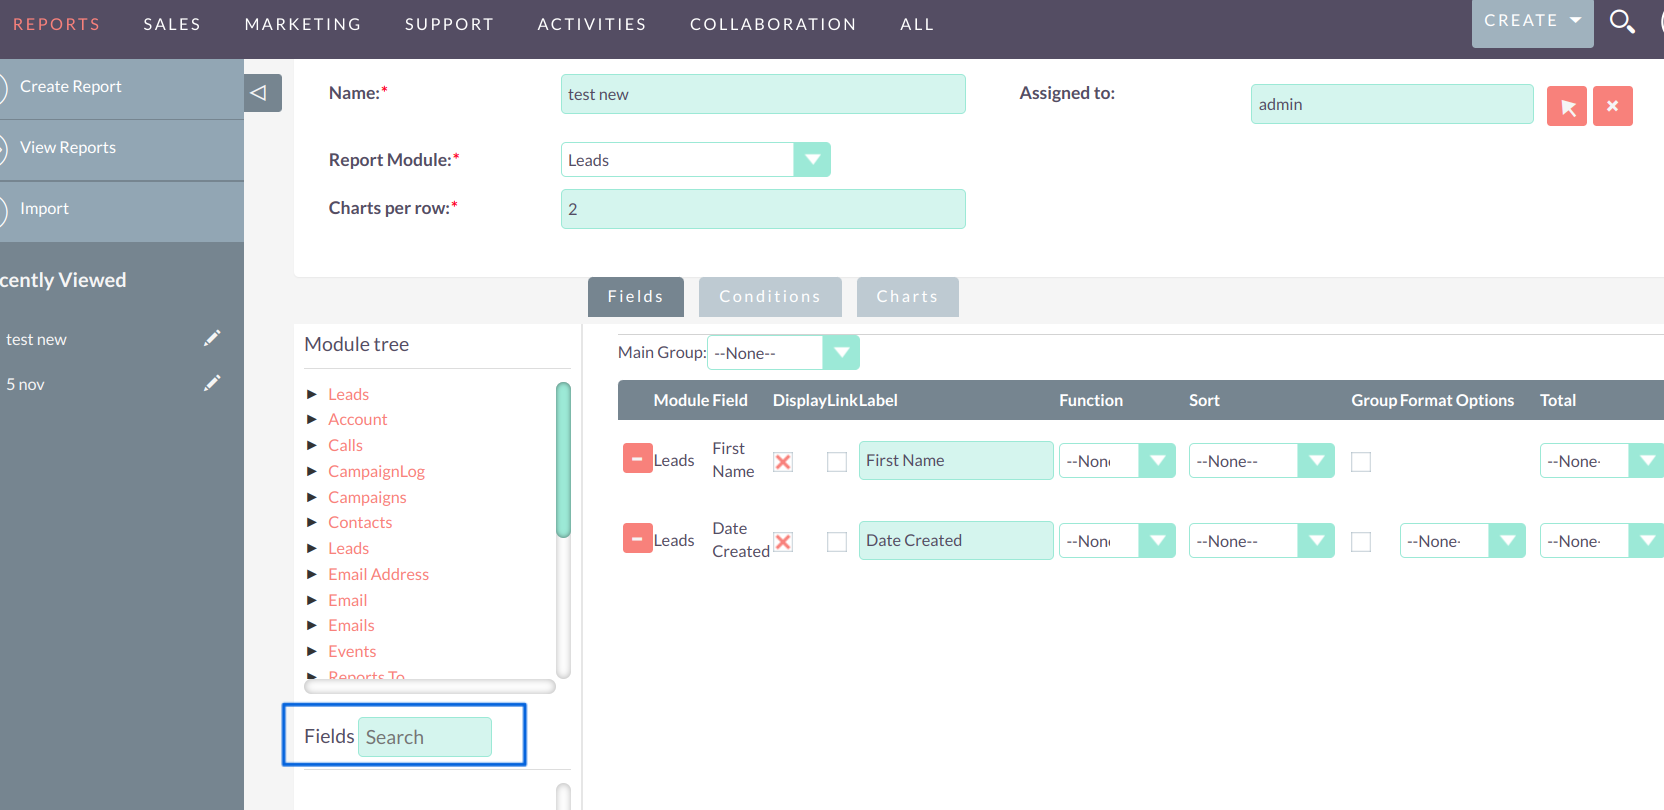
1. Put a name of the Report-- Select the Report Module--Select the Module Tree:
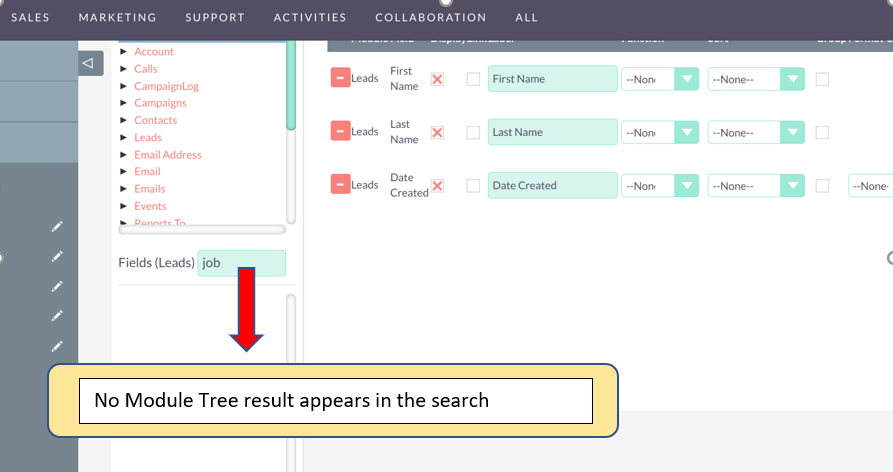
Users can search for a particular field for which data needs to be shown in the box. In the Module Tree selection interface, users can now easily search for particular fields to include. For instance, users can search for fields such as "First Name" and "Date Created" to display relevant data.
Step: 2. Customizing Field Visibility in Reports from Studio.
In Studio, the default for all module fields is set to "Yes," so all fields appear when a module is selected. Users can change this to "No" in Studio if they don't want certain fields to show in the report. This allows customization of the report to display only relevant fields.
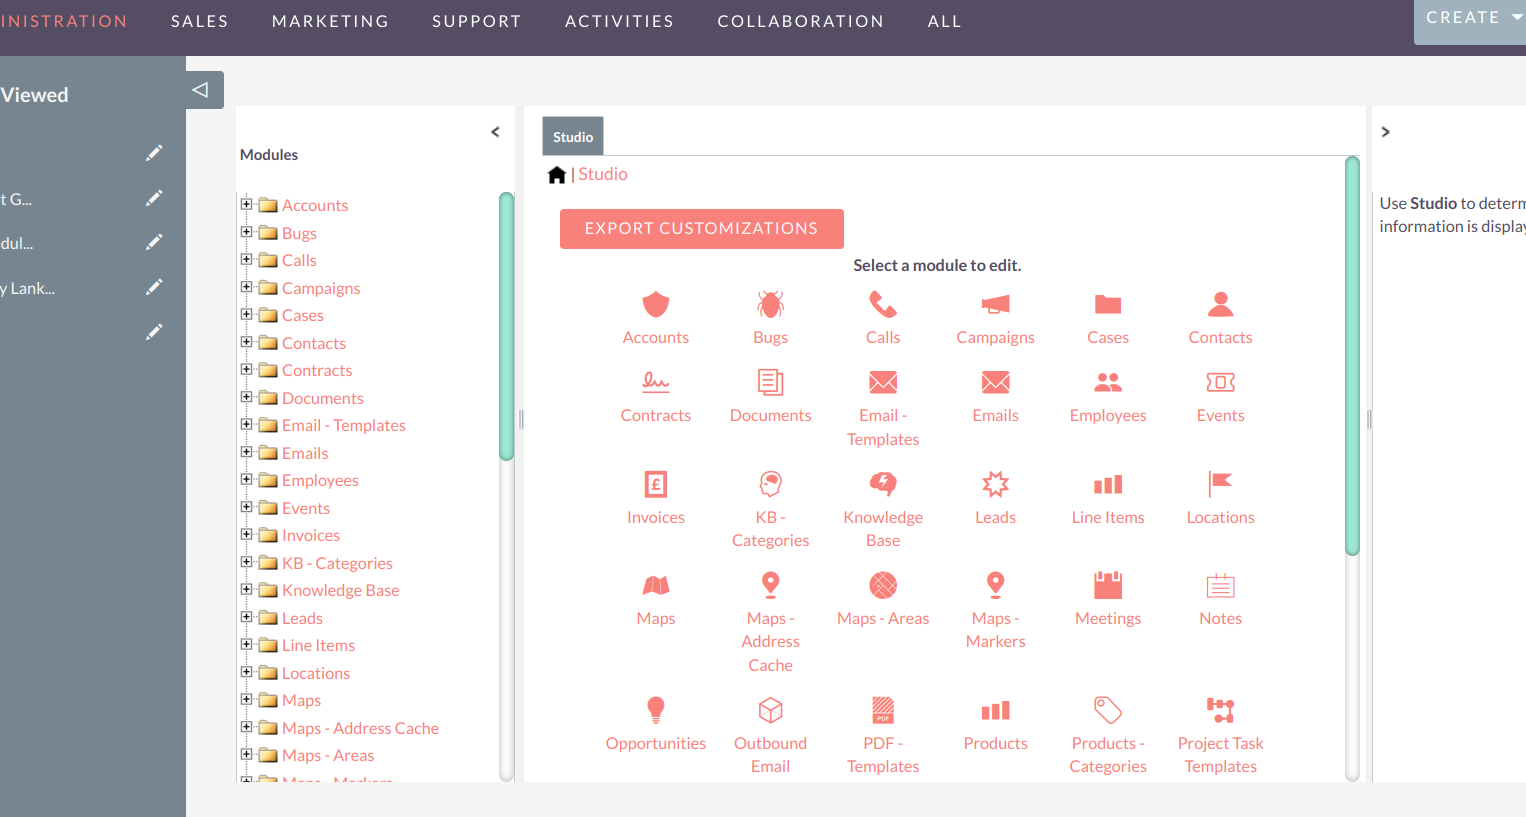
Report Module Field Tree Default Value is Set to "Yes".
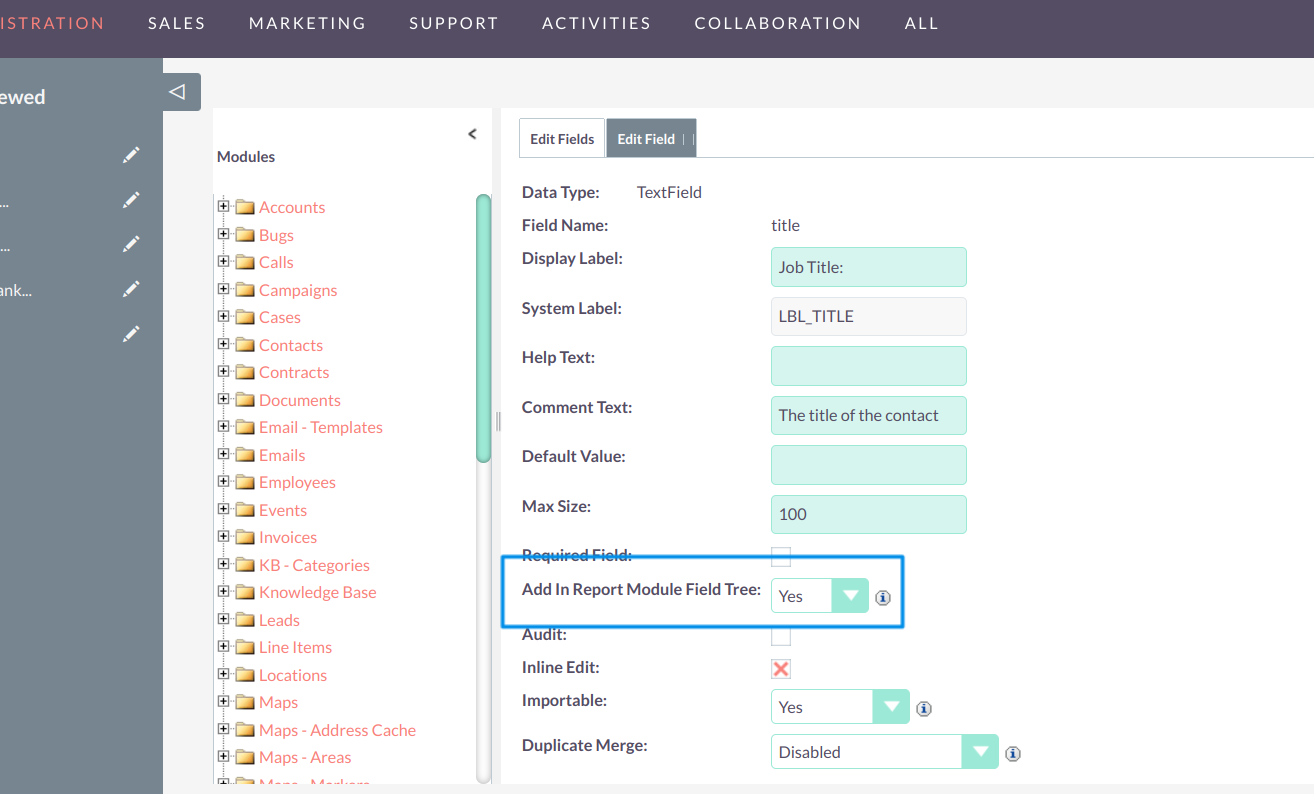
Customize Field Visibility: Select "No" from the Dropdown.
If a user doesn't want a particular field to appear for a selected module, they can set the field to "No" from the dropdown and save. This field will then be excluded from the generated report.
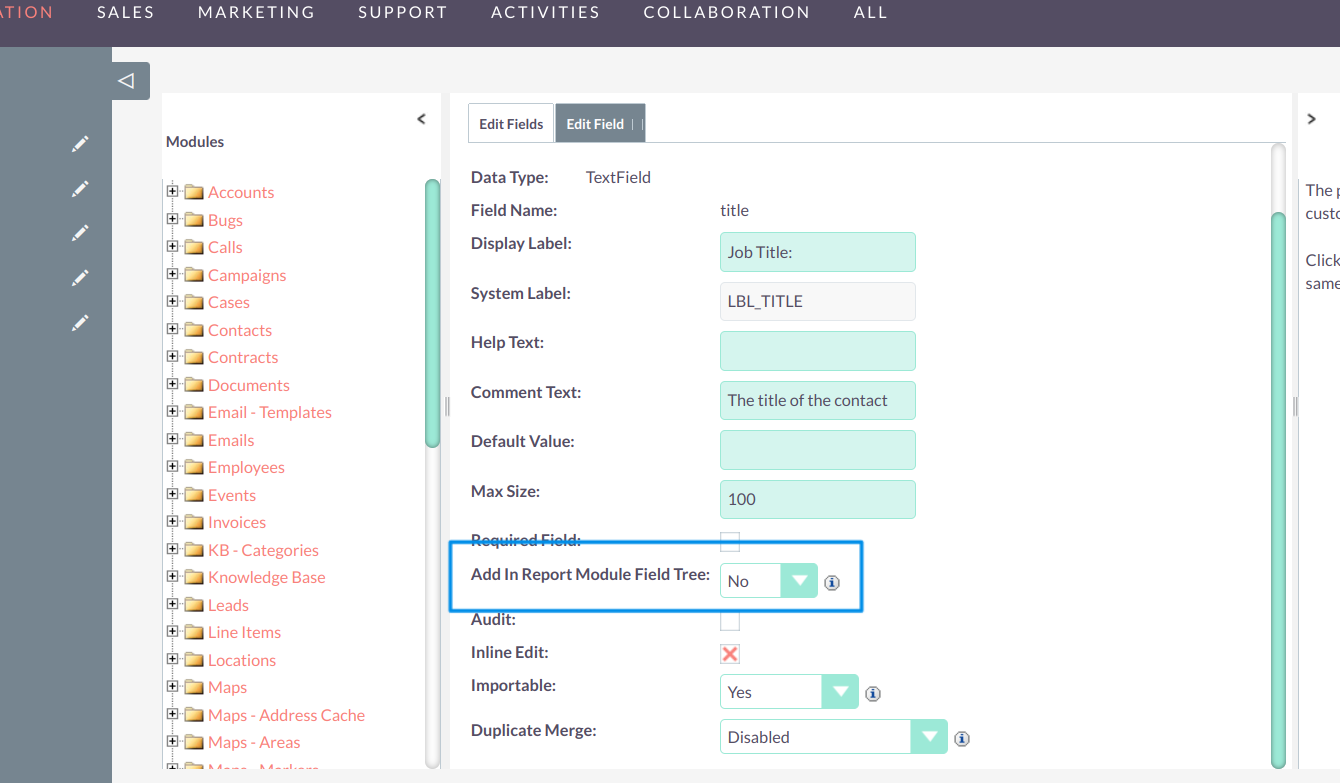
In the snapshot below, you can observe that once "No" is selected from the dropdown for a specific field, the module tree selection disappears.
Step: 3. Condition Update for Field in Box.
Users can now apply conditions based on filtering the fields within the designated box. For instance, users can specify conditions related to the "Date Created" field, allowing for dynamic filtering.
Step: 4. Custom Date Range Selection option.
Users now have the capability to define their own date ranges, empowering them to narrow down data analysis to specific timeframes according to their needs.
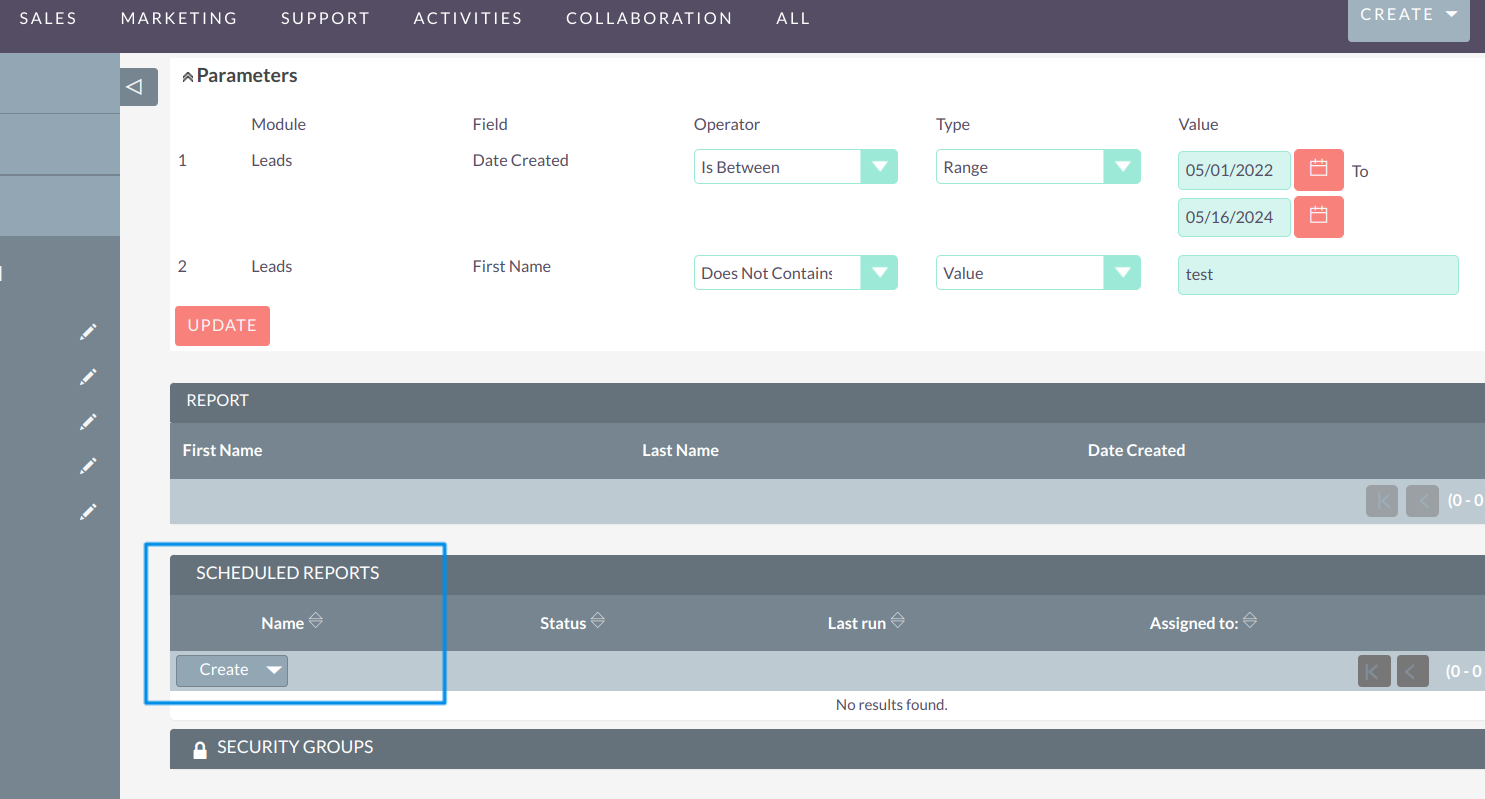
Step: 5. Excluding Data type functionality--Fields which Contain Varchar/ Text Field-- Operator added for "Does Not Contain."
Users can now specify a particular data type for which data should be excluded from the report. An option has been added in Operator for "Does Not Contain" and by inputting specific data in the value section, such as "Test," users can ensure that any data associated with this value will be excluded from the generated report.
Step: 6. Final Report-- After applying the specified customizations and parameters, the generated report is as follows.
This report reflects the refined data selection, including the exclusion of entries based on specified names and the application of custom date ranges.
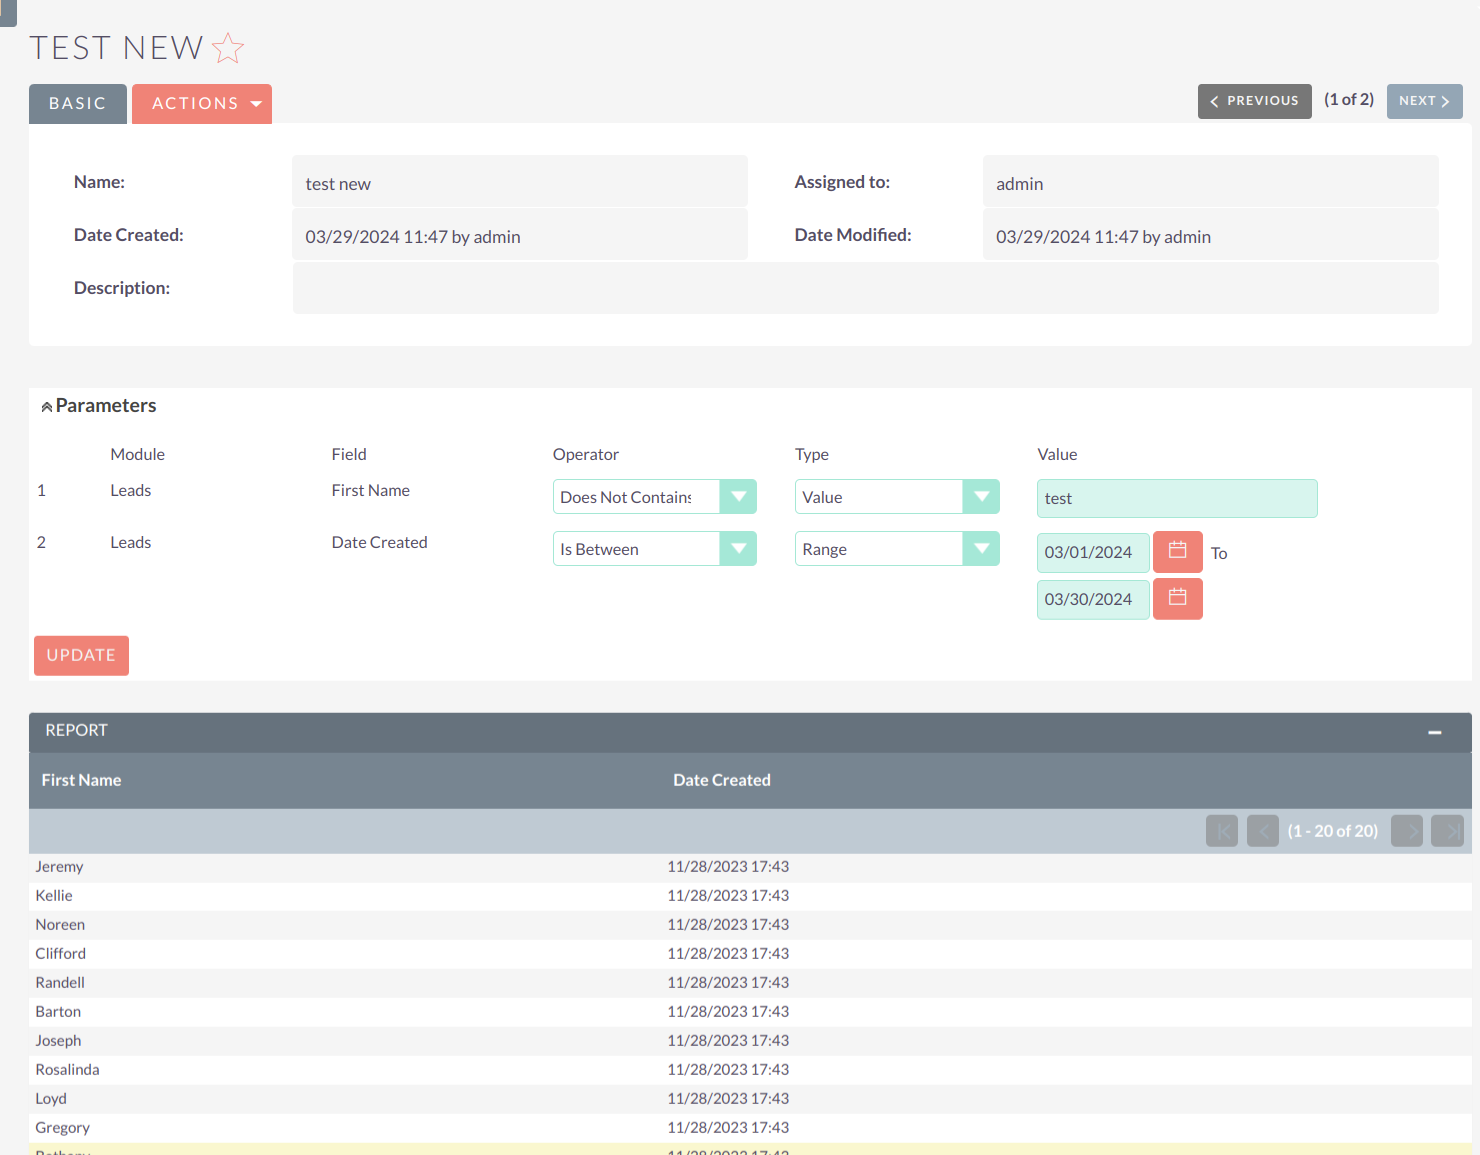
Step: 7. Scheduled Report Generation and Email Distribution: Users can now schedule reports using the scheduler feature and send them to selected recipients via email.
A). Creating Scheduled Reports: Under the generated report, you'll find a subpanel for scheduled reports. Click on it to create a new scheduled report.
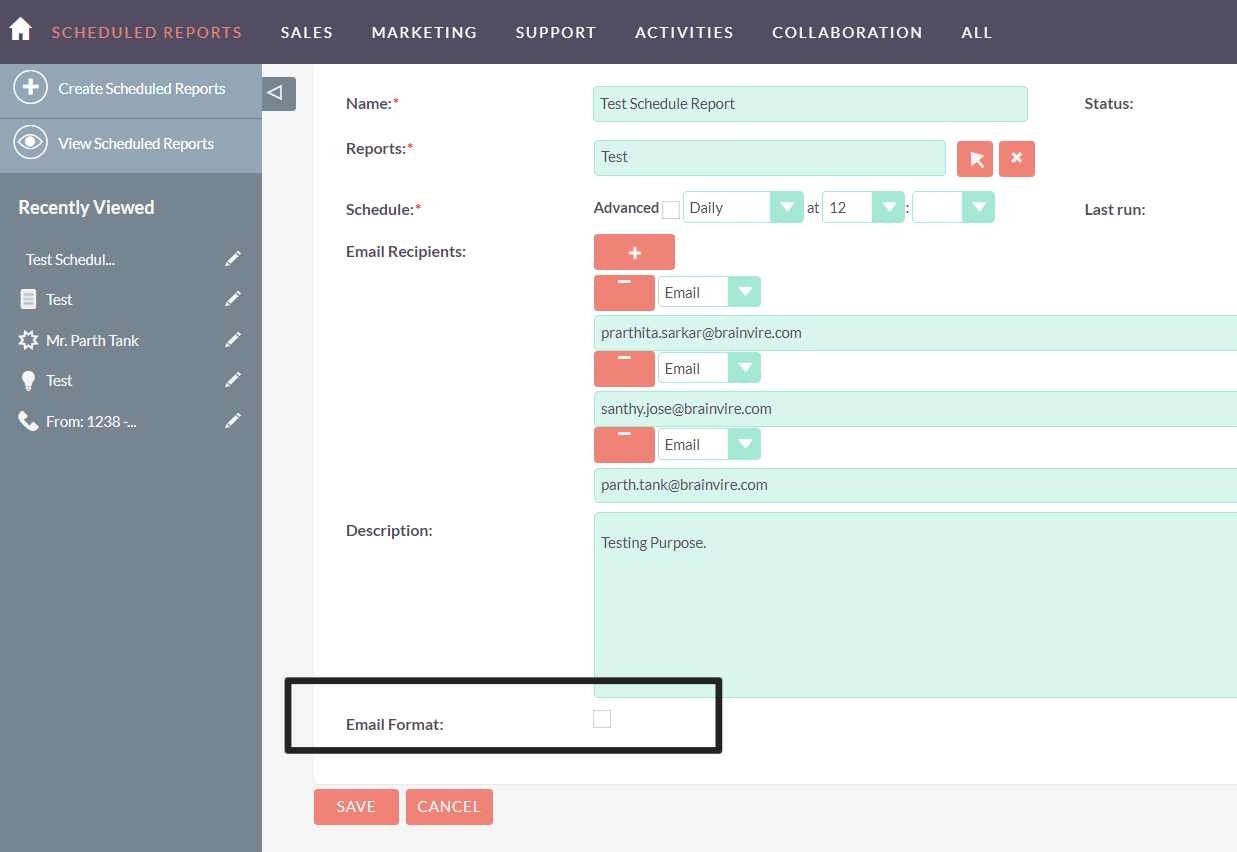
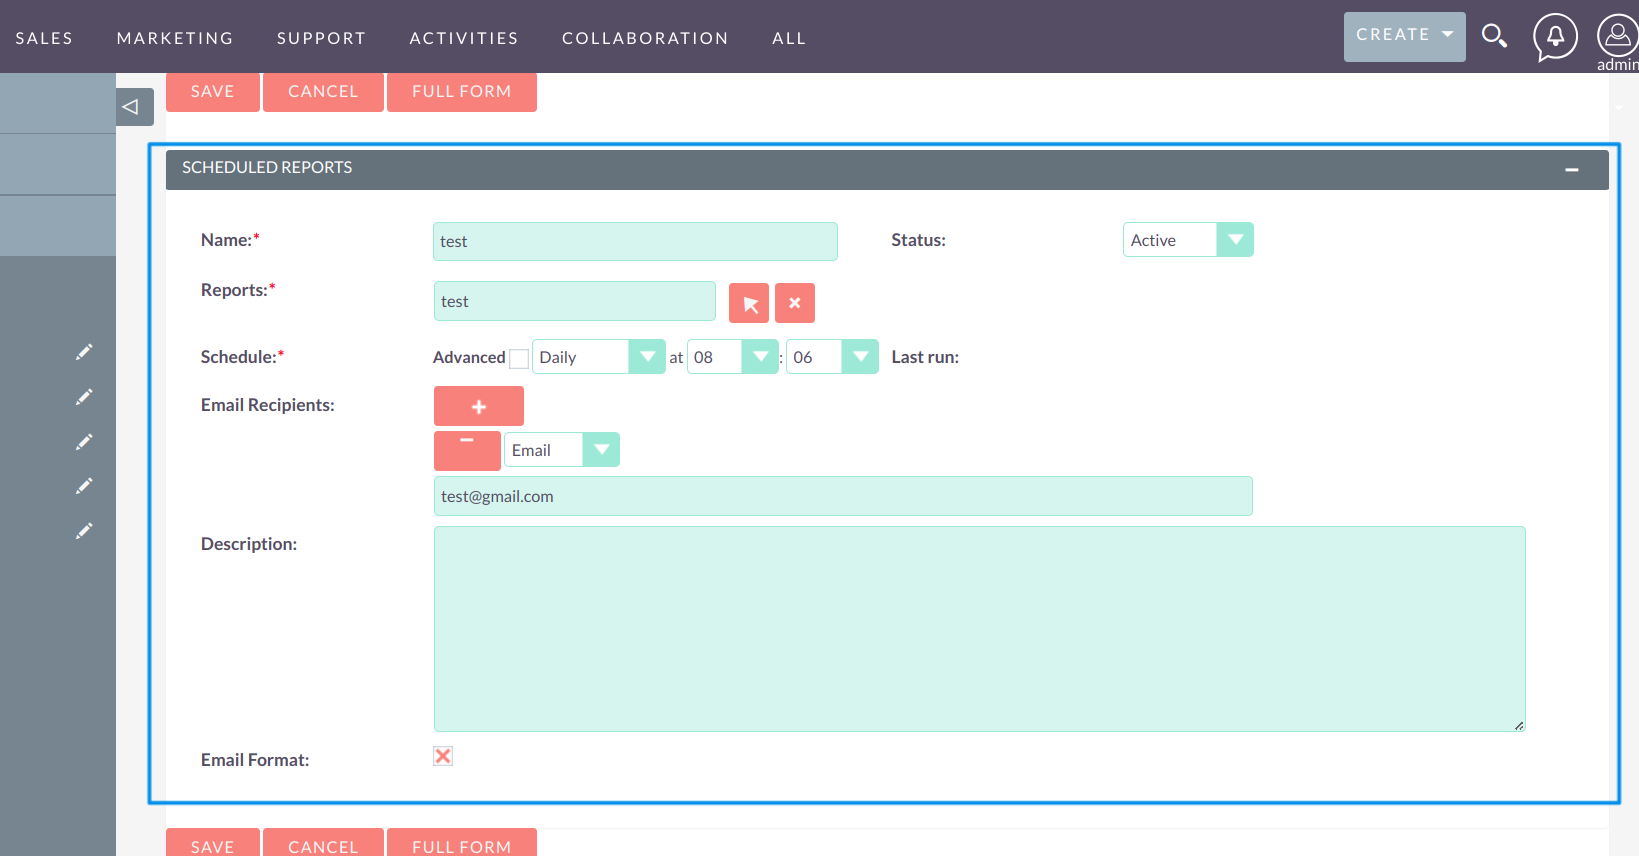
B). Setting Up Scheduled Reports: To create a scheduled report, specify the schedule time, recipient email IDs, and select the email format checkbox.
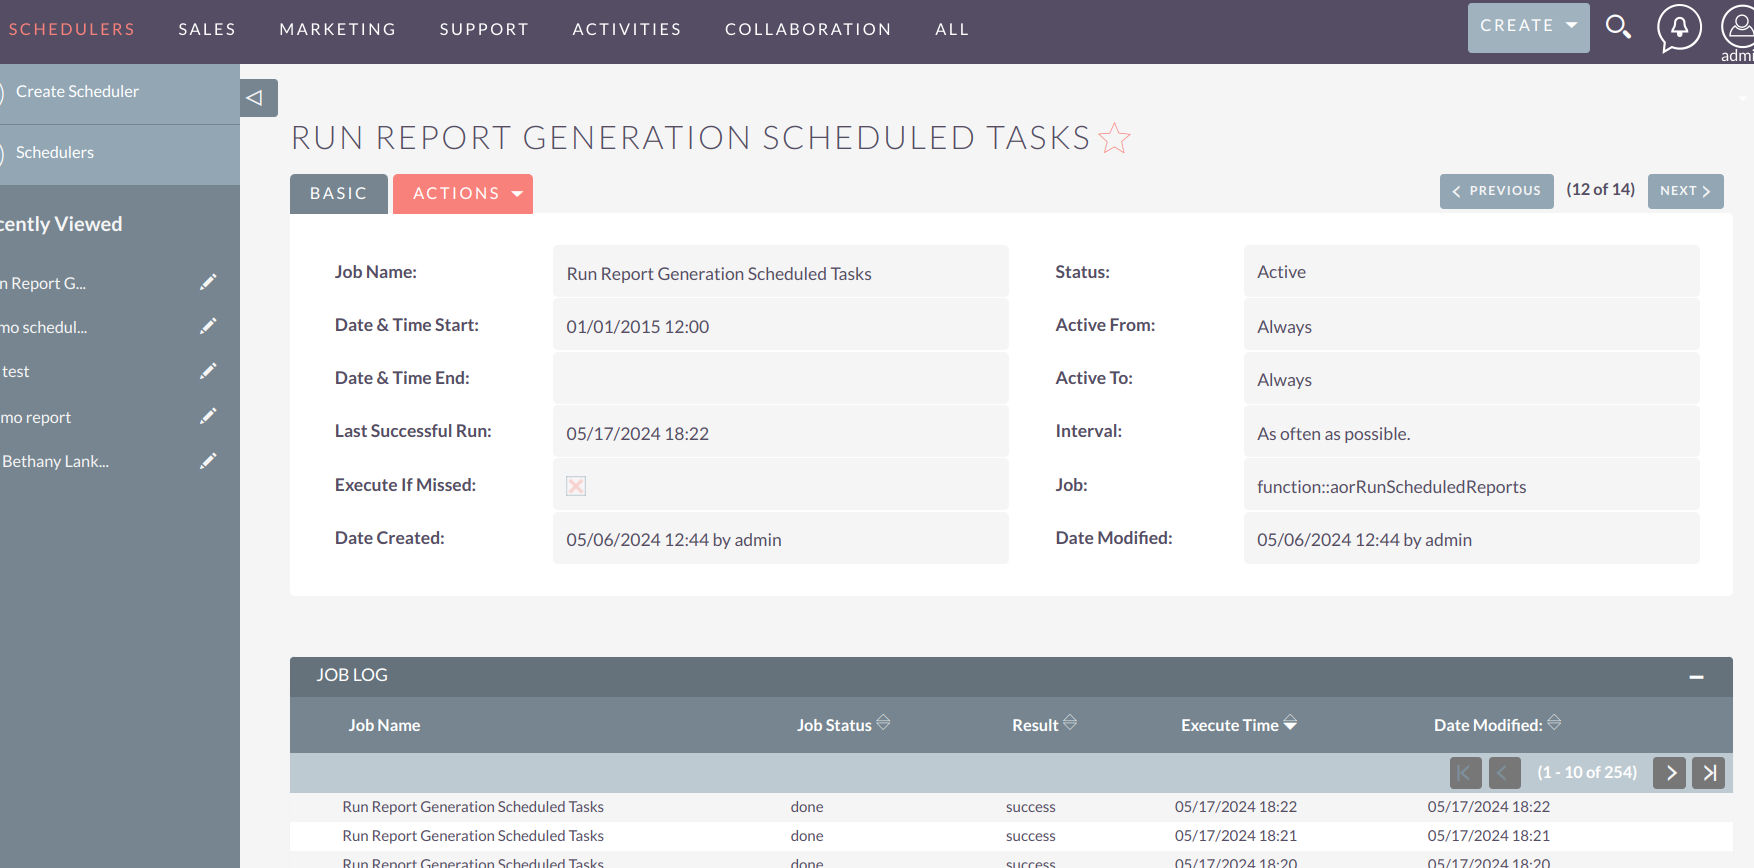
C). Scheduler Status Check: Make sure your scheduler is active and running successfully.
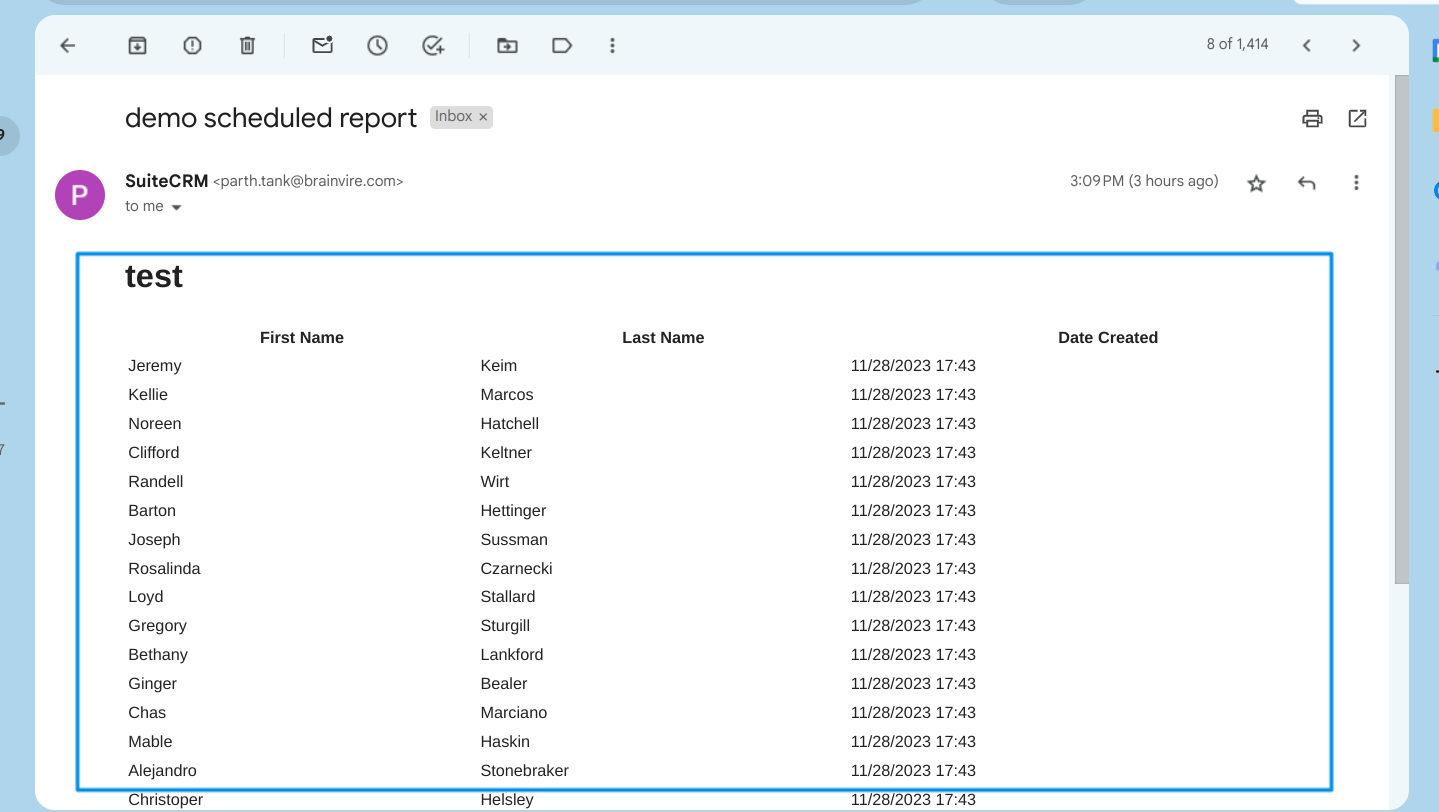
D). Confirmation of Scheduled Report Delivery: Scheduled reports are successfully delivered to recipients whose email addresses are added. Multiple scheduled reports can be created for different modules as needed.
E). CSV Format Reports: To receive reports in CSV format via email, uncheck the email format checkbox.
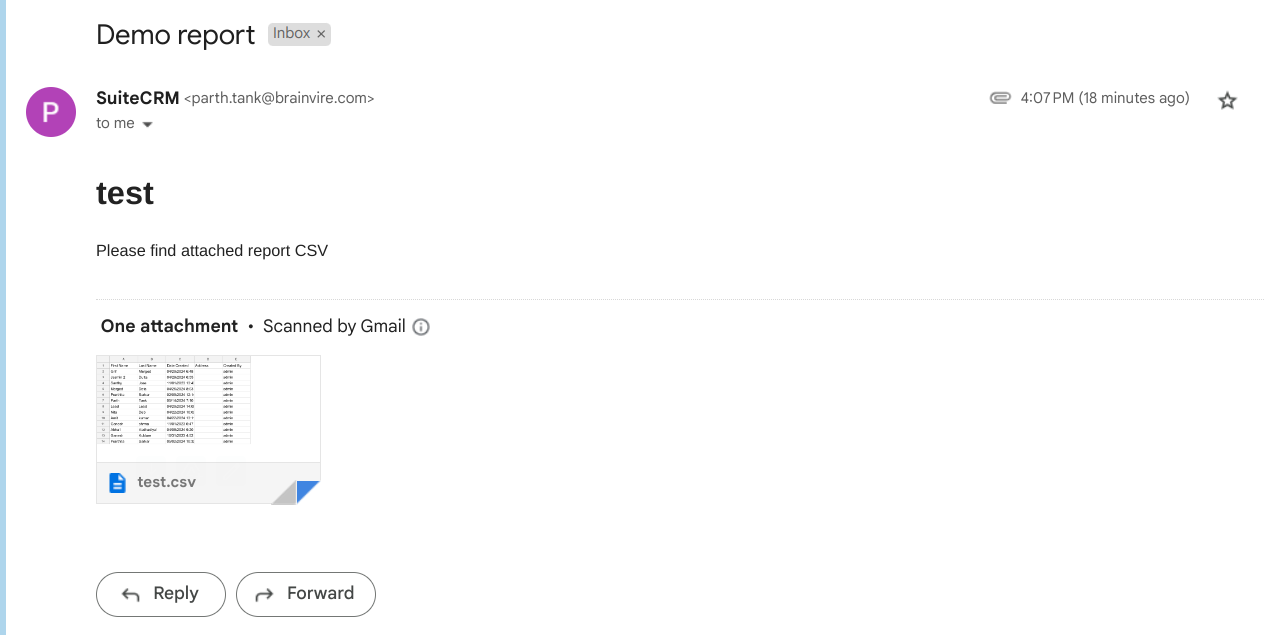
F). Scheduled Report Received in CSV Format: The snapshot confirms that the recipient has successfully received the scheduled report in CSV format.
