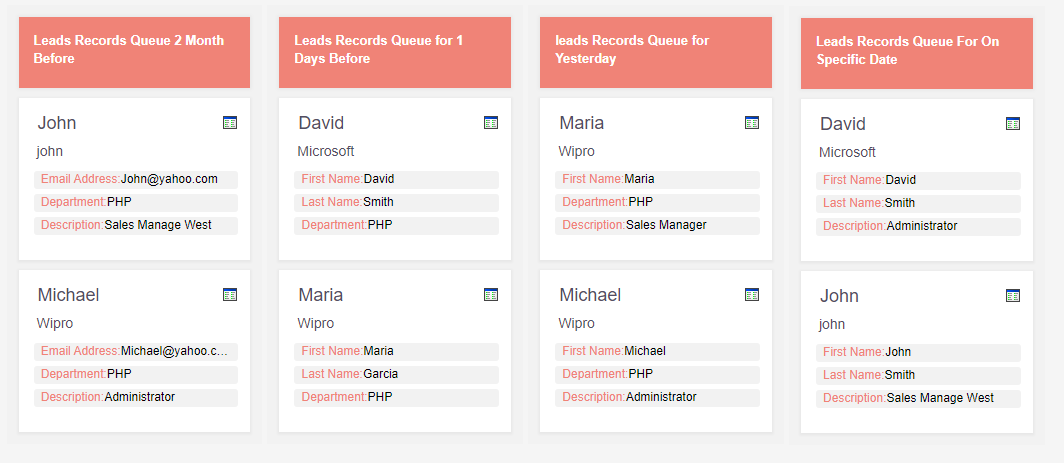
Records Queue displays a Kanban view of highly important records, such as records recently created, modified or assigned to users. This plugin helps sales and marketing teams stay focused on the current details of records, so business efficiency increases.
User Guide
Steps For Using Records Queue Features :
Step 1:
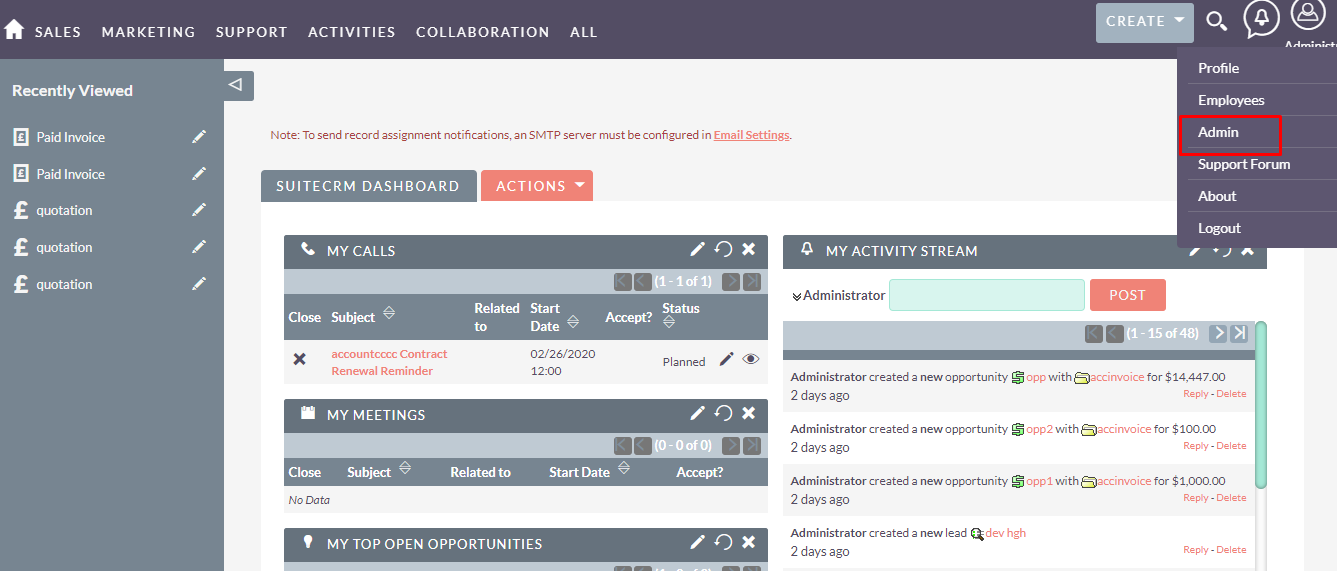
To open the Administration Page, Click on Admin tab, as shown in below screenshot.
Step 2:
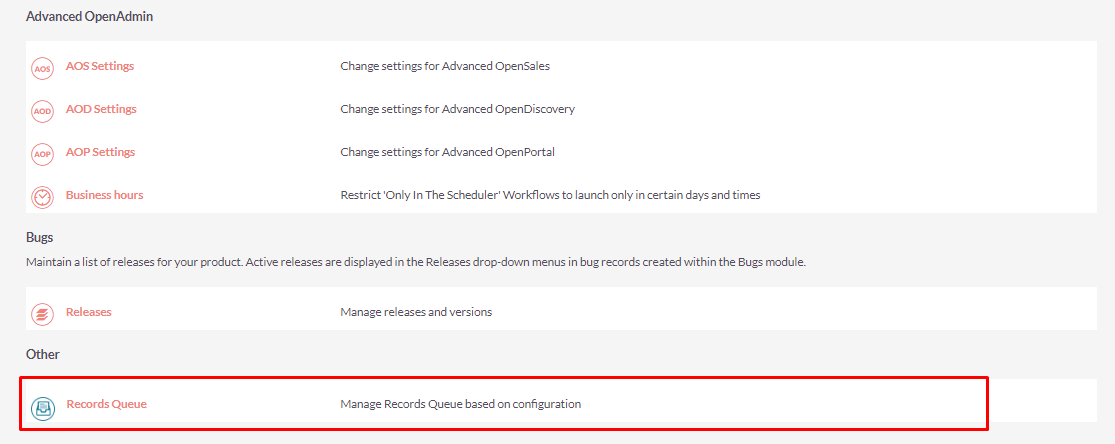
Open Administration page, Click on Records Queue from the Other section.
Step 3:
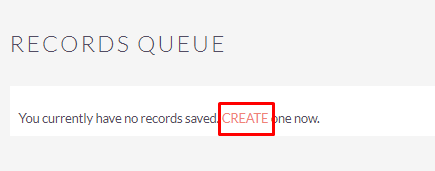
On click of link,”Records Queue” list view page will be open.(Note: If there is no record, than it will show link “You currently have no records saved. Create one now.” as shown in the below screenshot. Click on “CREATE” link to add new record.
Step 4:
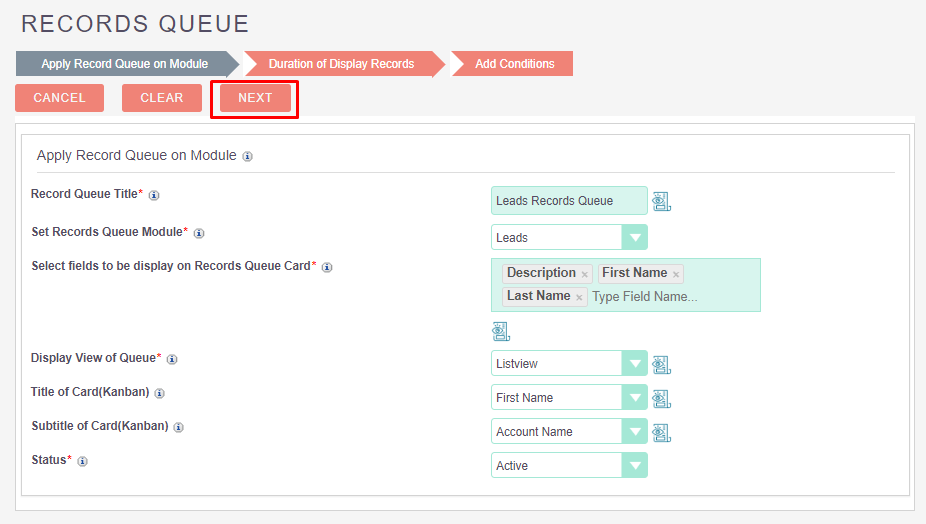
On click of CREATE link, Add Record Queue page will be open, select all required fields and click “NEXT” button as shown in the below screenshot.
i) Records Queue Title : Add Title for display Records Queue. ii) Set Records Queue Module: List of Modules available in SuiteCRM(Default & Custom Module) iii) Select fields to be Display on Records Queue Card : Show fields of Selected Module. Drag and Drop field from Left Box to Right Box. Records Data show in Widget based on field put in Right Box iv) Display View of Queue : 1) Listview : Add Record Queue Button in Listview of Module 2) Sidebar Menu : Add Menu(Link) in side bar of Module’s Listview v) Title of Card : List of Selected Module fields. Use of Card Title is showing as Header in widget vi)Subtitle of Card : List of Selected Module fields. Use of Card SubTitle is showing as Sub-Header in widget vii)Status : Active/Inactive
Step 5:
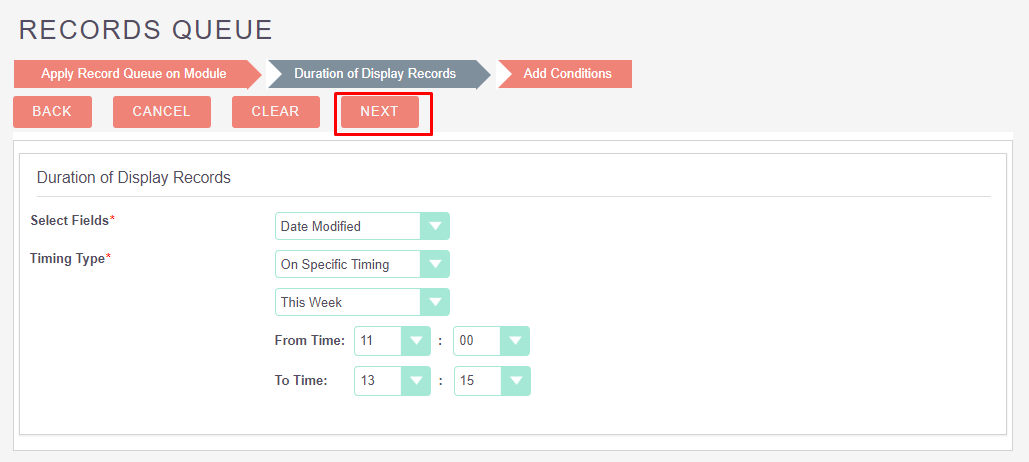
Duration of Display Records page will be open,select all required fields and click “NEXT” button as shown in the below screenshot. Select Fields : List of module fields which is selected in Step 1. It’s display only Date and Time fields. This field is used for checking records for Queue. Timing Type : On Specific Timing : i) This Week : Date Type field : Compare on Date DateTime Type field : Compare on Date and Time & also showing Start Time and End Time ii) Today Date Type field : Compare on Date DateTime Type field : Compare on Date and Time & also showing Start Time and End Time iii) Yesterday Date Type field : Compare on Date DateTime Type field : Compare on Date and Time & also showing Start Time and End Time iv) On Specific Date Date & DateTime Type field : Show Date Option from which you can define Specific Date If Timing Type is “On Specific Timing” then it will be shown like below screenshot.
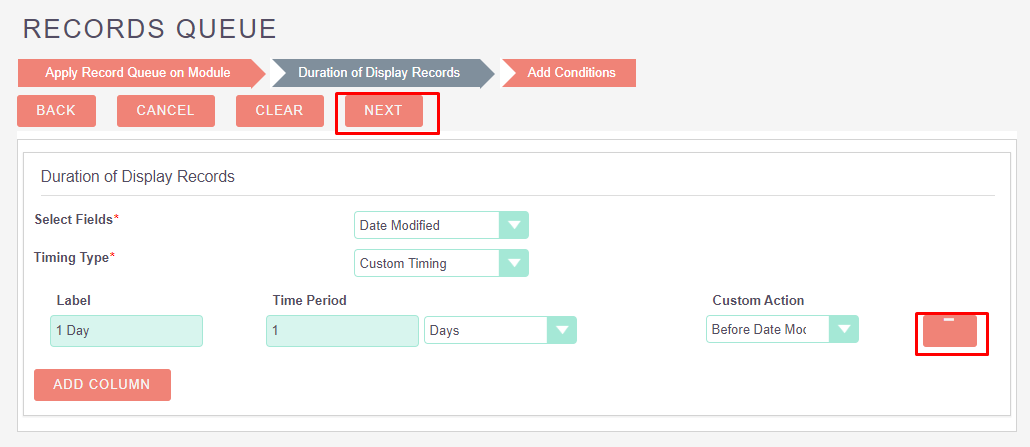
2)Custom Timing If Timing Type is “Custom Timing” then it will be shown like below screenshot. Custom Timing has following options If Select Fields type is “Datetime/Datetimecombo” then its display below options i) Hours ii) Minutes iii) Days iv) Month If Select Fields type is “Date” then its display below options i) Days ii) Month For adding Custom Timing, Click on “ADD COLUMN” button. Using which you can add multiple Custom Timing.
Click on “-” Button if you want to remove column.After click on “NEXT” button of Record Queue.
Step 6:
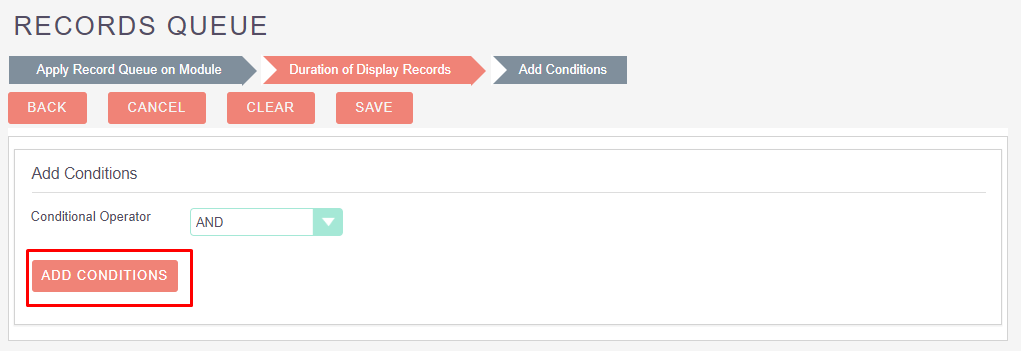
Add Conditions will be open,select all required fields and click “NEXT” button as shown in the below screenshot.

After Add Conditiotions Save Records Queue Configuration as shown in the below screenshot.

Step 7:
After saving the record, it will redirect to list view and to edit the record, click on Pencil icon, as shown in the below screenshot.

Step 8:
To Delete the record, click on Delete button as shown in the below screenshot.

Step 9:
As per Configuration, “RECORDS QUEUE” display on Listview shown below screenshot.

After Click on “RECORDS QUEUE” its Shown Below.
