MTS Stripe Integration unites SuiteCRM with Stripe’s payment processing platform. This plugin allows you to easily embed a "Buy Now" button and send payment links to your customers, so they can seamlessly pay invoices online. It also supports a variety of credit cards and debit cards, so you can accept payments from a global audience.
Admin Guide
Stripe settings
Follow the instructions below or get a PDF of the full Admin/User Guide: Download
- Create Secret key
- Go to https://dashboard.stripe.com/login and login into Stripe

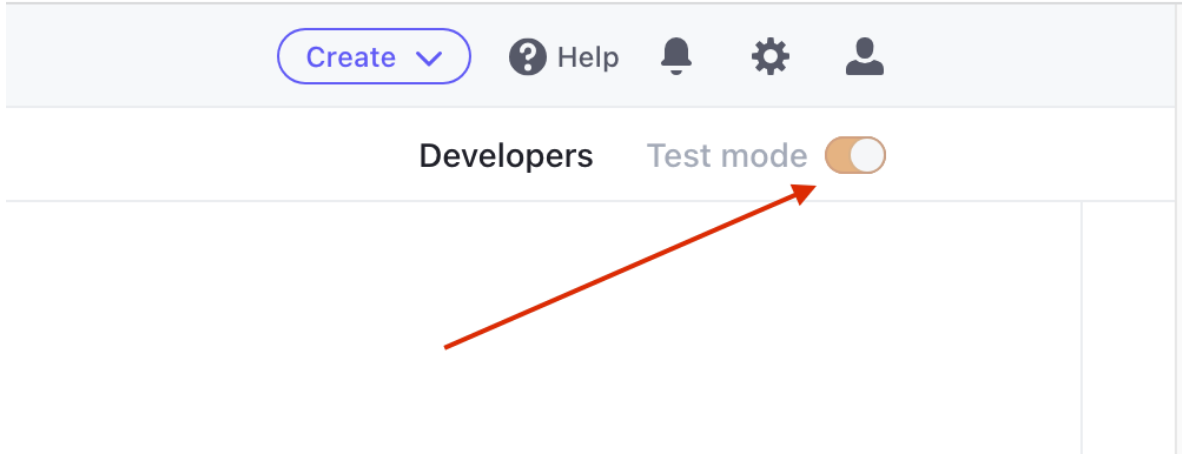
- Default, Stripe is enabled in Test mode (If you deploy to production, please disabled it to switch to production env. Note: Make sure your Stripe already activated to disabled test mode, I do not need a production so my account does not activated)
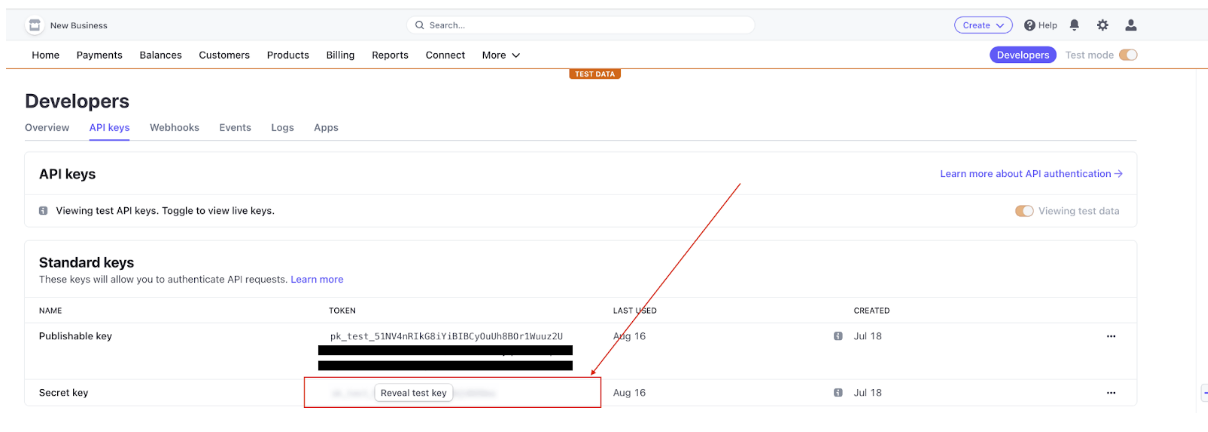
- As above image > Click on Developers > Click on API Keys tab > Click Reveal test key to get the secret key
- Config webhook & create endpoint **secret key

- On the current page > Click on Webhooks tab > Click **Add endpoint **

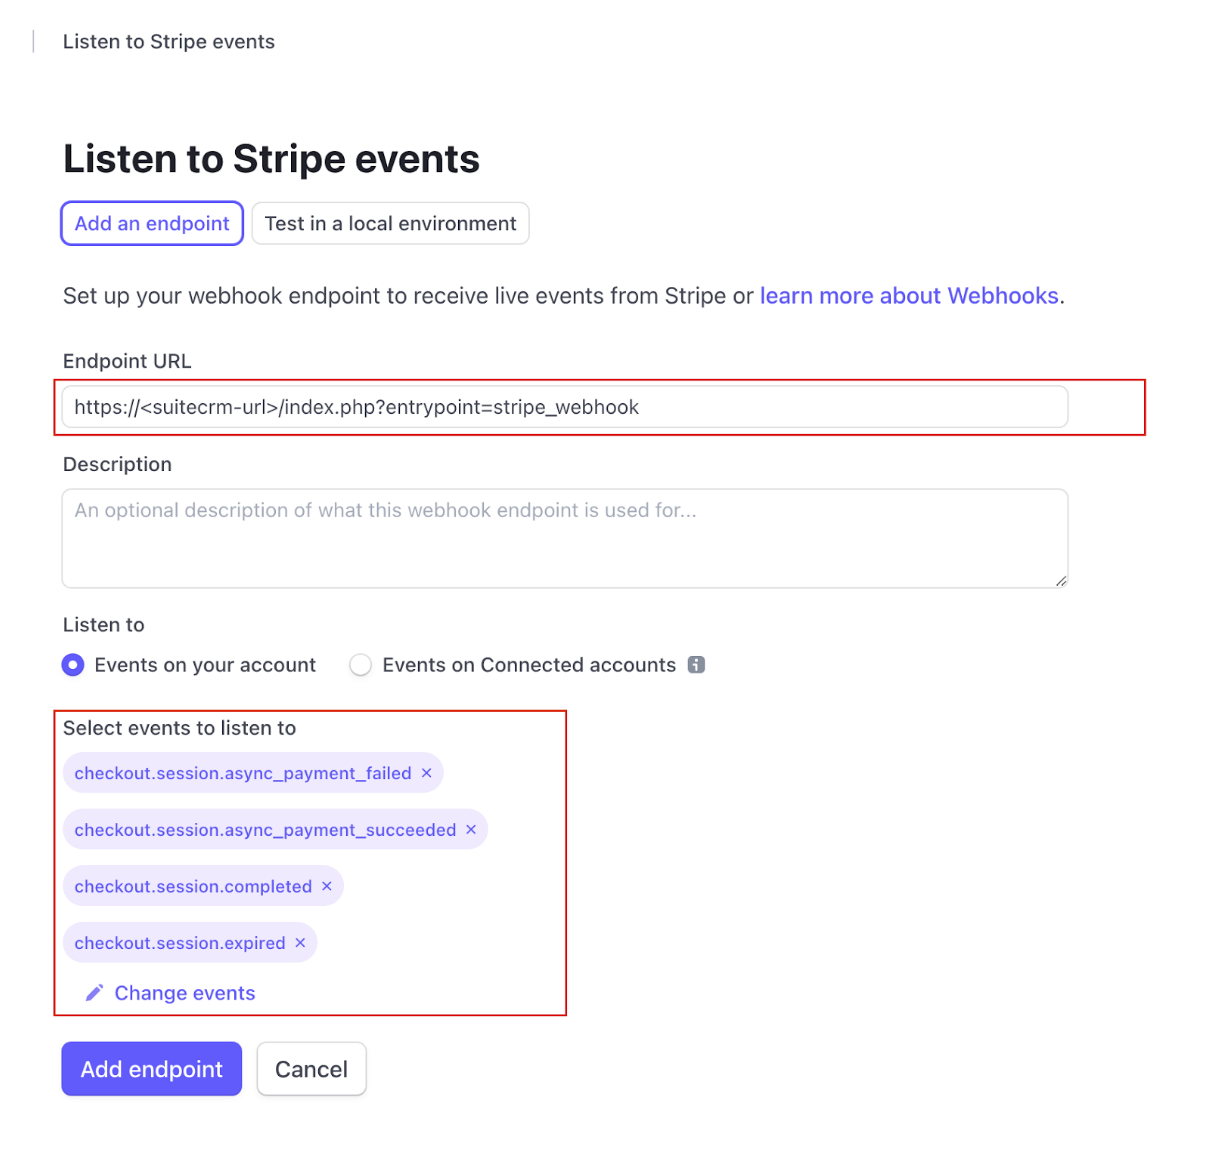
- Enter the endpoint information & select all checkout event

- Endpoint: https://[suitecrm-url]/index.php?entrypoint=stripe_webhook
- Event to listen: as above. Stripe will be send information to SuiteCRM via endpoint once one of above event is emit
- Hit ‘Add endpoint’ then go to the webhook detail > click on Reveal to pick the **endpoint secret key **

You are done for the Stripe setting. Let move to SuiteCRM side
SuiteCRM settings
- Login as admin user
- Go to the admin area
- Jump to Module Loader > Select the package > Install
- Quick repair & rebuild
- Scroll to the bottom > Click execute to run necessary SQL
- Back to the admin area
- Go to the MTS Stripe Integration license settings
- Input your license > Click validate
- Search and click on to the MTS Stripe Integration settings link
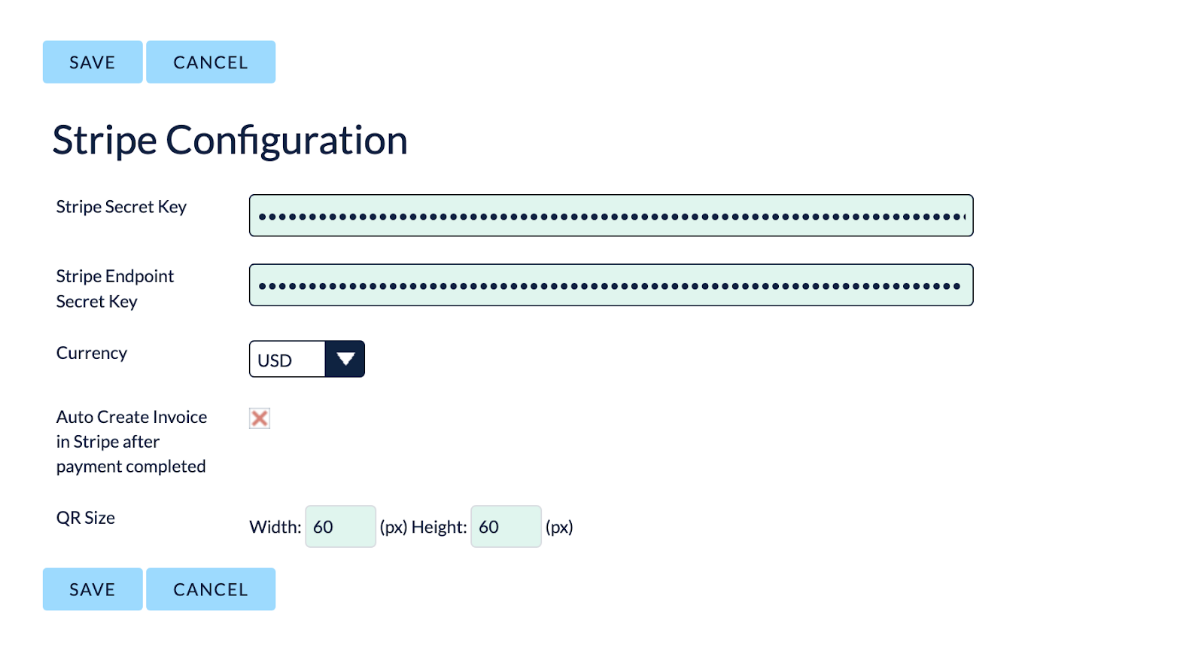
- Input Secret key and Endpoint Secret Key, checked for Invoice creation if you want to auto create Stripe Invoice after payment completed and config QR size

- Hit Save
Great work! You are done all. Let try with the feature


2 years ago
Stripe settings
You are done for the Stripe setting. Let move to SuiteCRM side
SuiteCRM settings
Login as admin user Go to the admin area Jump to Module Loader > Select the package > Install Quick repair & rebuild Scroll to the bottom > Click execute to run necessary SQL Back to the admin area Go to the MTS Stripe Integration license settings Input your license > Click validate Search and click on to the MTS Stripe Integration settings link Input Secret key and Endpoint Secret Key, checked for Invoice creation if you want to auto create Stripe Invoice after payment completed and config QR size Hit Save
Great work! You are done all. Let try with the feature